Dave sent me some pics last week . They had the kids and grand kids over and had a fun day with the Jeeps. I’m glad to see him (them) enjoying the Jeeps.
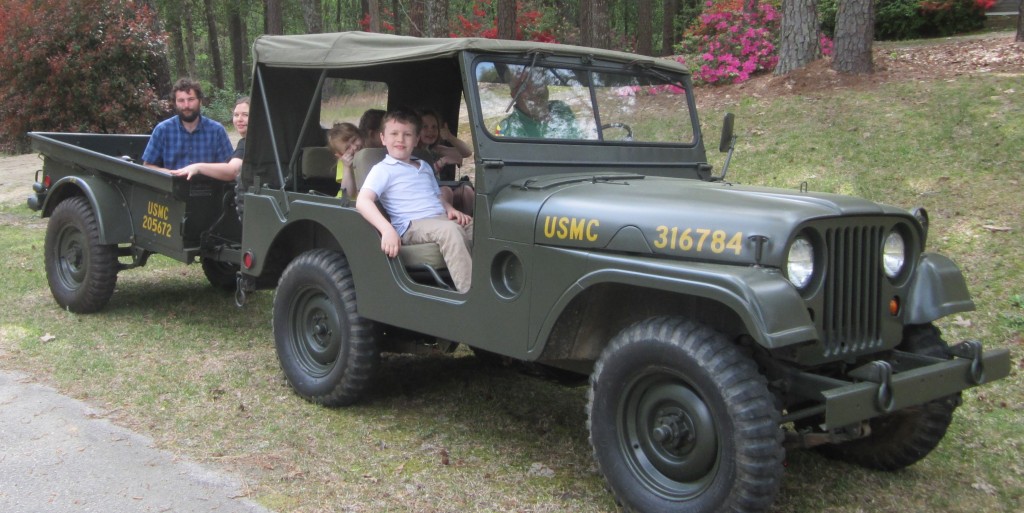
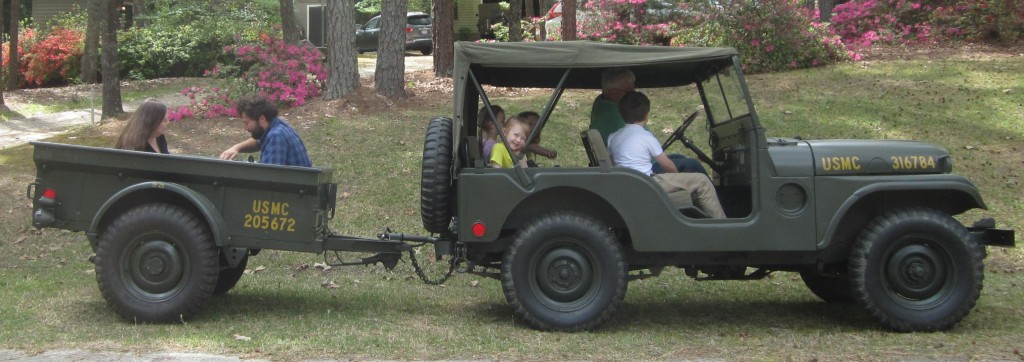
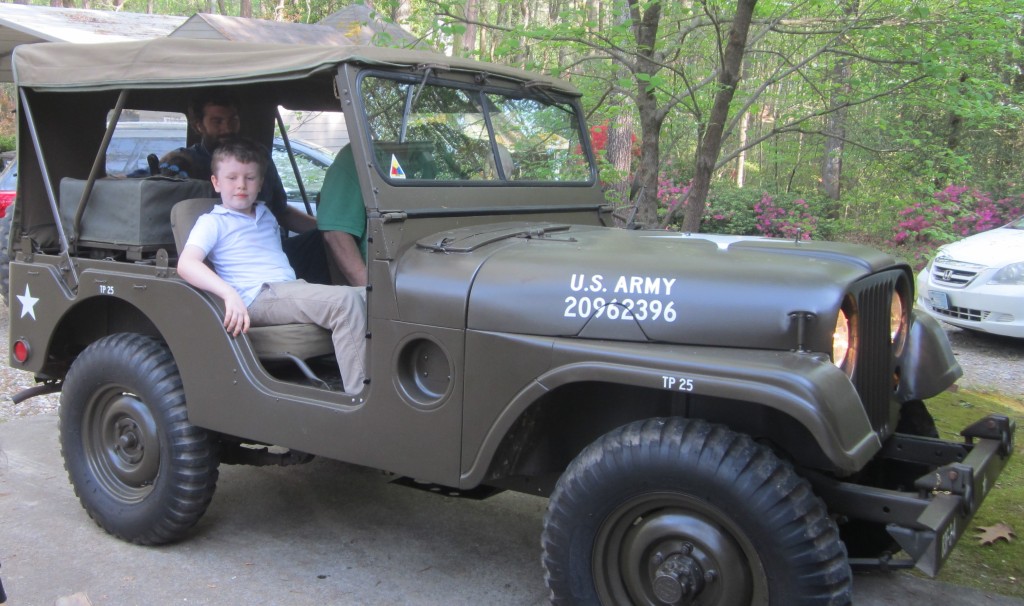
Dave sent me some pics last week . They had the kids and grand kids over and had a fun day with the Jeeps. I’m glad to see him (them) enjoying the Jeeps.
I am going to use this same write up on both Jeep sites using different pictures.
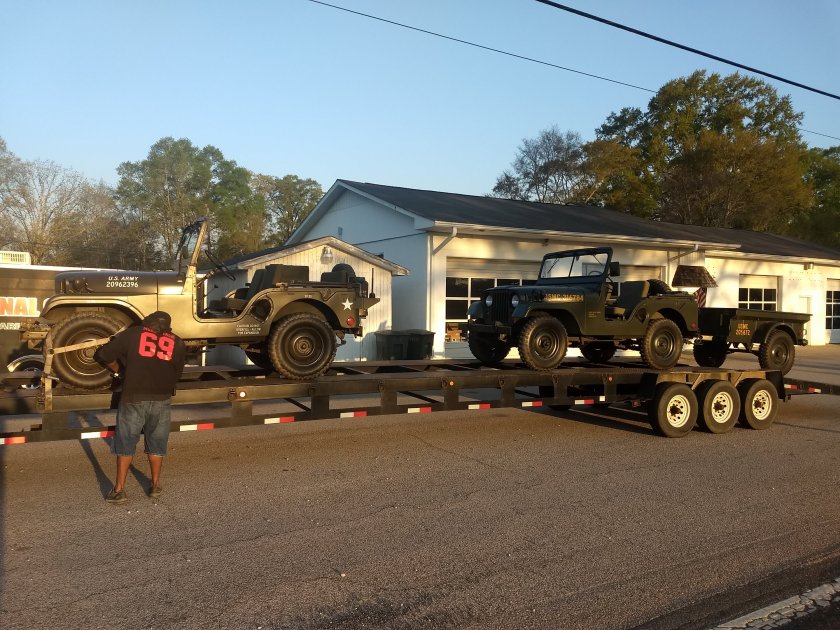
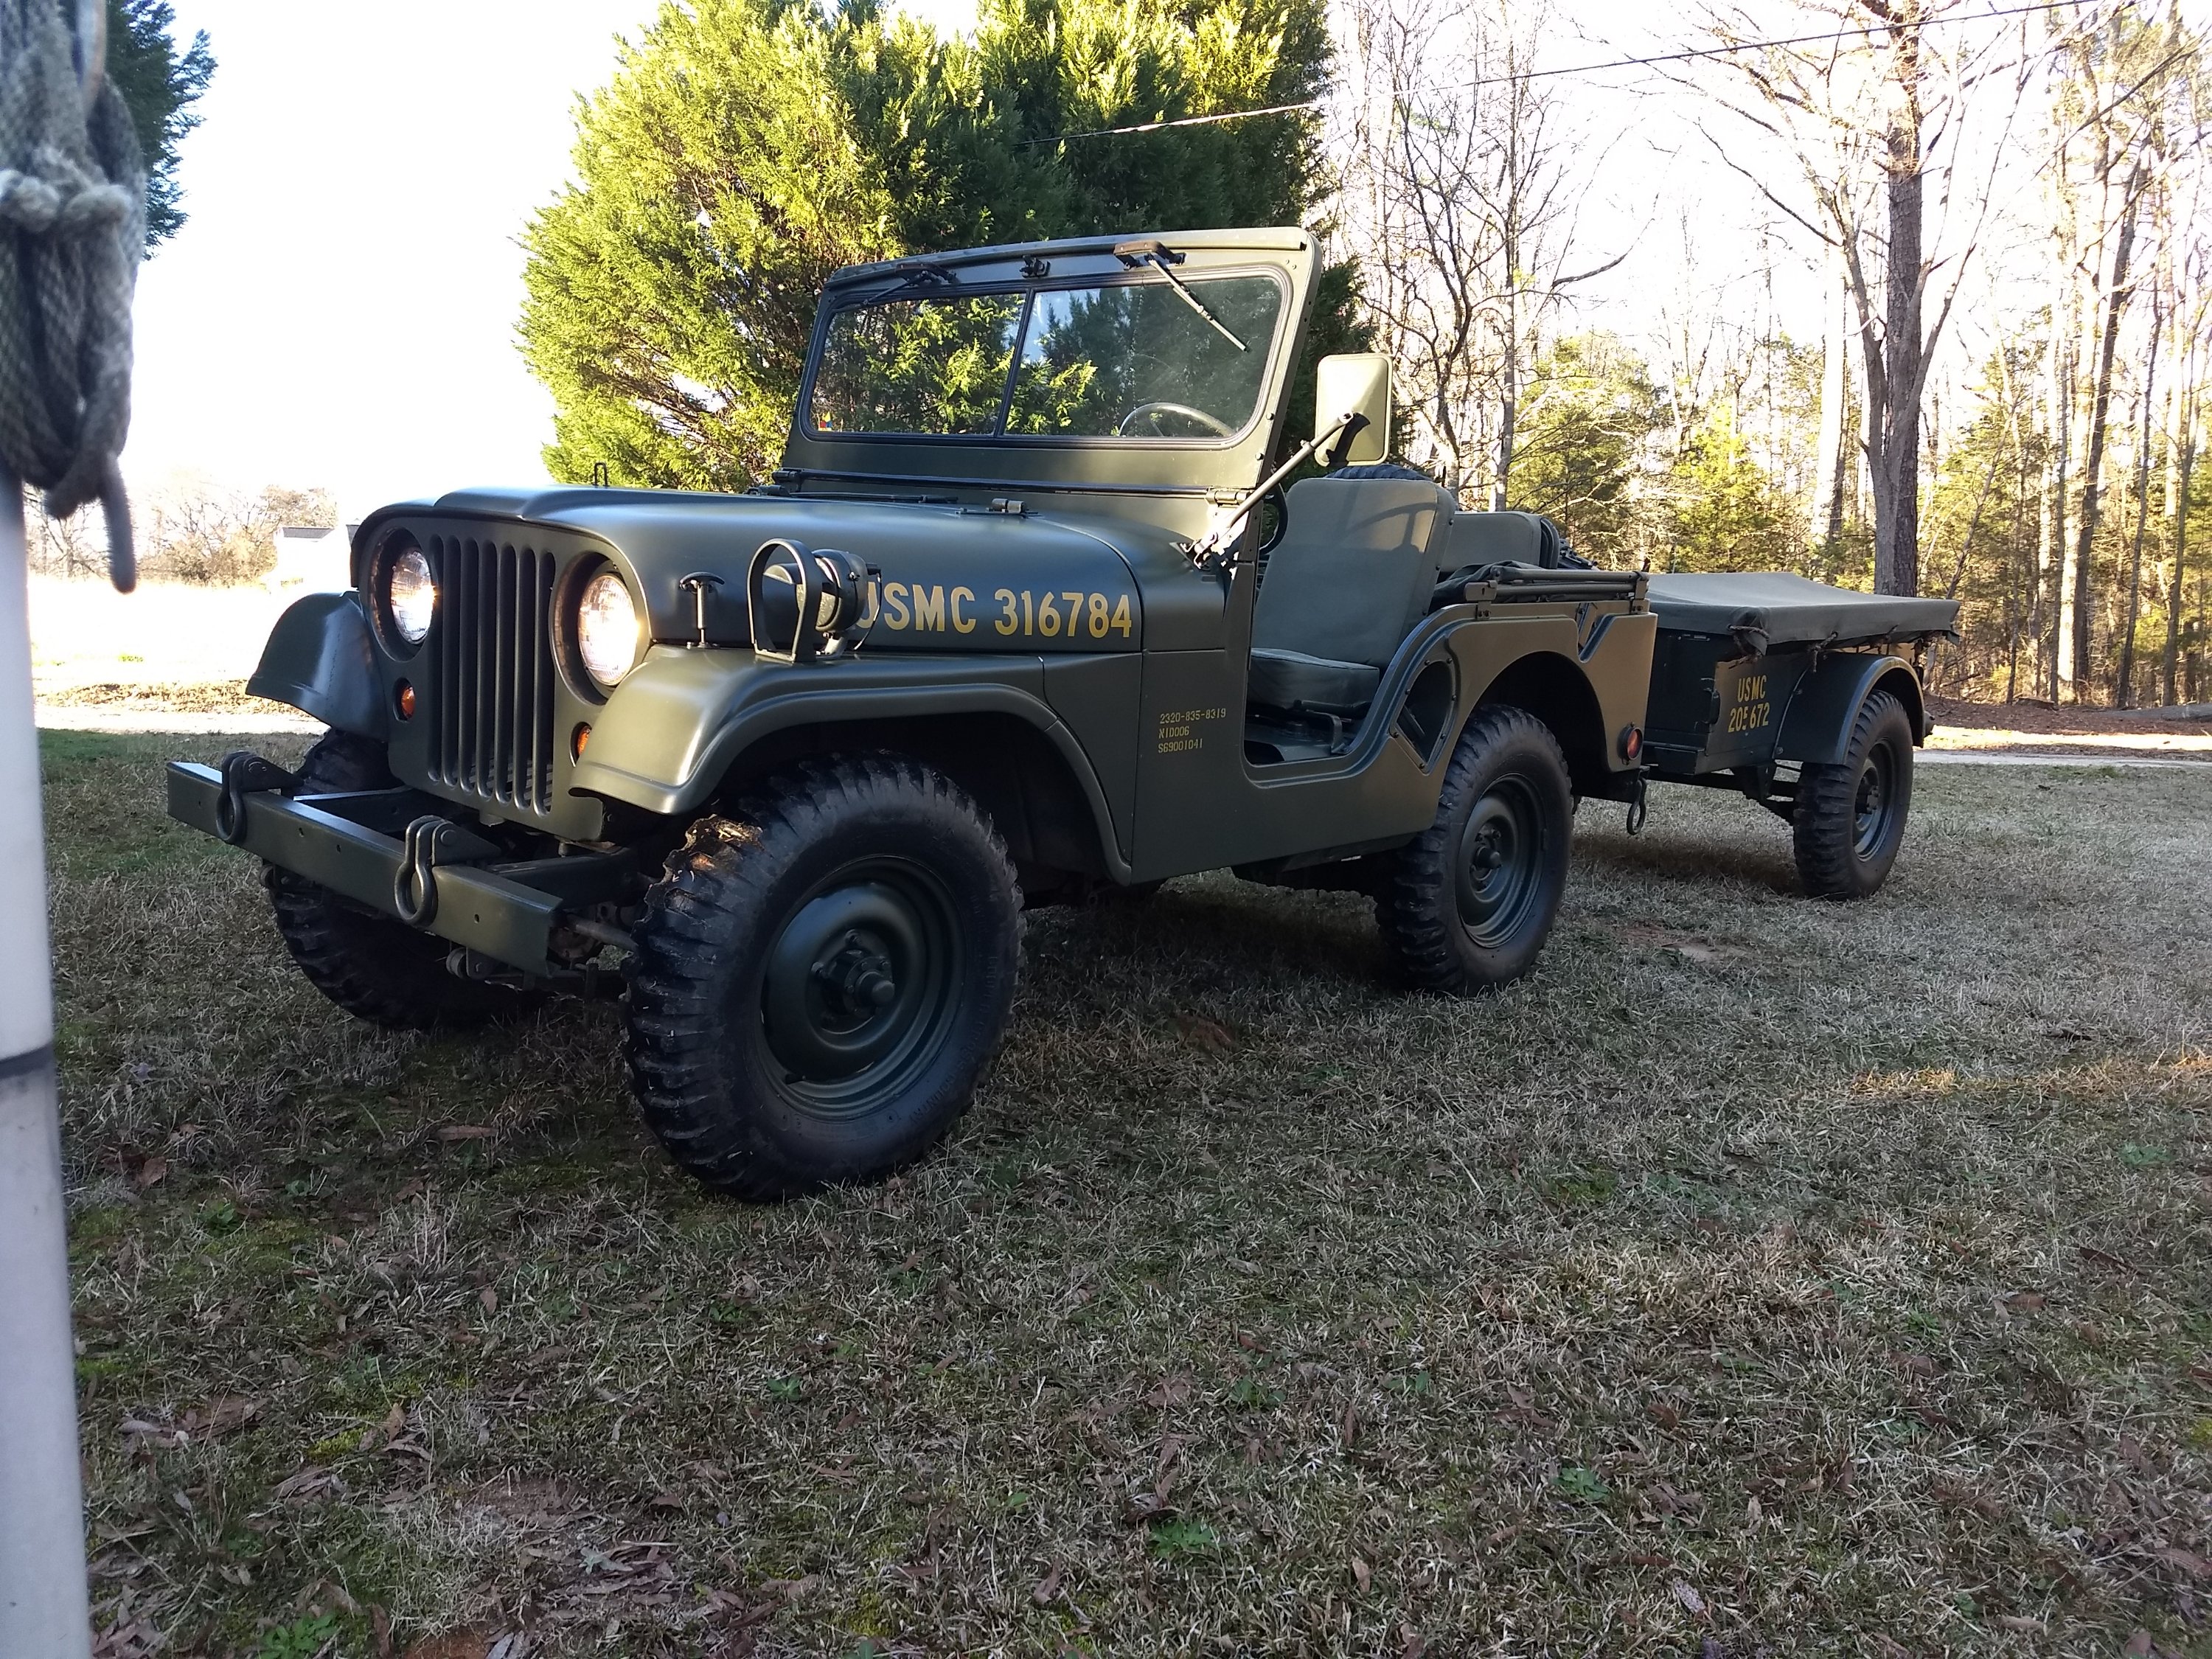
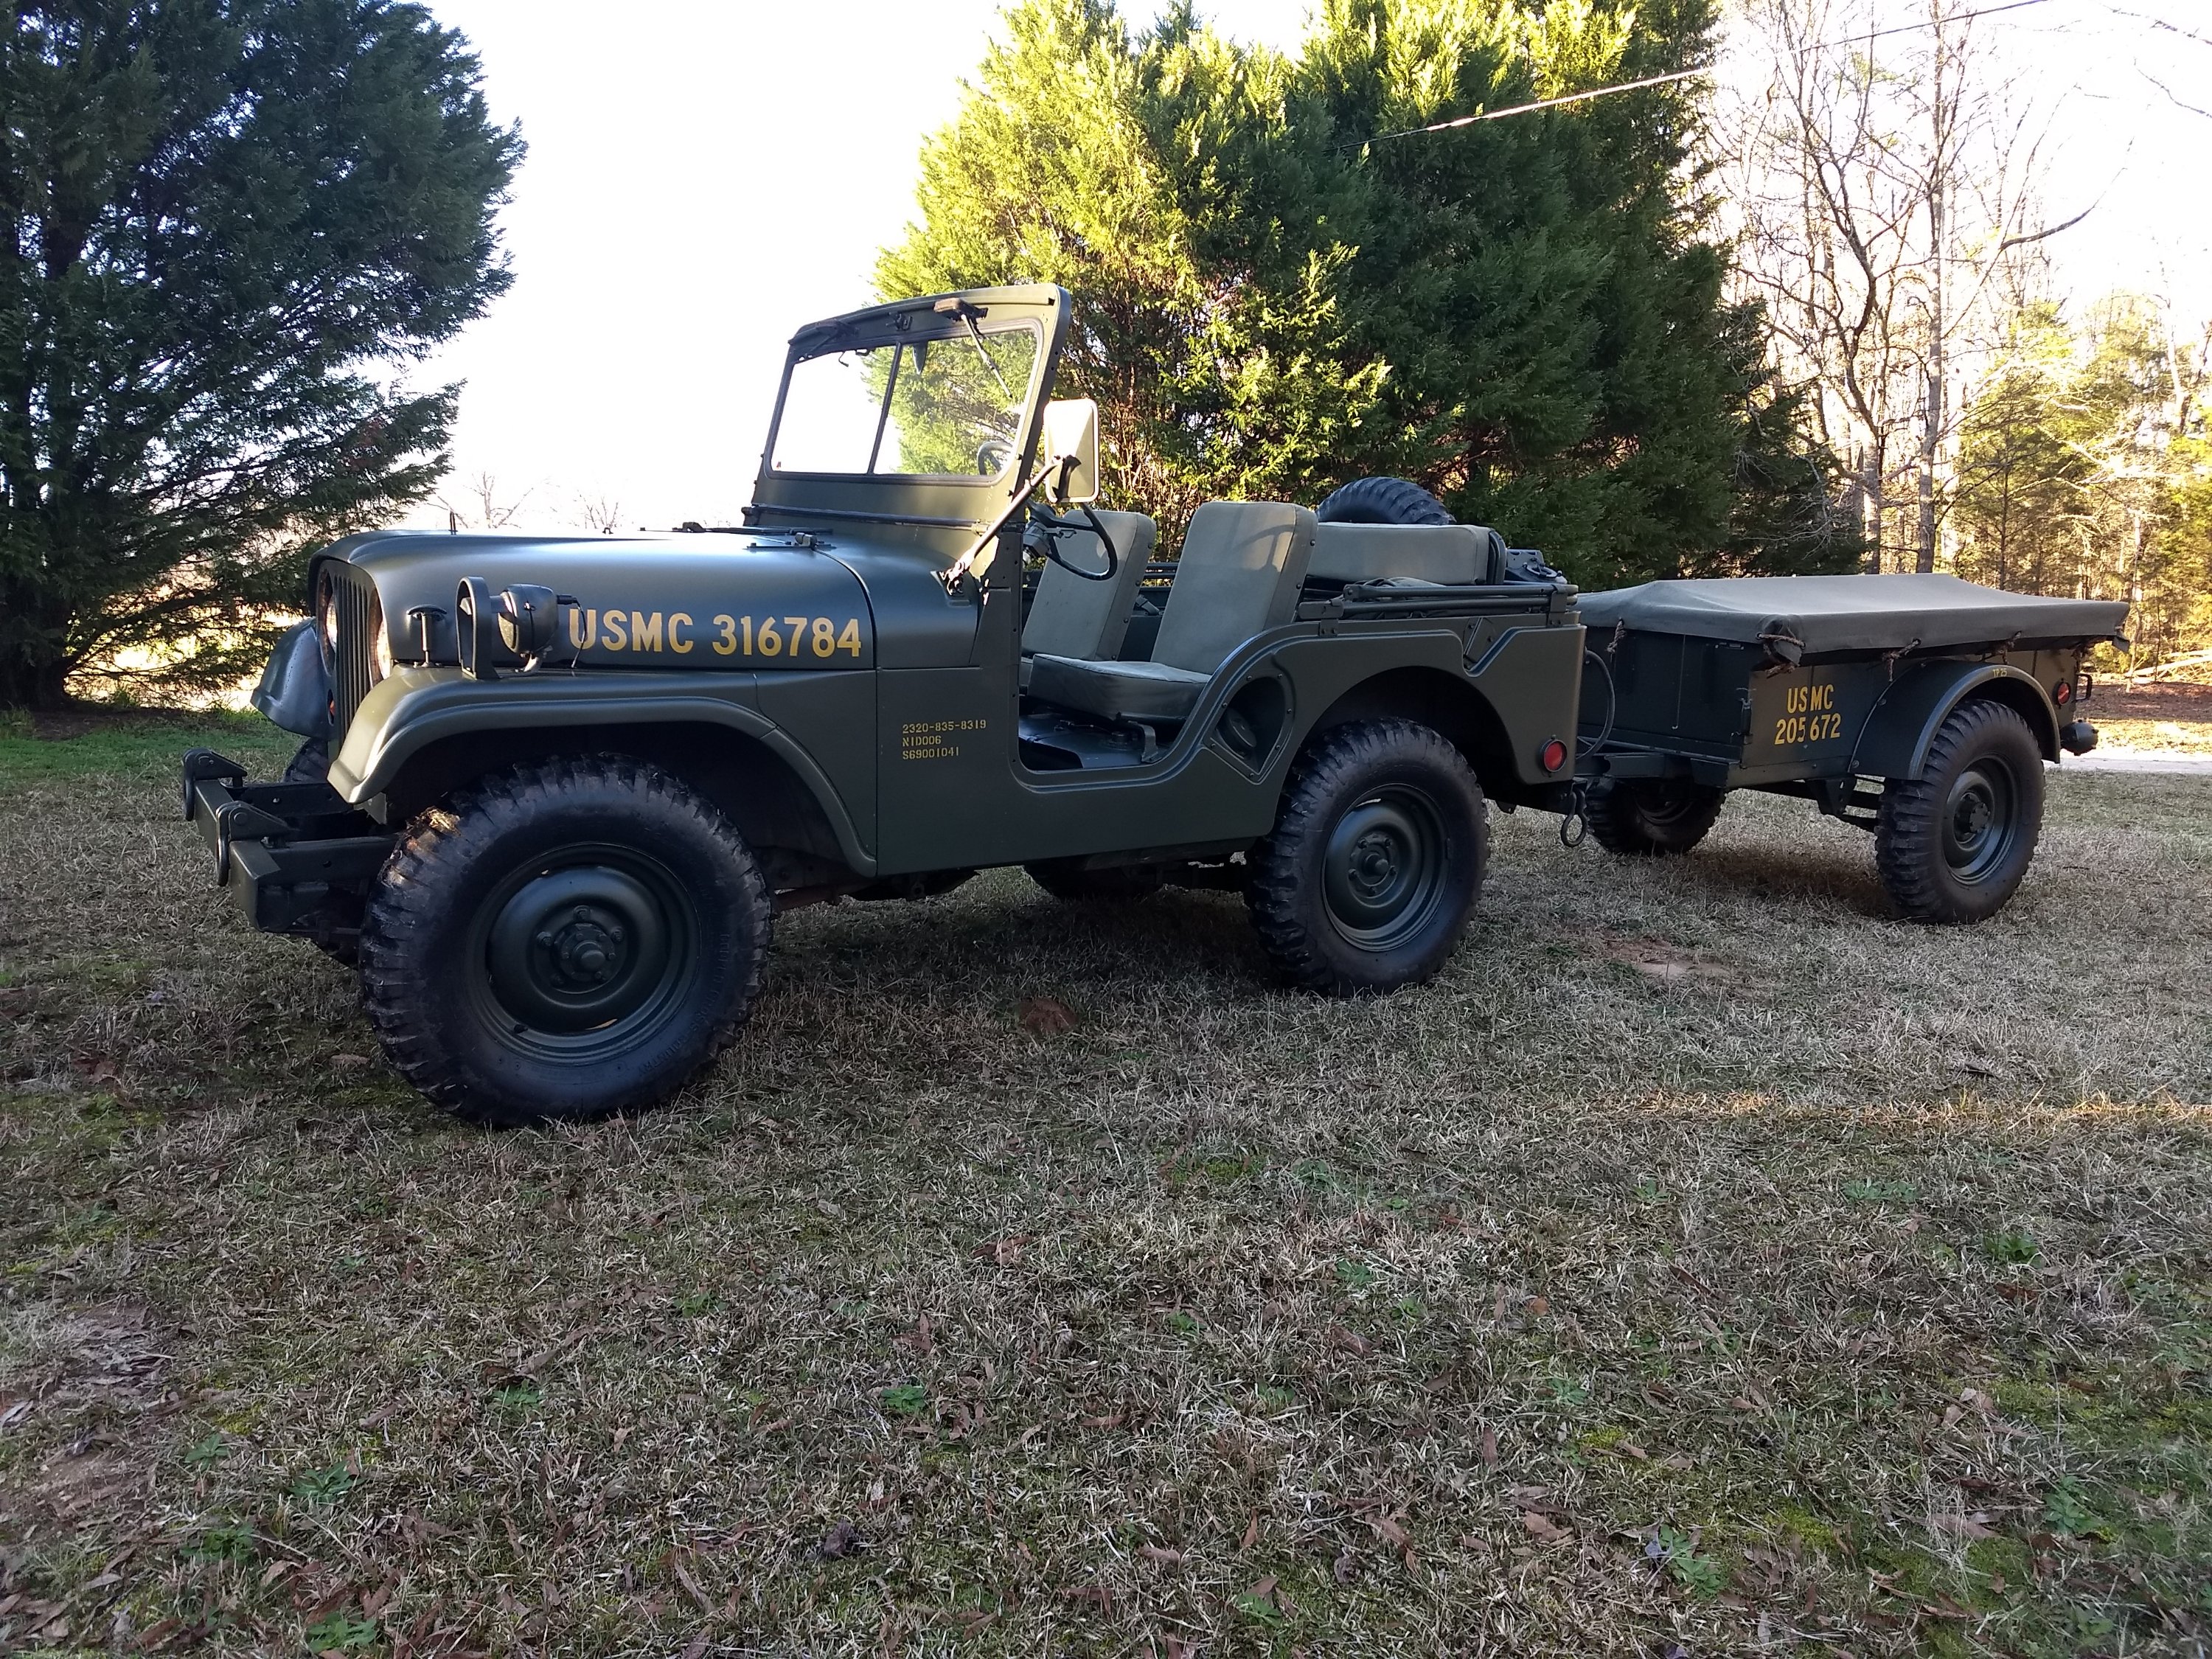
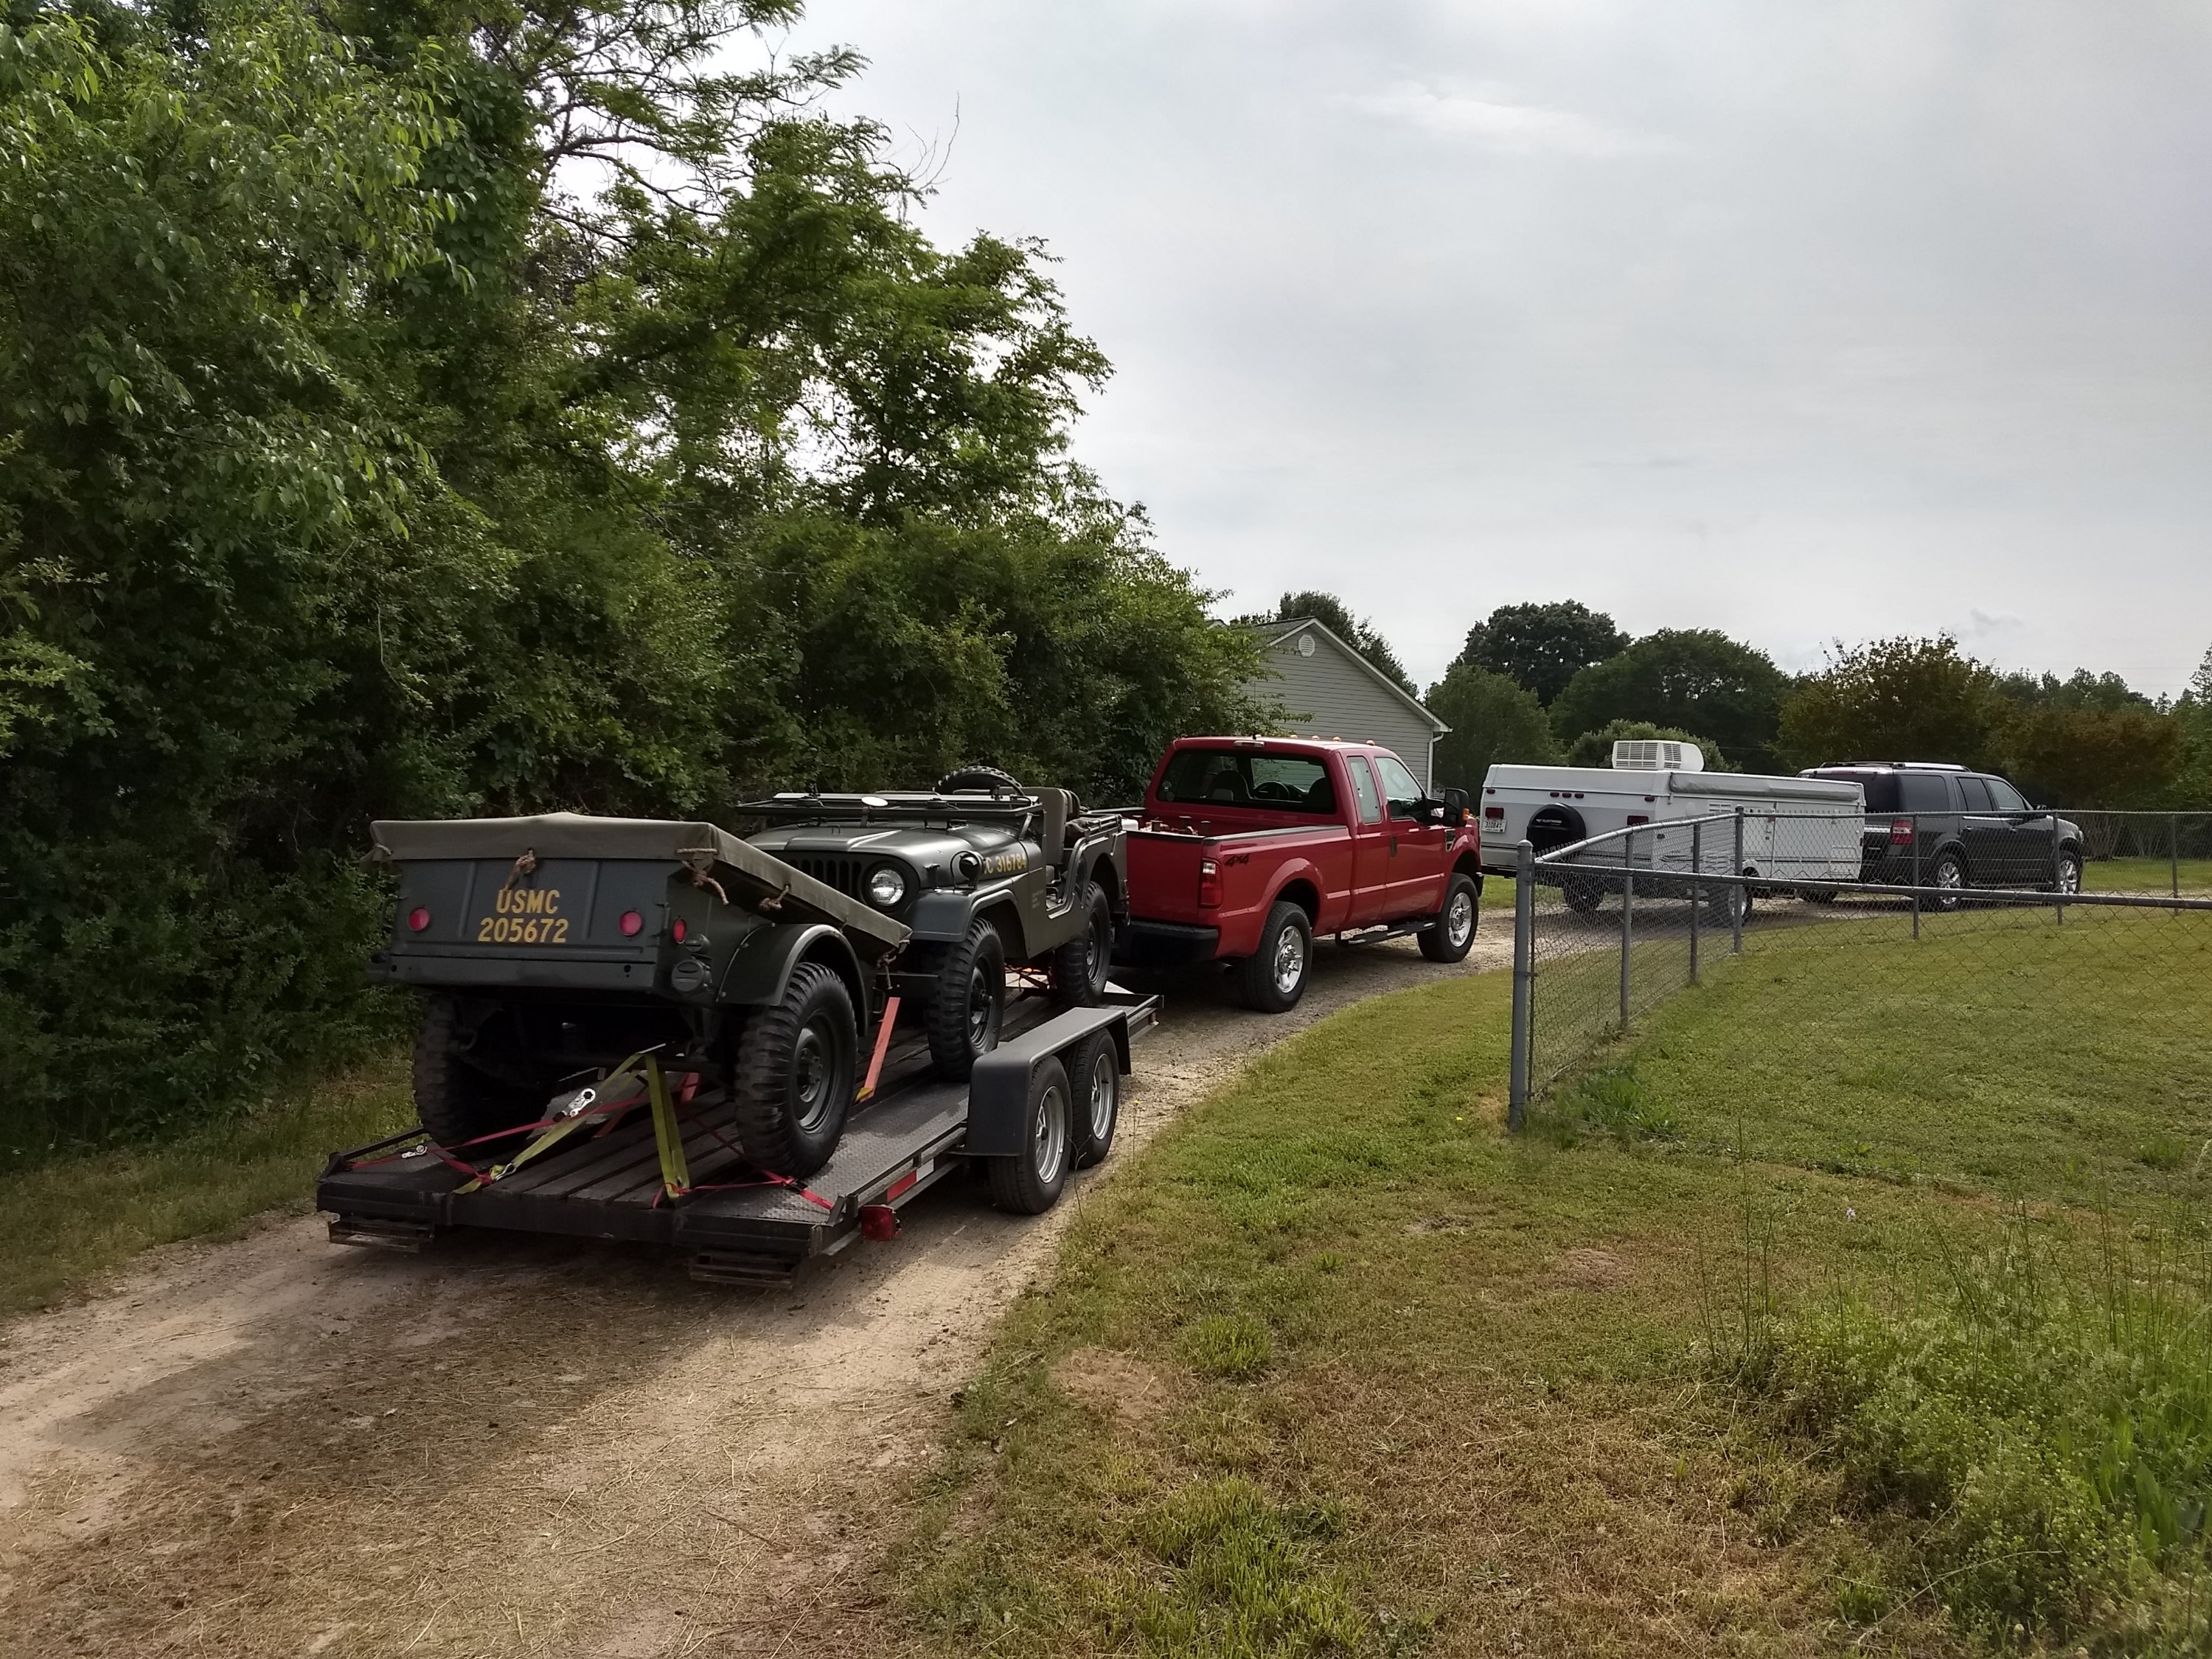
Today was a sad day. I ended my 24 year run with my military Jeeps at 7:45 this morning. The guy was supposed to be at the pickup location at 8am but he texted and said he was going to be there by 7:15 – I was on my way out the door to spend a few more minutes with the Jeeps to get them started up/warmed up and make sure everything was loaded. Instead I had to rush out, crank them up, warm them up , hook up the trailer and take off a mile up the road to meet the carrier.
I fired up the Army Jeep first – started and idled with no problem. I set the choke half way and 4 clicks on the throttle. Then I moved over to the USMC Jeep – same thing – fired right up. I set the choke and throttle. By that time, I moved back to the Army Jeep and adjusted the choke/throttle. Back to the USMC – I took the tag off of it and adjusted it. I looked around to make sure everything was in the trailer that was going with them – all of the canvas, doors, trailer canvas and spare parts box. I adjusted closed the choke/throttle on both of them and let them idle for a minute more – time to say goodbye while I was alone! I can only imagine it is like sending a child off for college because I know I will see them again at the Denton show or I can always go to visit the new owner if he doesn’t bring them to the show. But they aren’t mine anymore. I can’t go outside to tinker with them or go for a ride or cuss them because they wouldn’t start when I wanted to go for a ride, LOL. Good times! I have the memories and pictures.
Here’s the last ride up the driveway:
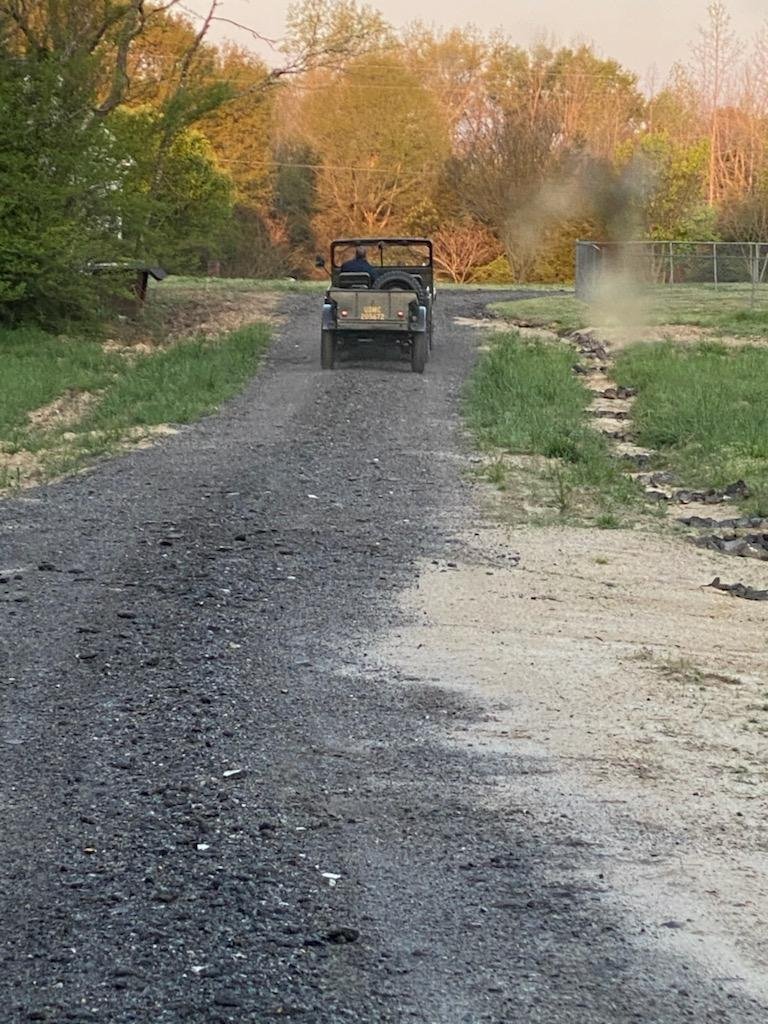
Getting out on the road:
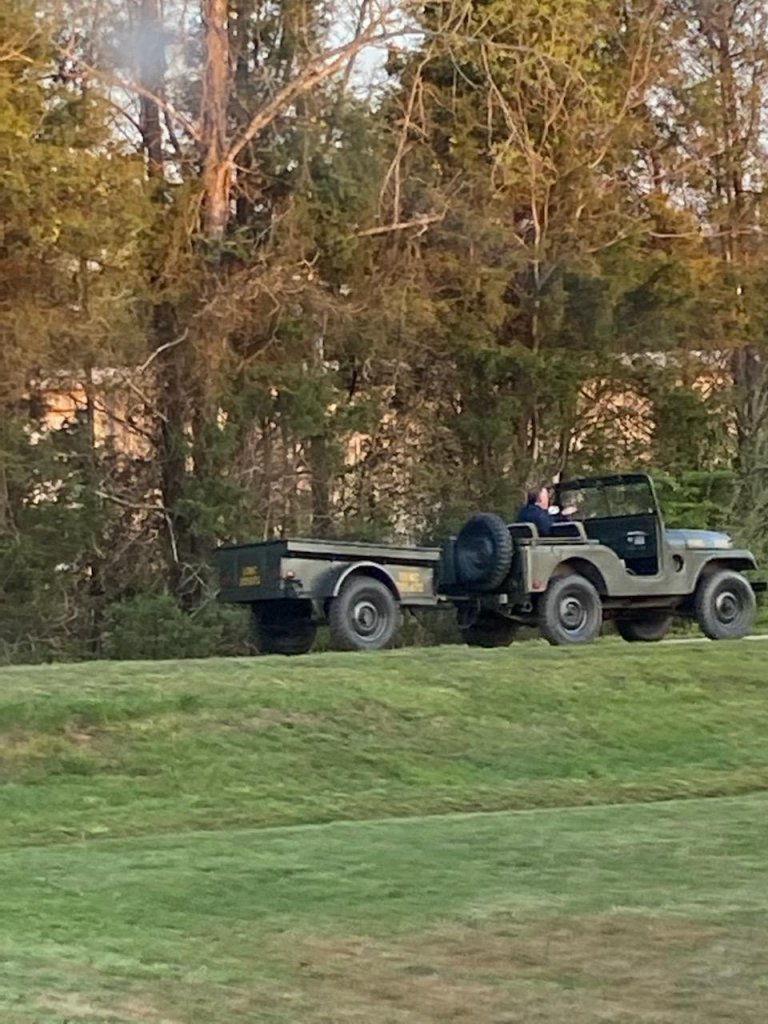
Halfway there:

Saying goodbye one last time:
Loaded up and off to the new owner – GONE, just like that! So long 316784!
Now I have empty garage syndrome:
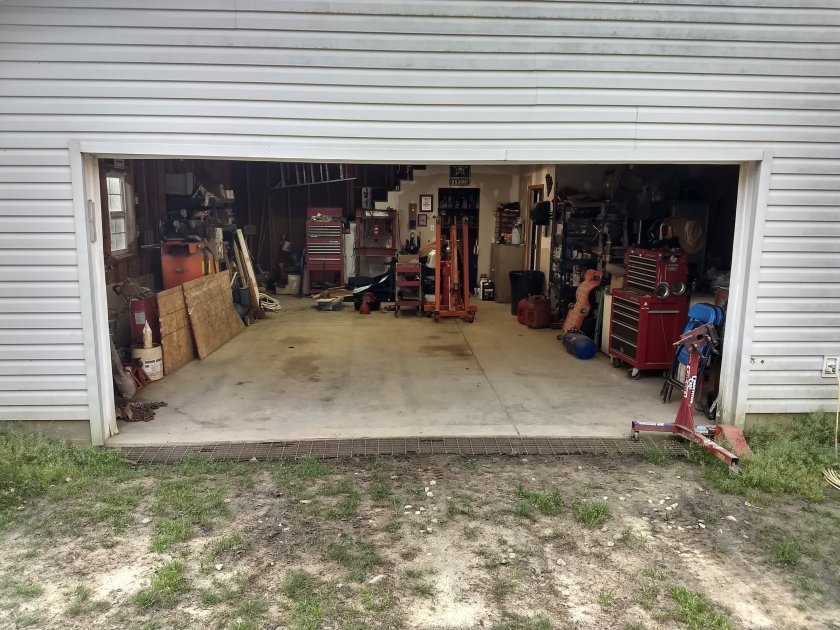
Well not quite empty, LOL – but now I have space to work on getting rid of unused stuff.
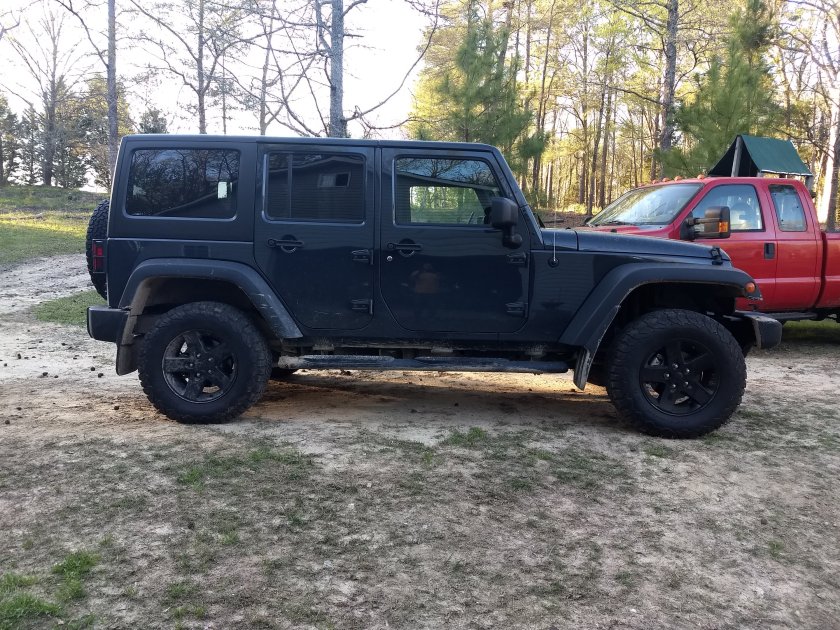
I got rid of the military Jeeps, but they are being replaced by a NEW(er) 2017 Jeep Wrangler JKU Big Bear. I have been wanting to buy a new Jeep since I got rid of my 1993 Wrangler YJ back in 1997. Now, with the funds freed up by selling my hobby, I was able to put a real nice down payment on one and still have money left to put toward paying my mortgage off and saving. I guess that helps a little with the empty garage syndrome thing.

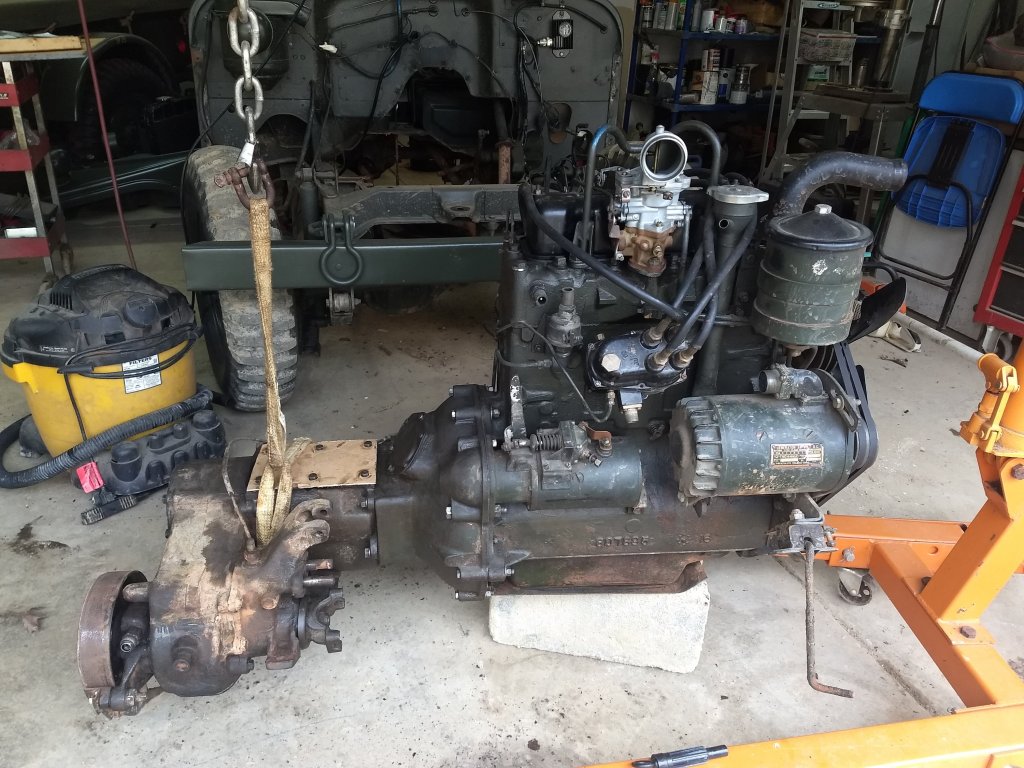
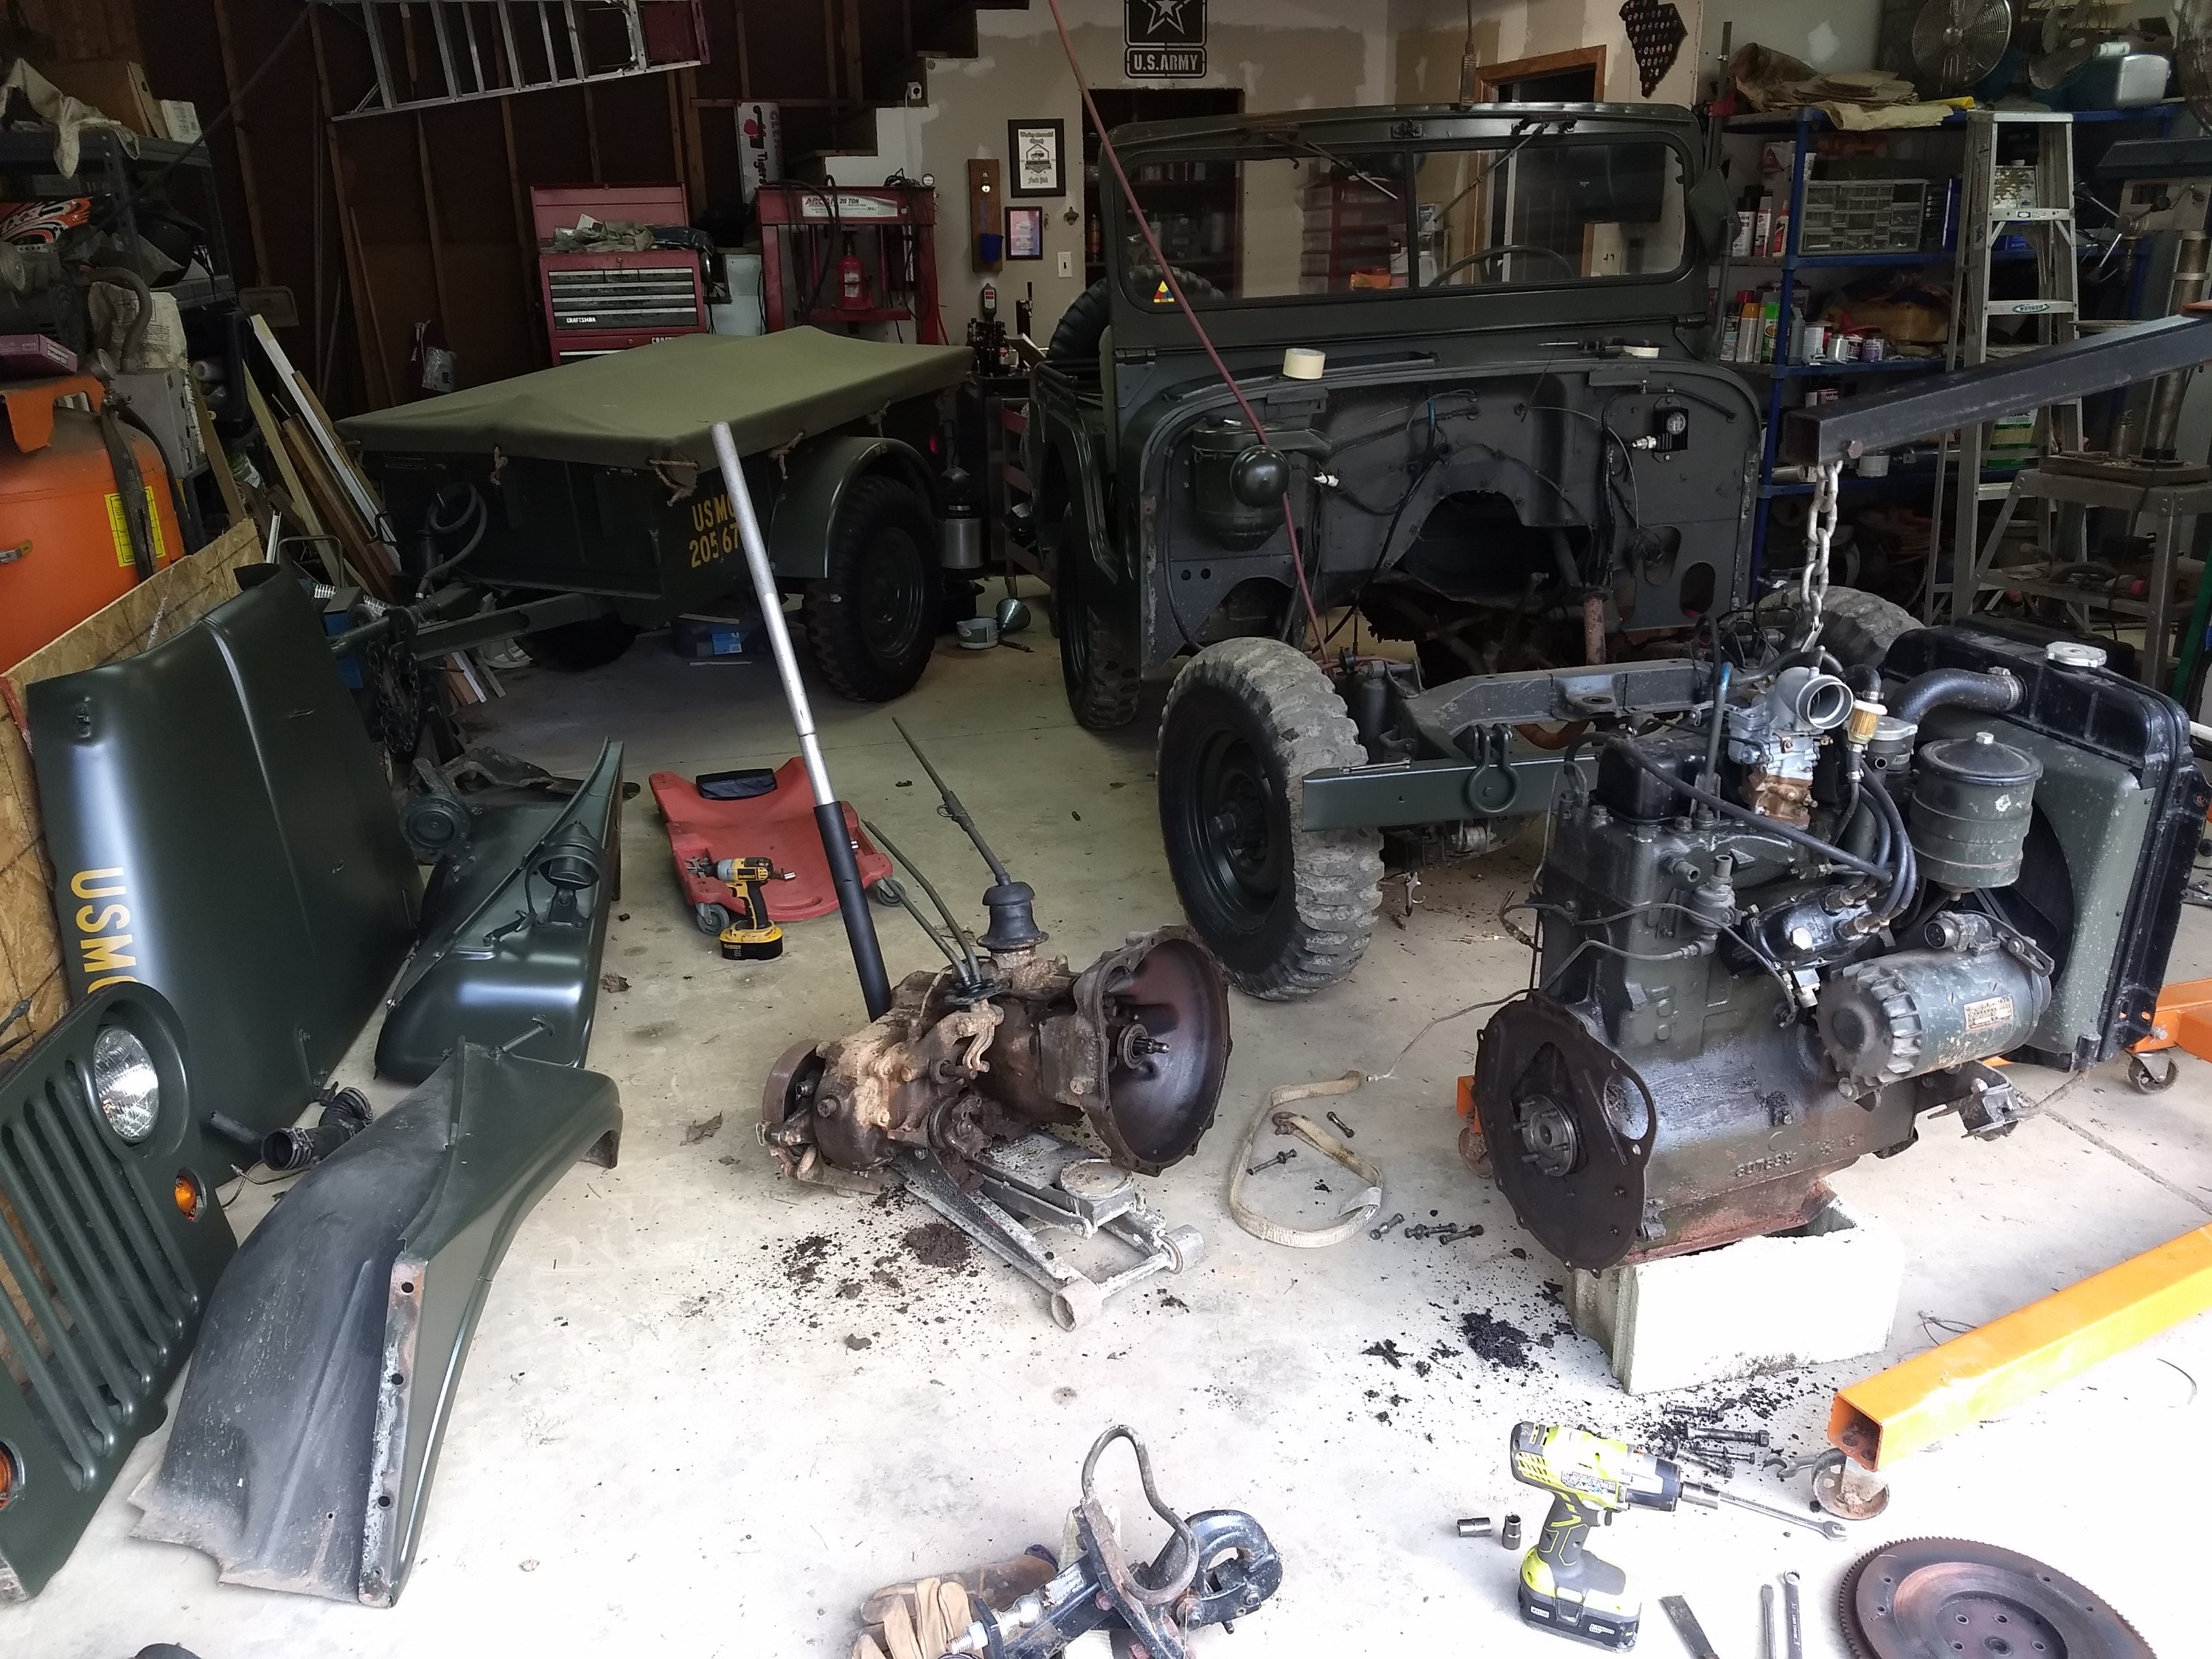
I decided to pull the transmission back off the engine and the bellhousing of to reseal the front of the trans. The old felt desk were pretty hard and prob didn’t seal anything. Once that was done I remarried them and started working on resealing the steering gear. That job was uneventful. Putting the engine back in was straight forward made much easier by pulling the trans shifter tower and transfer levers off. I made a cardboard cover for the transmission to keep debris out.
I did finally realize something after opening m38a1s for 25yrs. It is MUCH easier to work on anything trans or transfer related with the floorboards out!
Once I got everything buttoned back up, I fired her up – and that’s exactly what she did! The clutch felt good – stiff and quiet. BUT, she ground gears! It was late in the day, so I called it quits for the day. But then I played around for a while and got the radiator and grill installed, floorboards installed, carb adjusted and radiator filled.
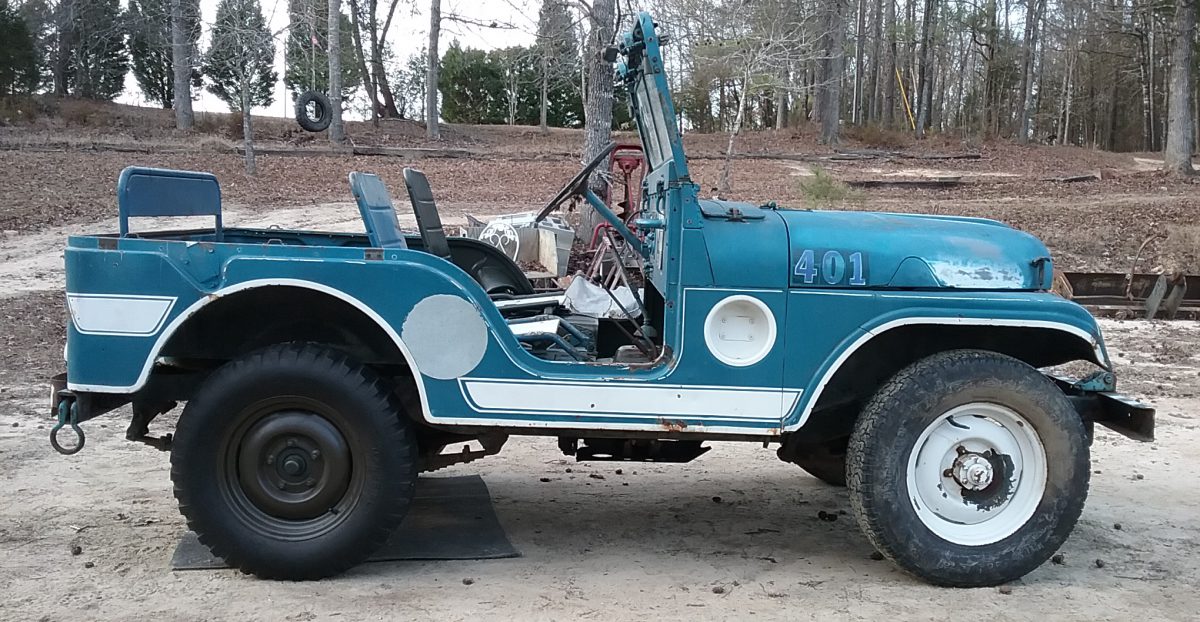
In preparation to sell her, I have a few things that need to be done to make me feel better about selling her.
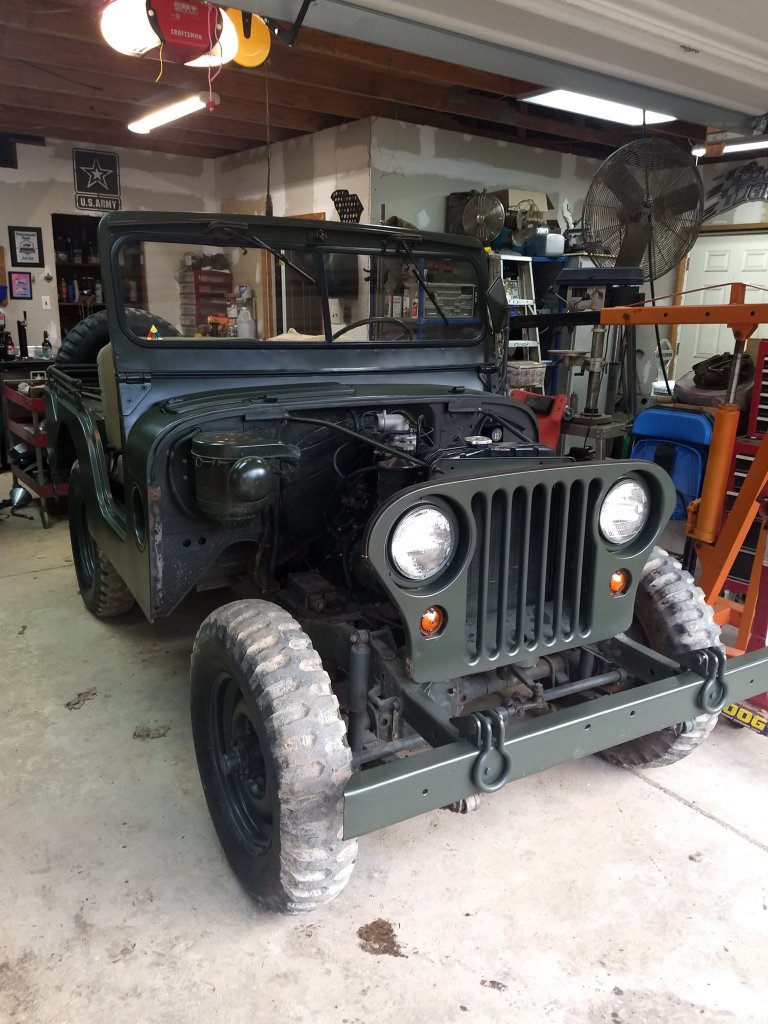
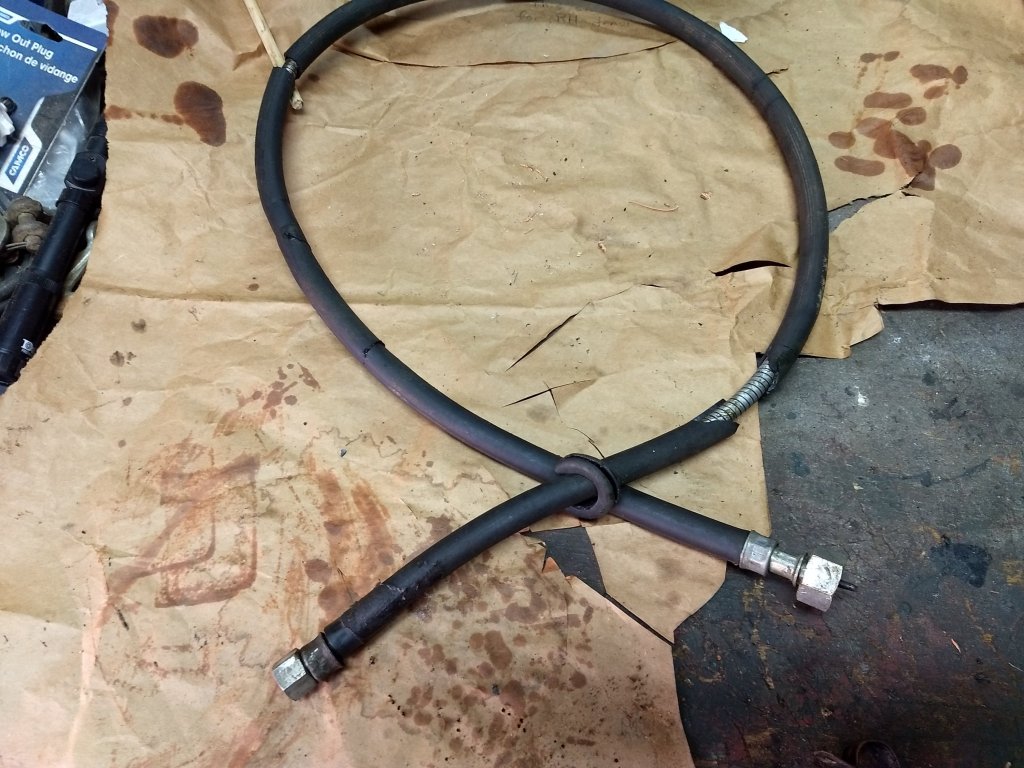
That led to the pic above. She needs a new clutch, rear seal, oil pan gasket, valve cover gasket, re seal the transfer case and tranny and remove/clean the carb.
After I seperated the engine and trans to inspect and found the throw out bearing was falling apart and the little return spring was missing. The clutch disc and pressure plate looked good and the flywheel had a little wear. I have a resurfaced flywheel to go back in.
This afternoon I had some nice weather, so I got some things done with the Jeep.
First order of business was to figure out why the speedometer wasn’t working. I unscrewed the cable from the speedometer and twisted the core – seemed to turn fine. Next, I got on the creeper and unscrewed the cable from the transfer case – YEP, there’s the problem! The end going into the transfer was broken off. I pulled the core out from the speedometer end and then pulled the whole cable out of the Jeep.
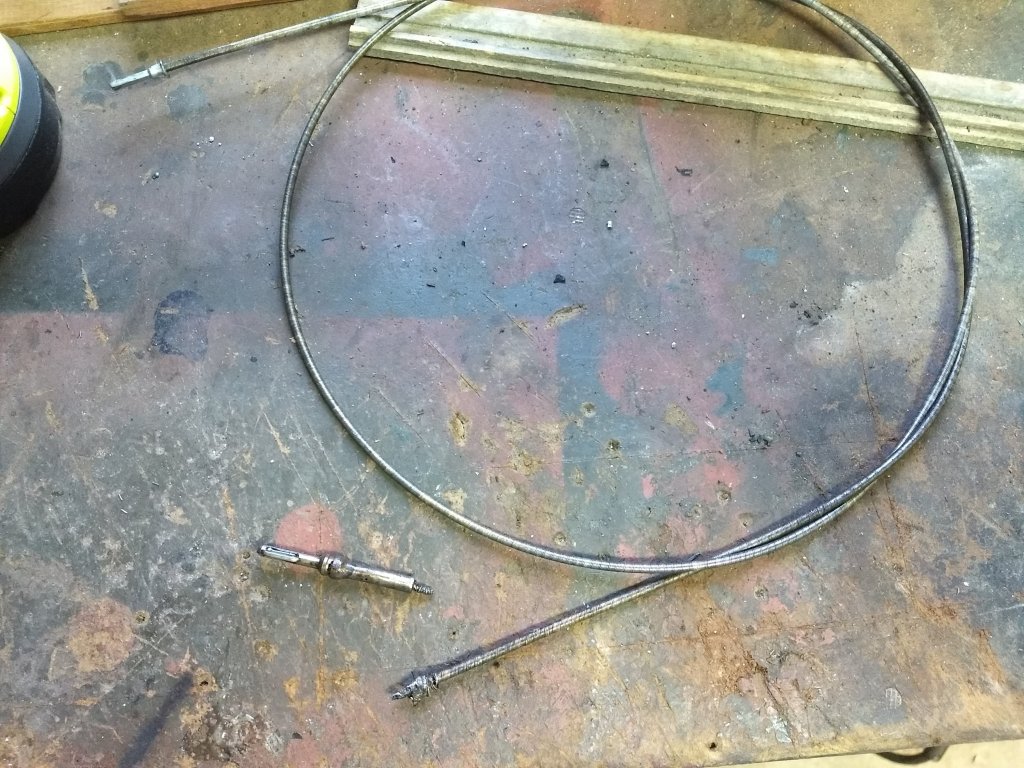
I scrounged around my spares box and found an old crusty cable with a good core.
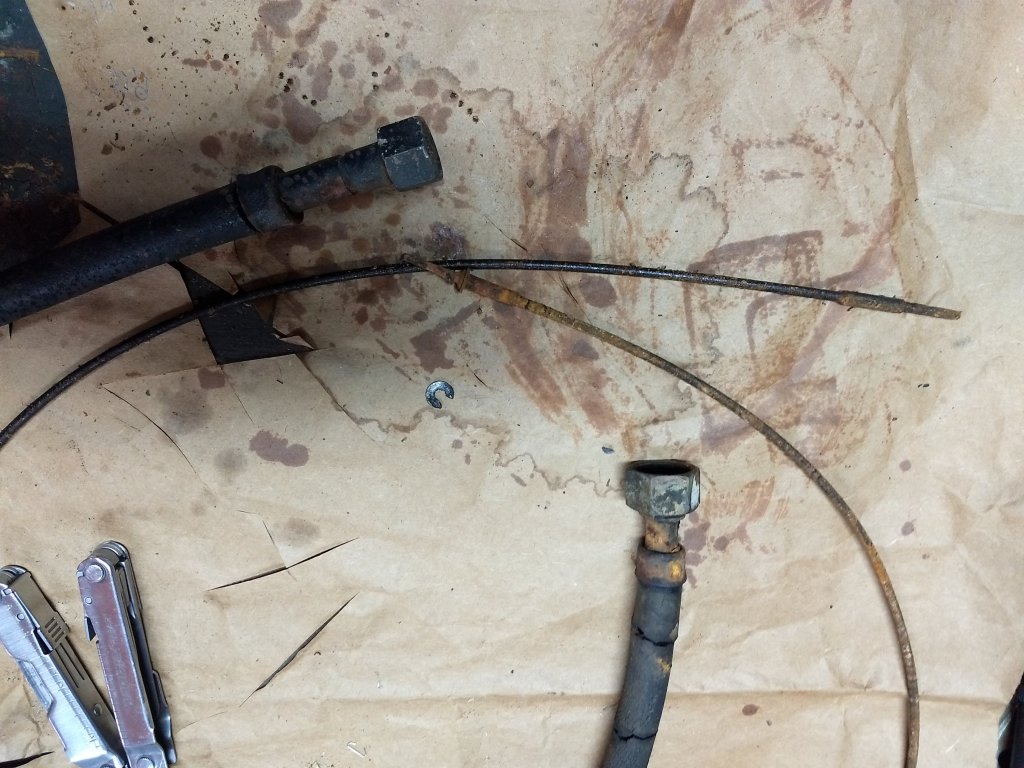
I proceeded to clean the cable with gas – swishing back and forth, dumped it and repeat. I did this 4 times before the gas came out fairly clean! I then blew it out with air, cleaned and lubed the core and installed it – turned like a FAIRLY new one then (a LOT smoother anyway)! The cable casing is kind of ratty, but it’ll work for now.
I installed the “new” cable and a new firewall grommet and reinstalled the instrument panel.
While I was getting dirty under the Jeep, I checked the trans and transfer oil – EMPTY! Damn, I knew it was dripping a little, but not that much! After checking around, I found that the trans plug was loose and leaking. 2qt of GL4 and an hour later they were refilled – man I gotta find a better way to do that job! I need to buy a pump it something – the quart bottle and ⅜” hose method takes forever!
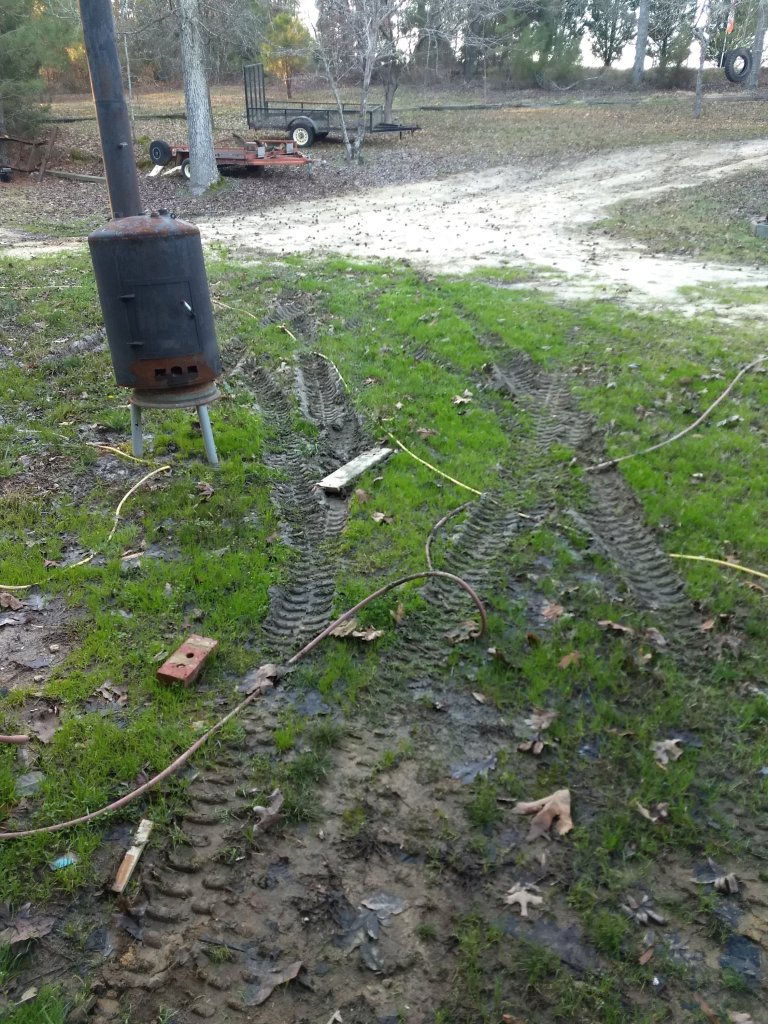
Now that I had oil again, I decided to go for a ride to see if the speedometer worked. When backing out of the shop, the Jeep started spinning in the mud. I had to put it in 4 low to back the trailer up the hill without sliding into my wood stove.
Once on the driveway, I took off up the road. Time to test my new turn signals along with everything else. The speedometer is working again and not bouncing! I got on the road – not far, but got up to about 35 before I had to turn into the field. Man, this thing was bouncing and shimmying and running like crap! I drove around the field and got back on the road to go back to the house because I don’t have much gas in it. Ran even worse on the way back.
I guess a front end alignment is in order the next time I’m off. I’m thinking it’s running bad because it hasn’t been run in a long time. There’s still a banging under the passenger floorboard that sounds like the front driveshaft is tapping the floorboard! Or maybe a mount is bad – definitely have to find that because it’s very annoying!
I pulled up in front of the house and proceeded to give her a long overdue bath. I actually should’ve done that before I started working on her the other week. That would’ve made the work MUCH easier and cleaner!
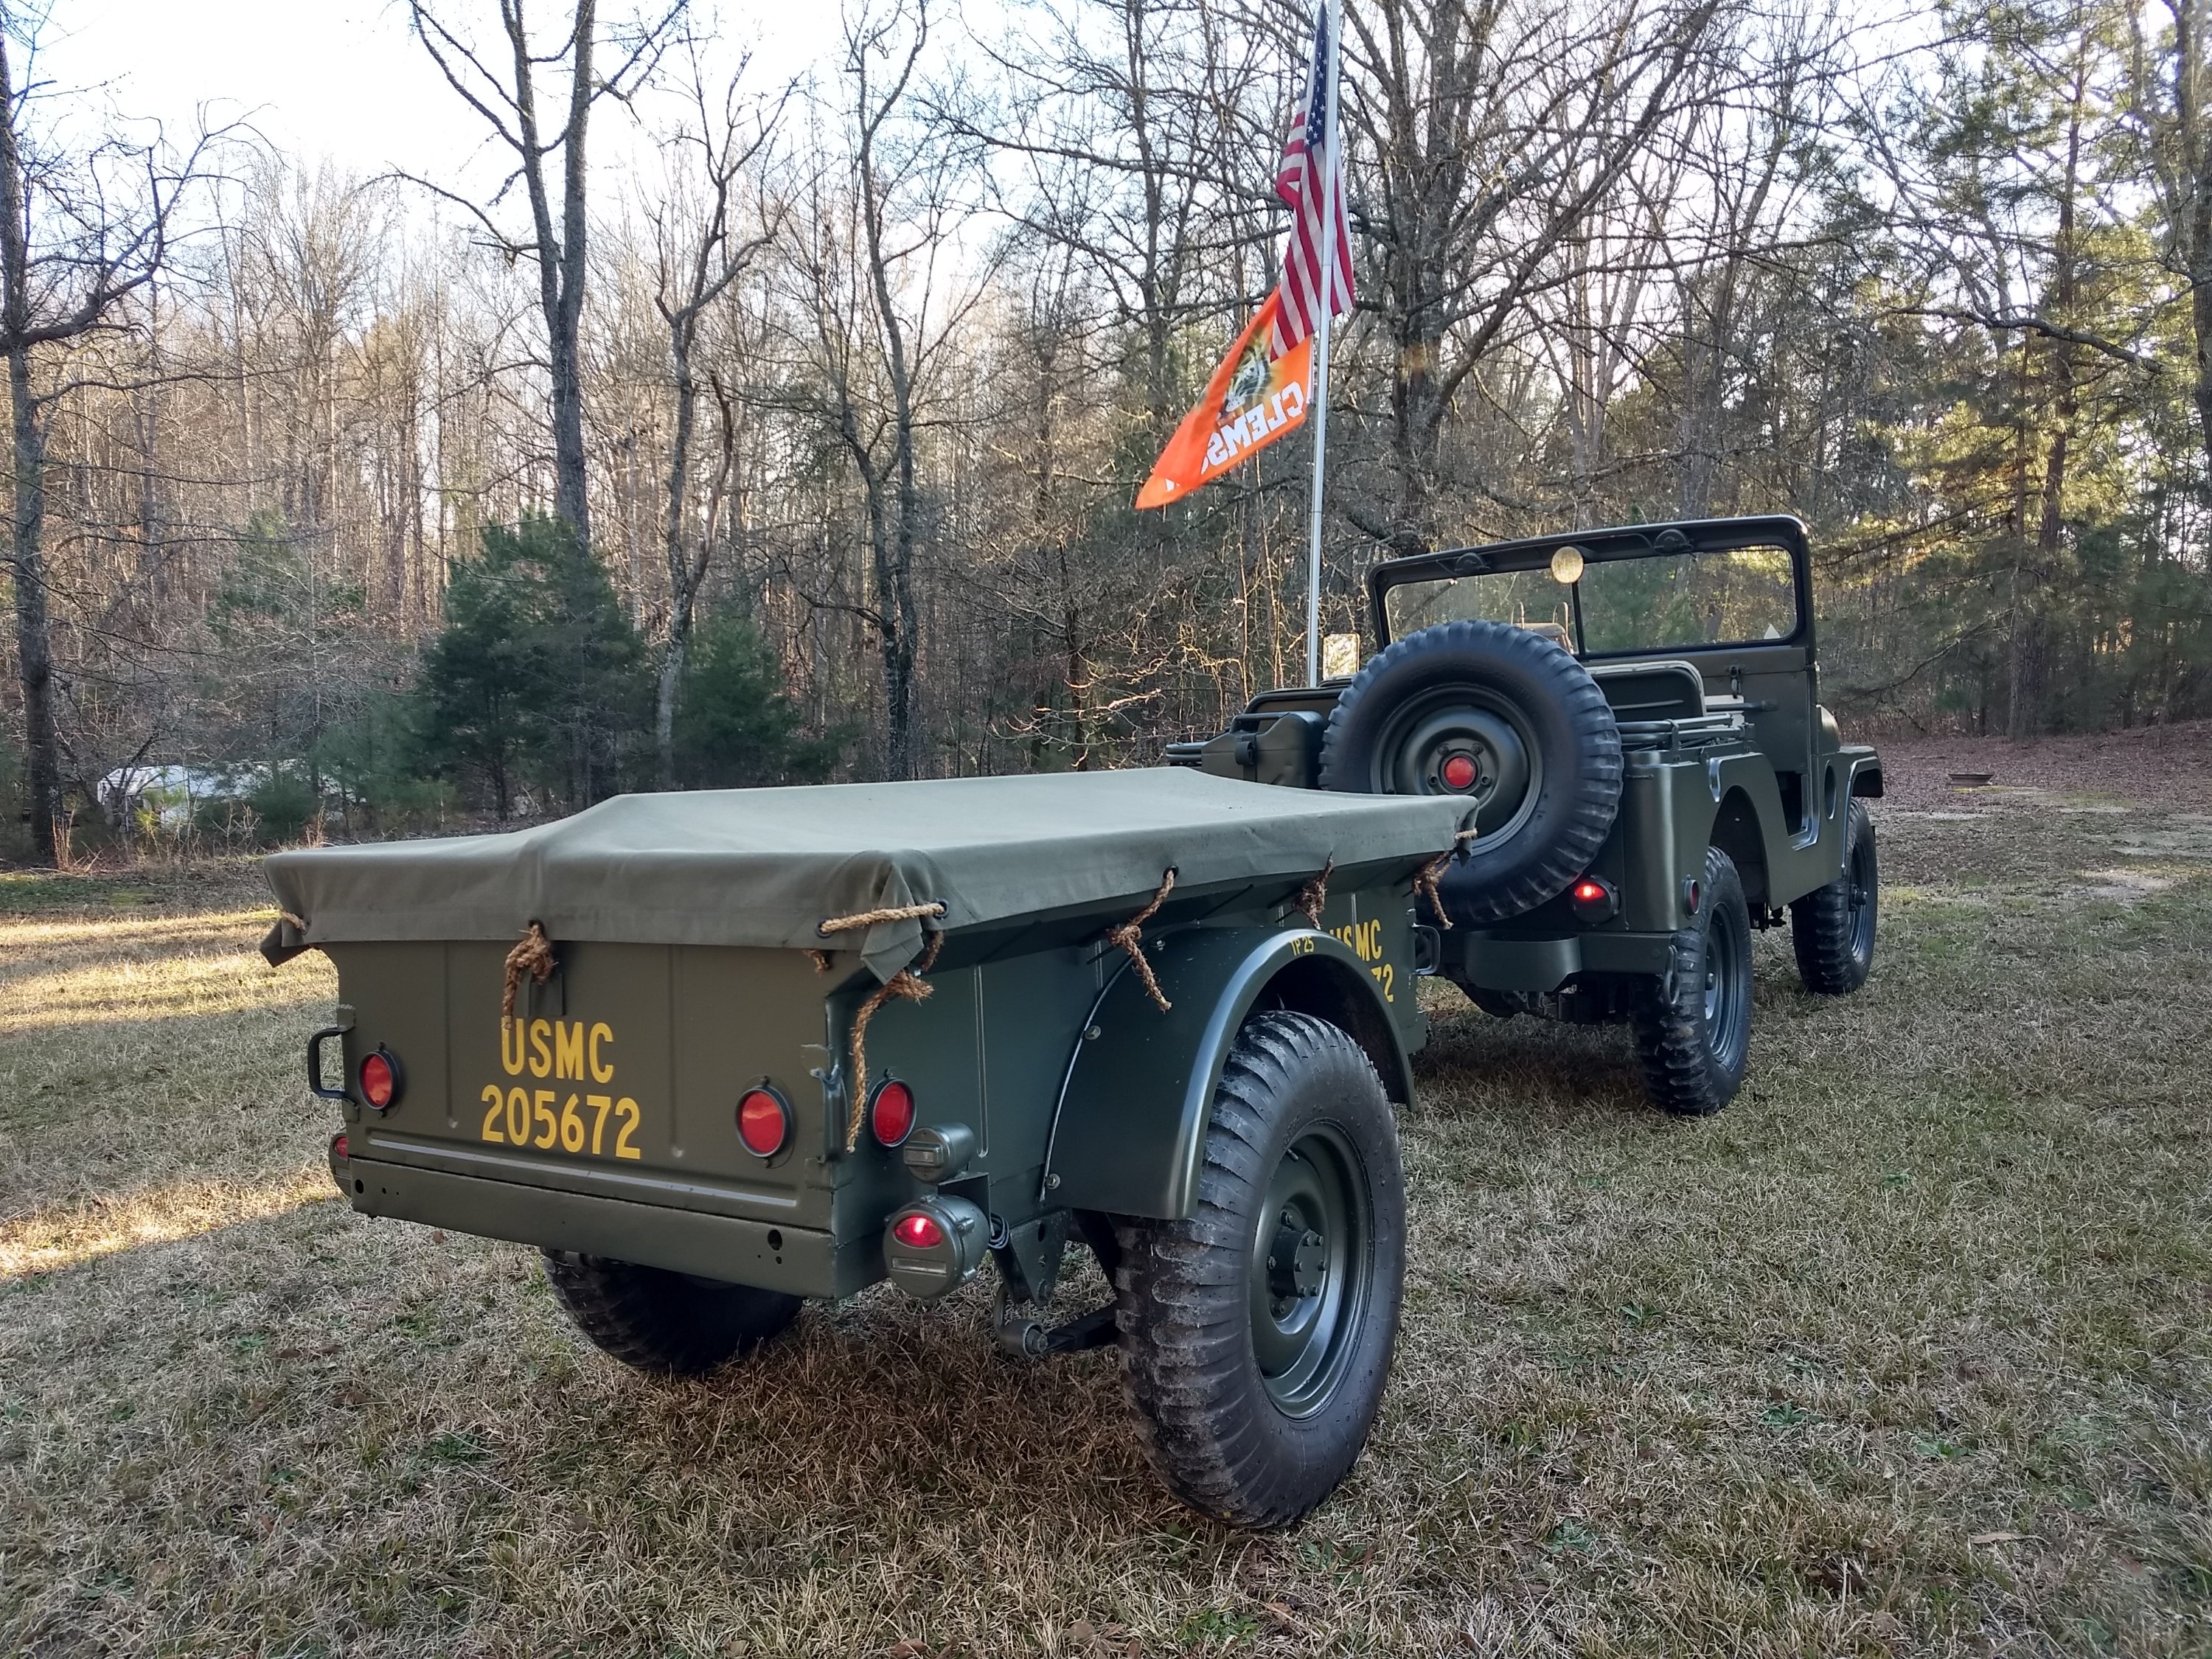
After I washed the Jeep and trailer, I took them up the hill for pics.

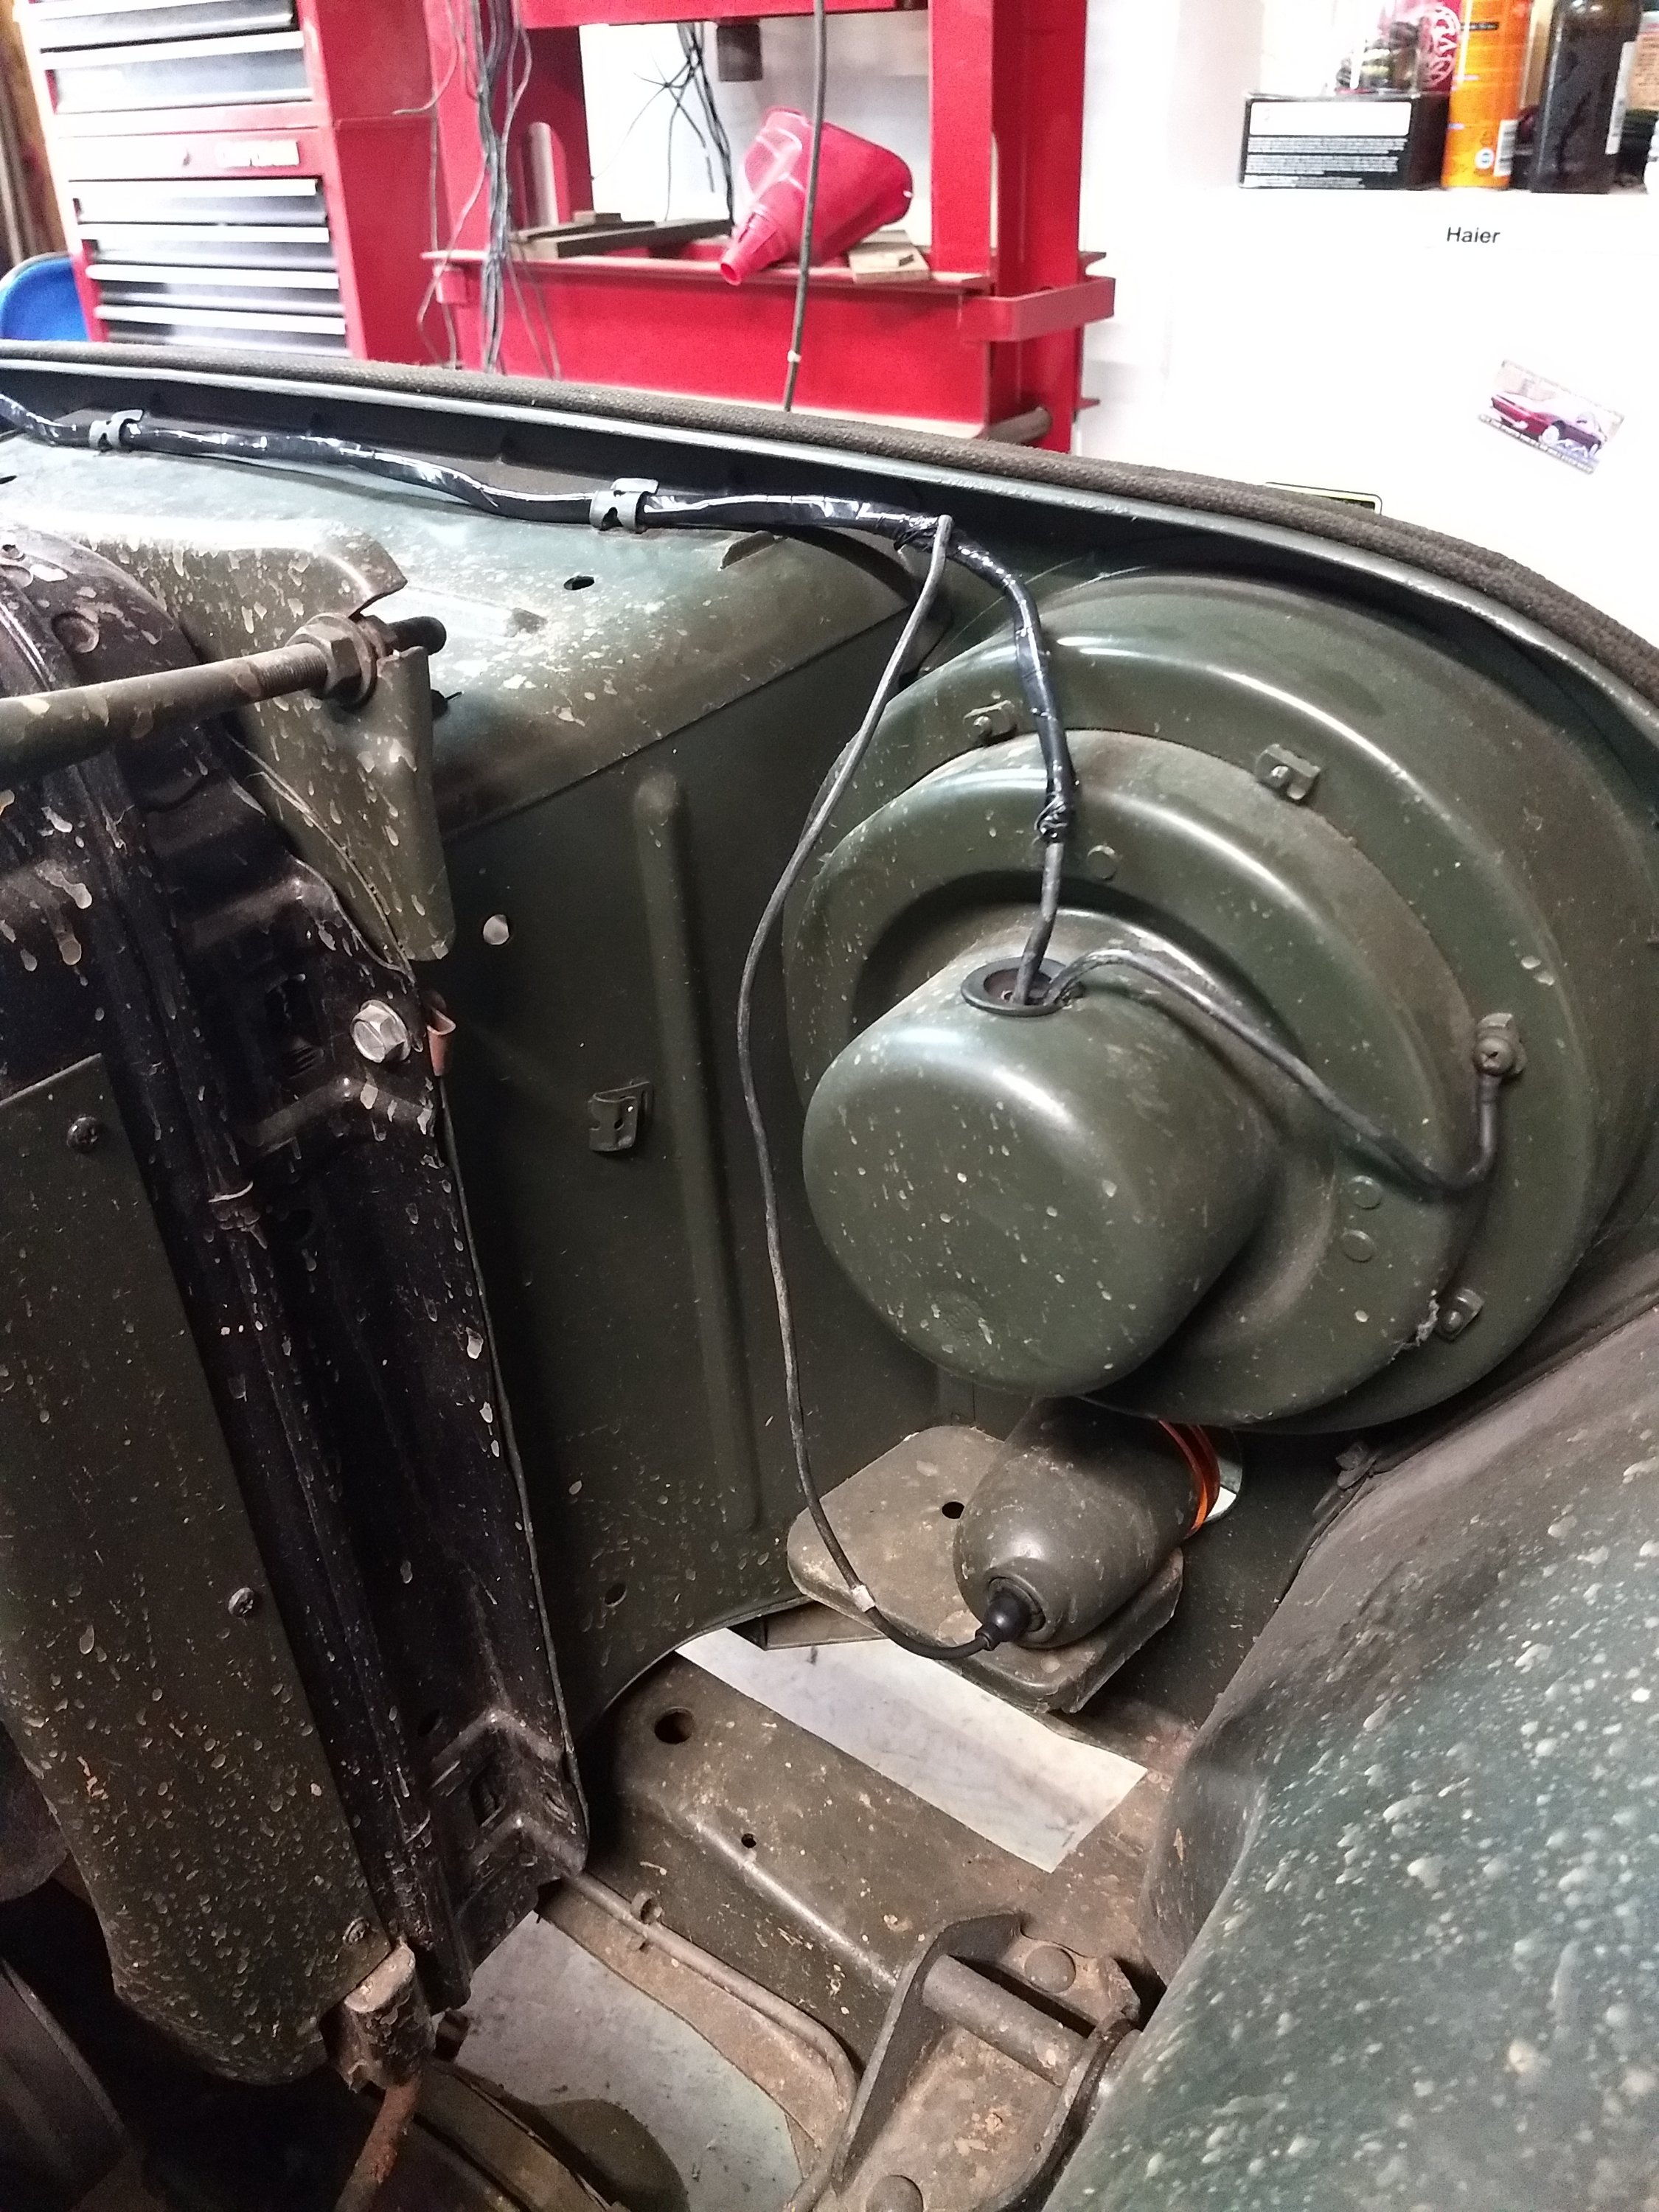
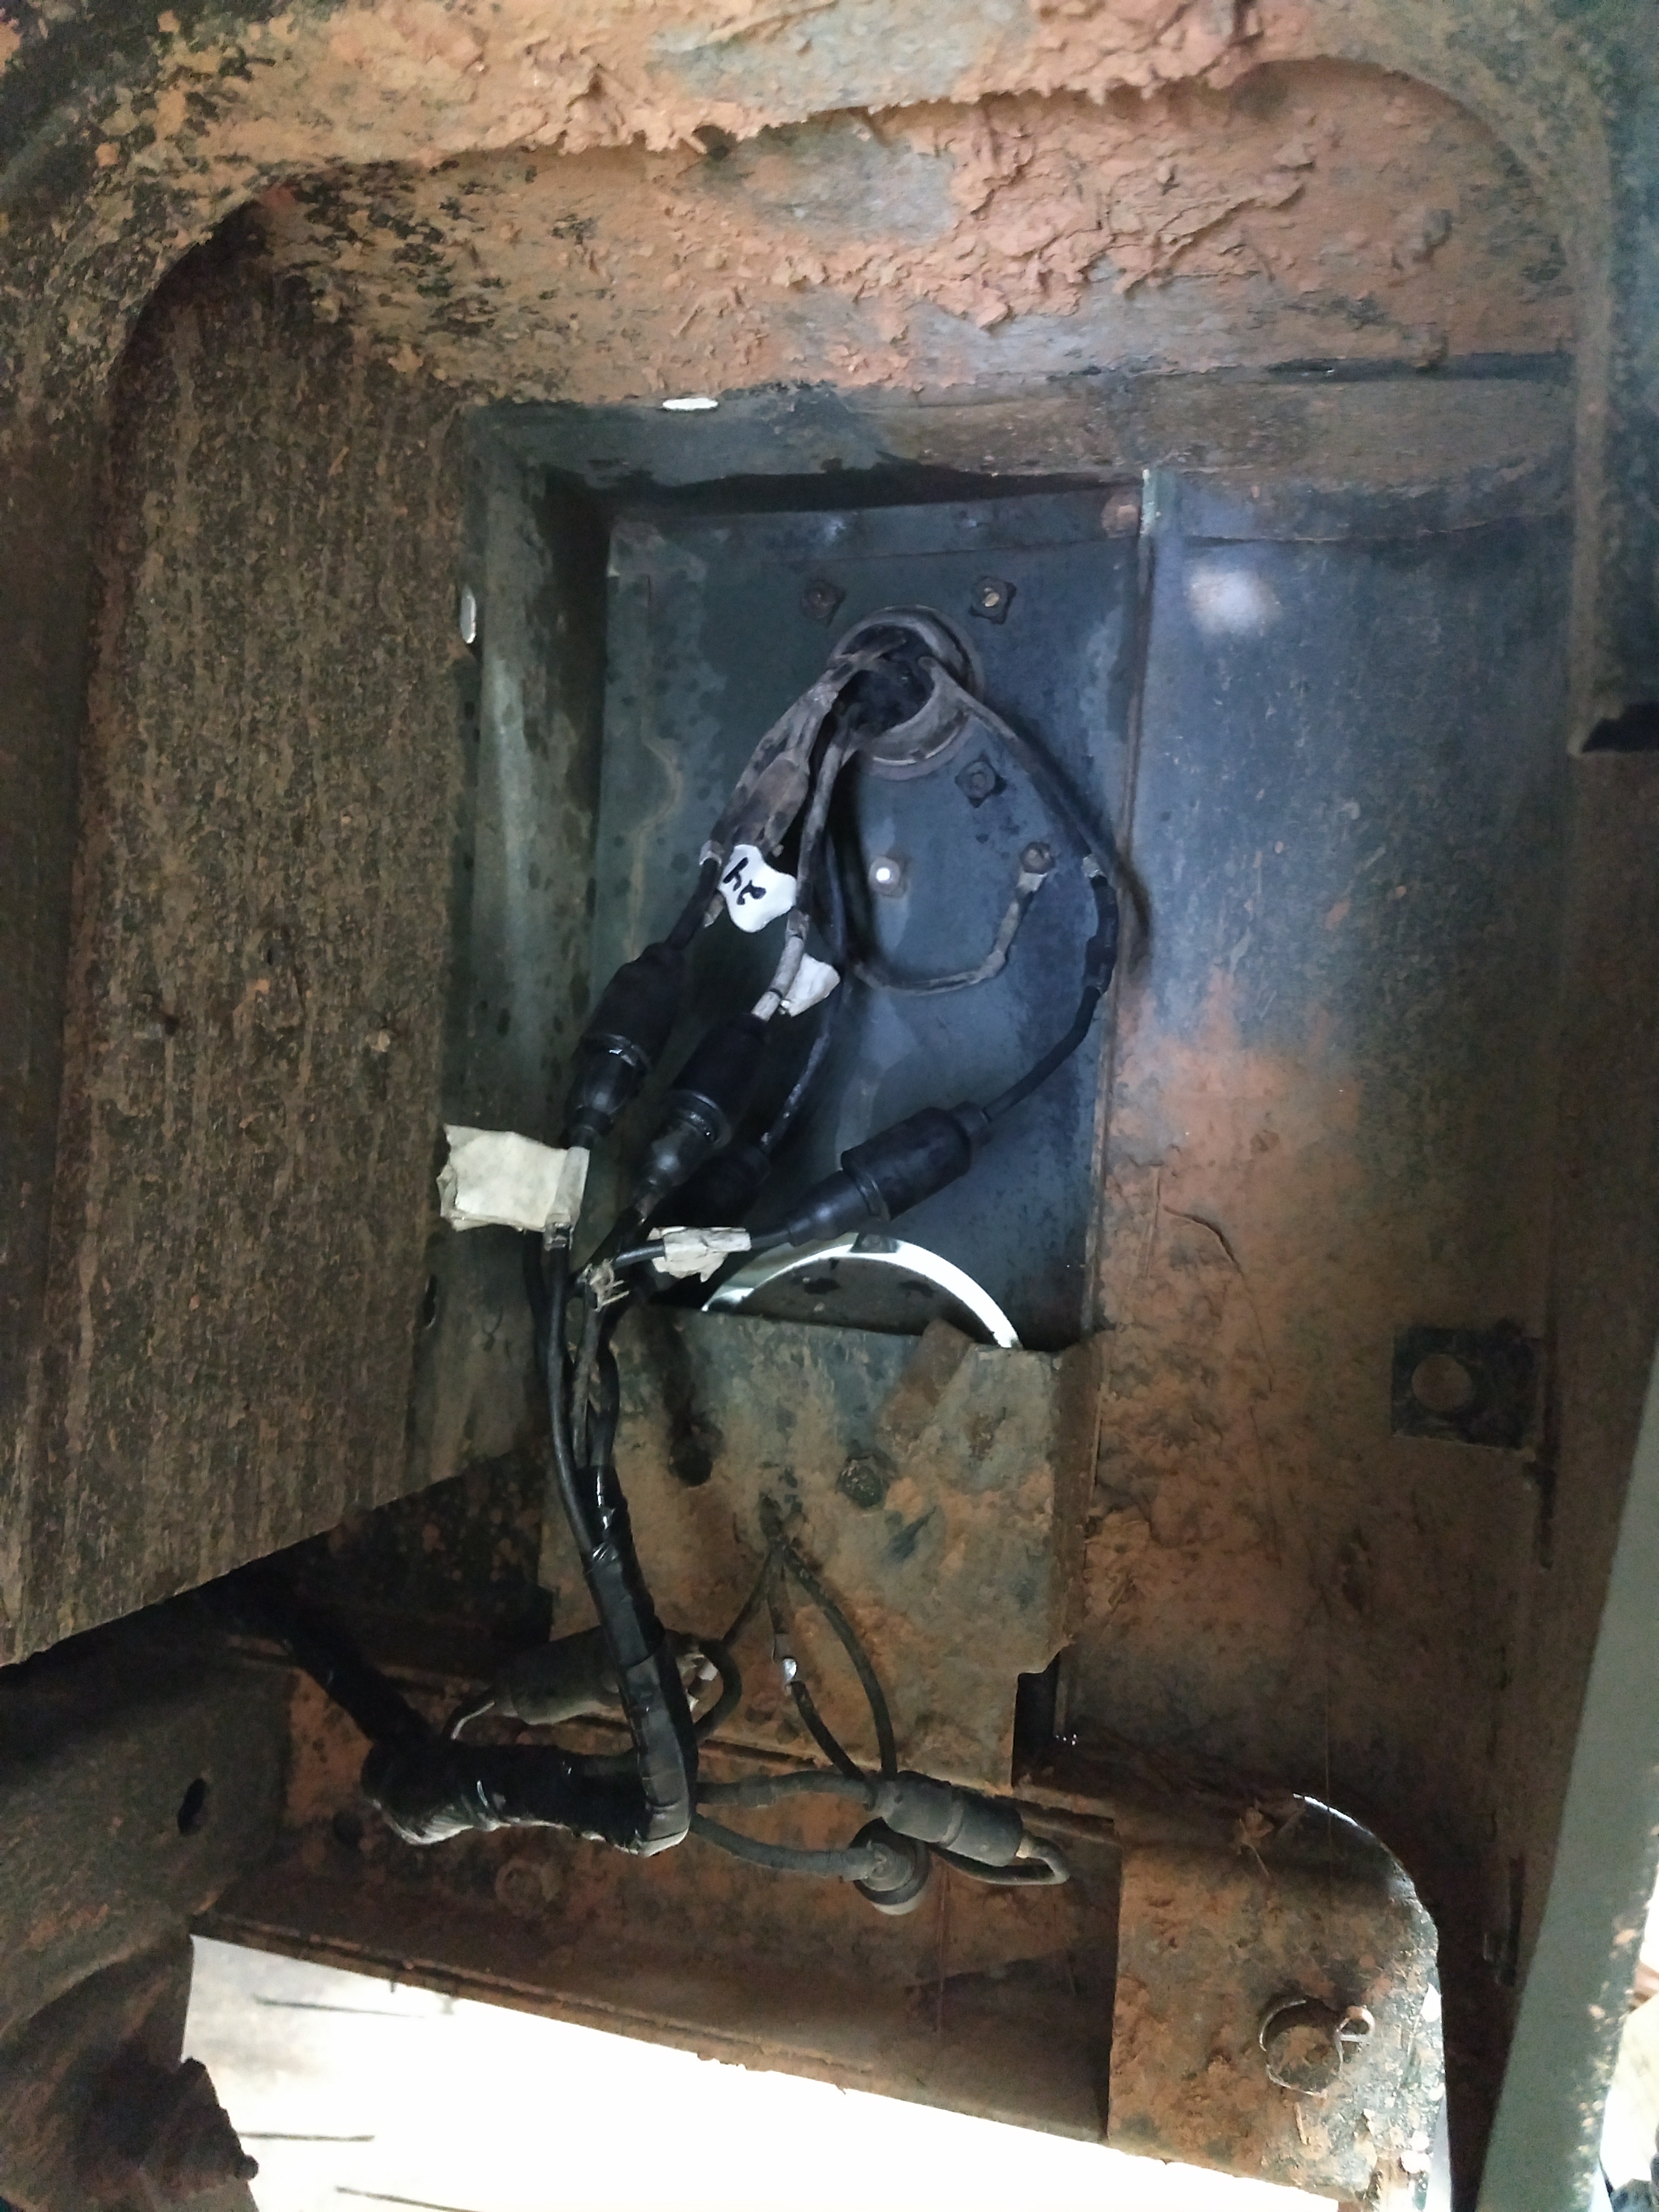
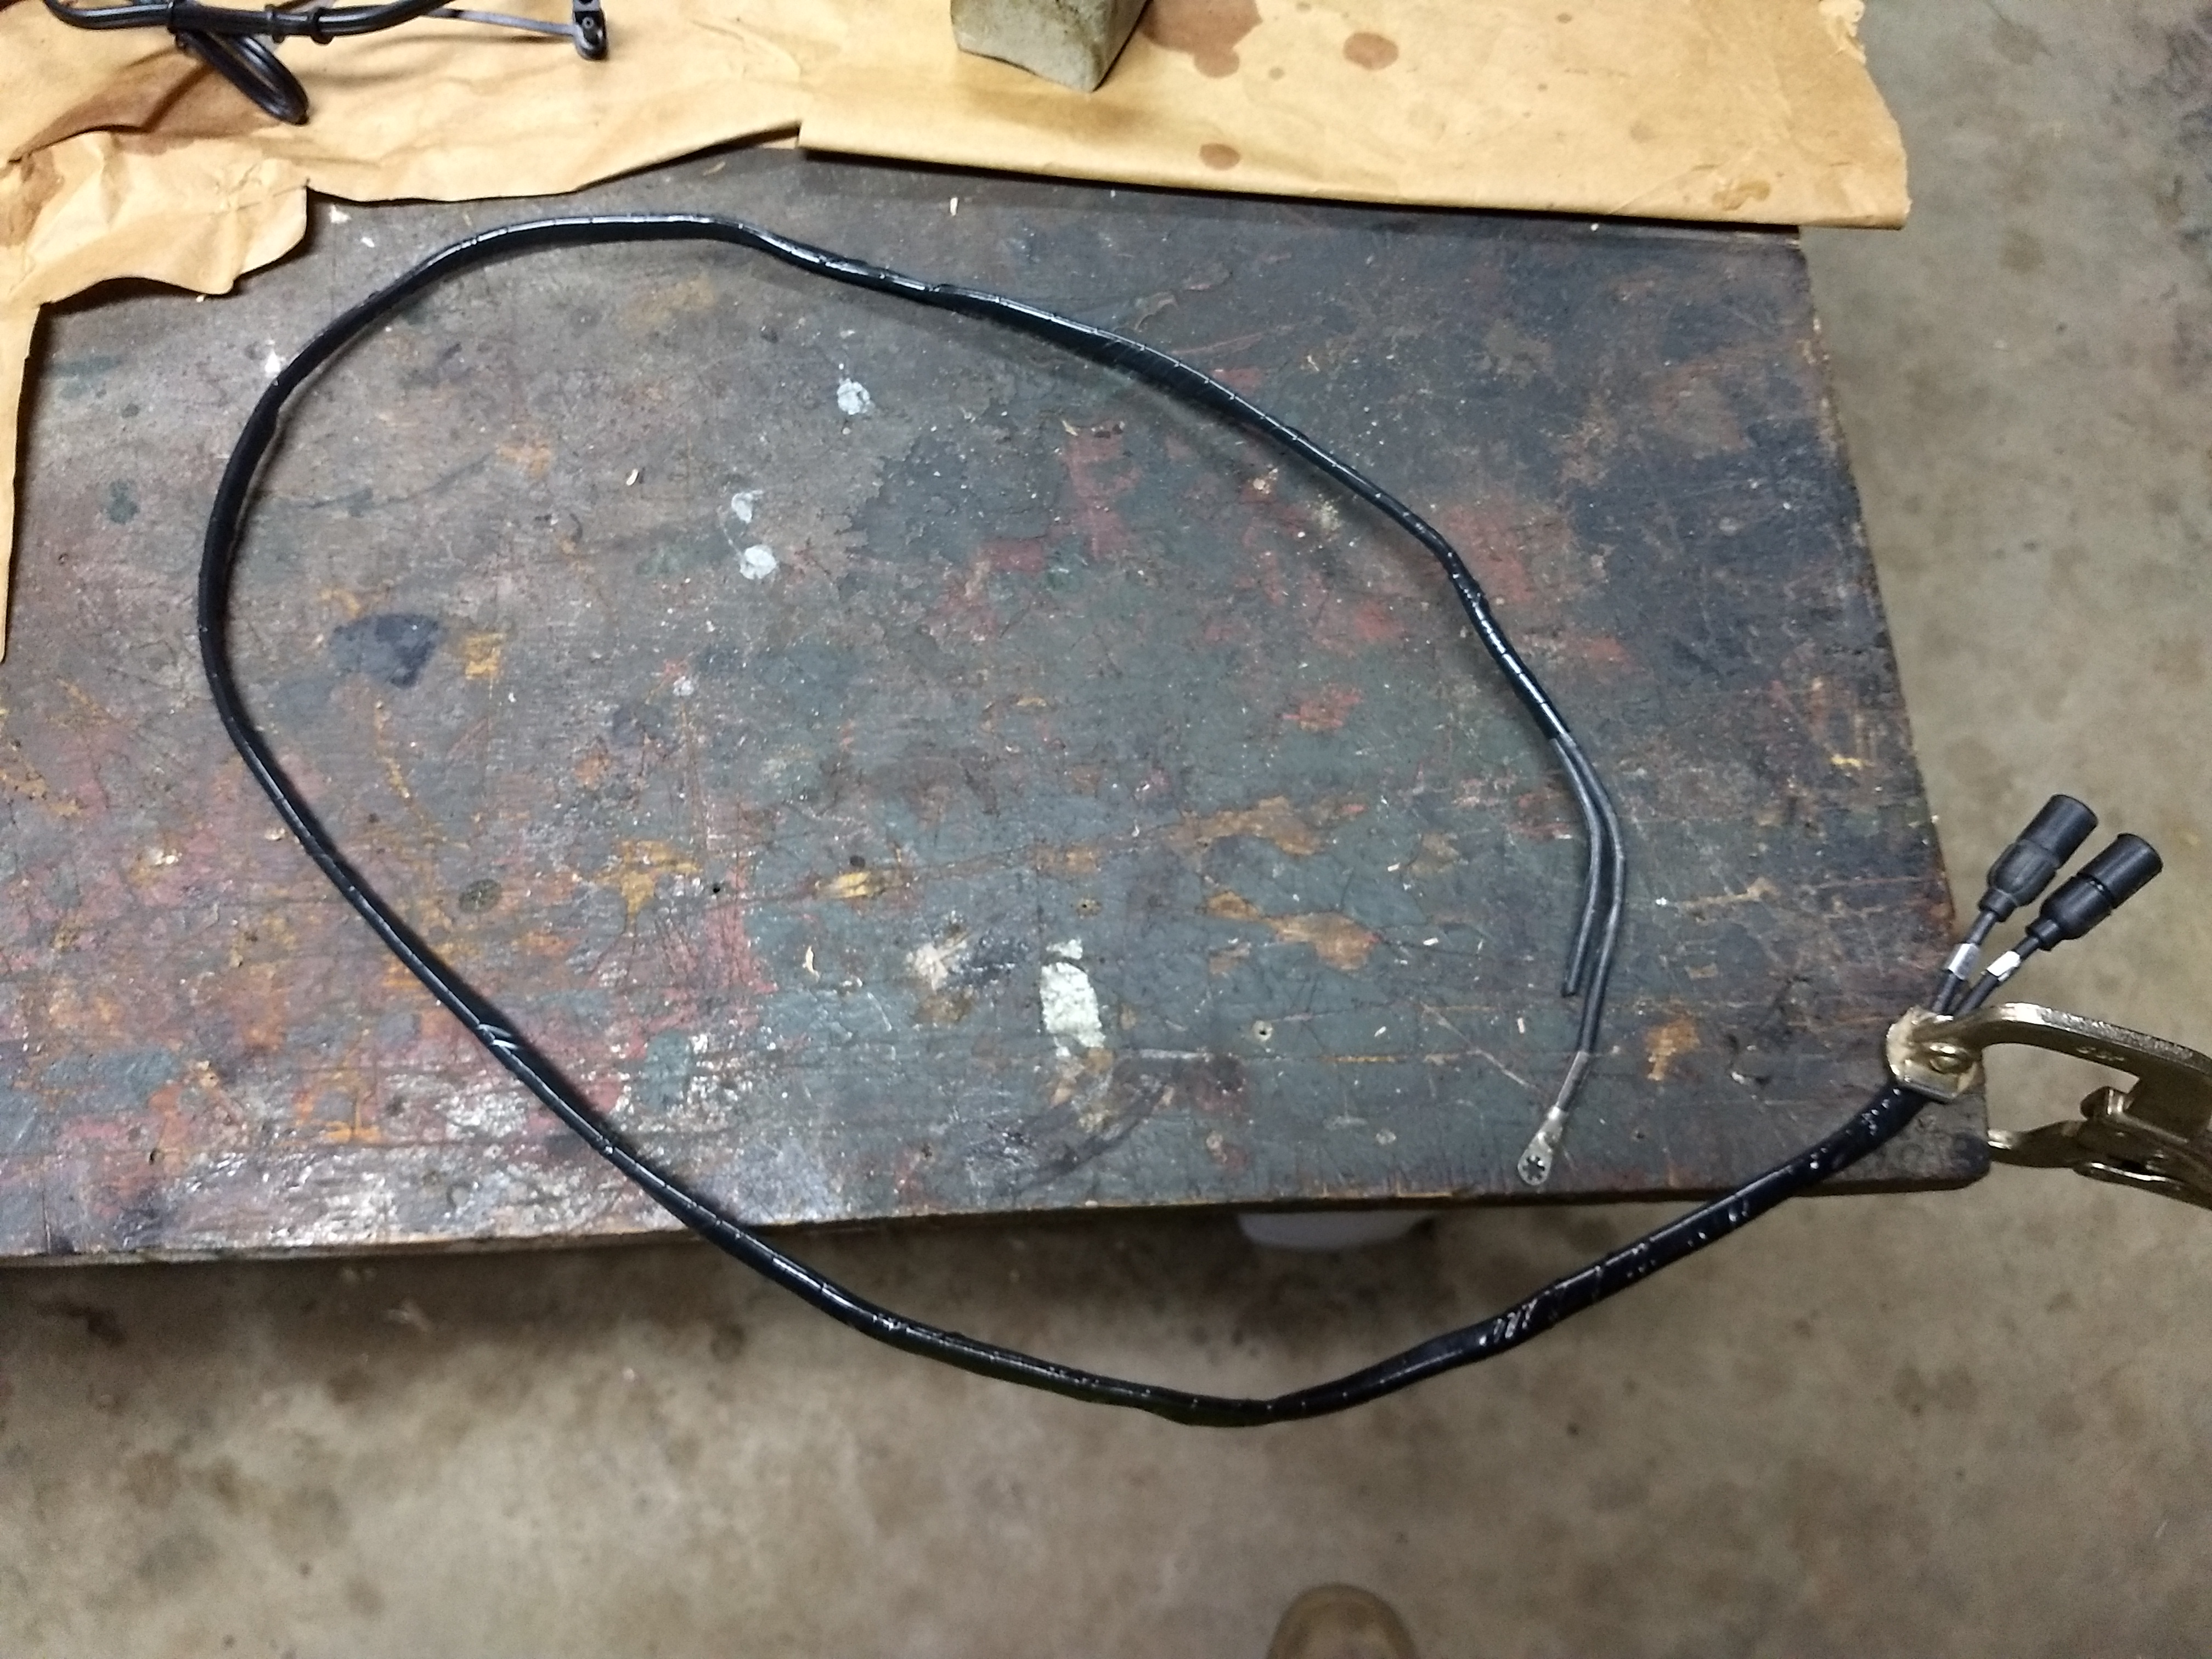
The parts that I ordered to finish up the turn signal install were supposed to be delivered today. I didn’t want to waste half a day of good weather waiting on the mail lady, so I decided to make a new headlight wiring harness.
I started off by marking (on masking tape) all of the wires whose number tags I could read.
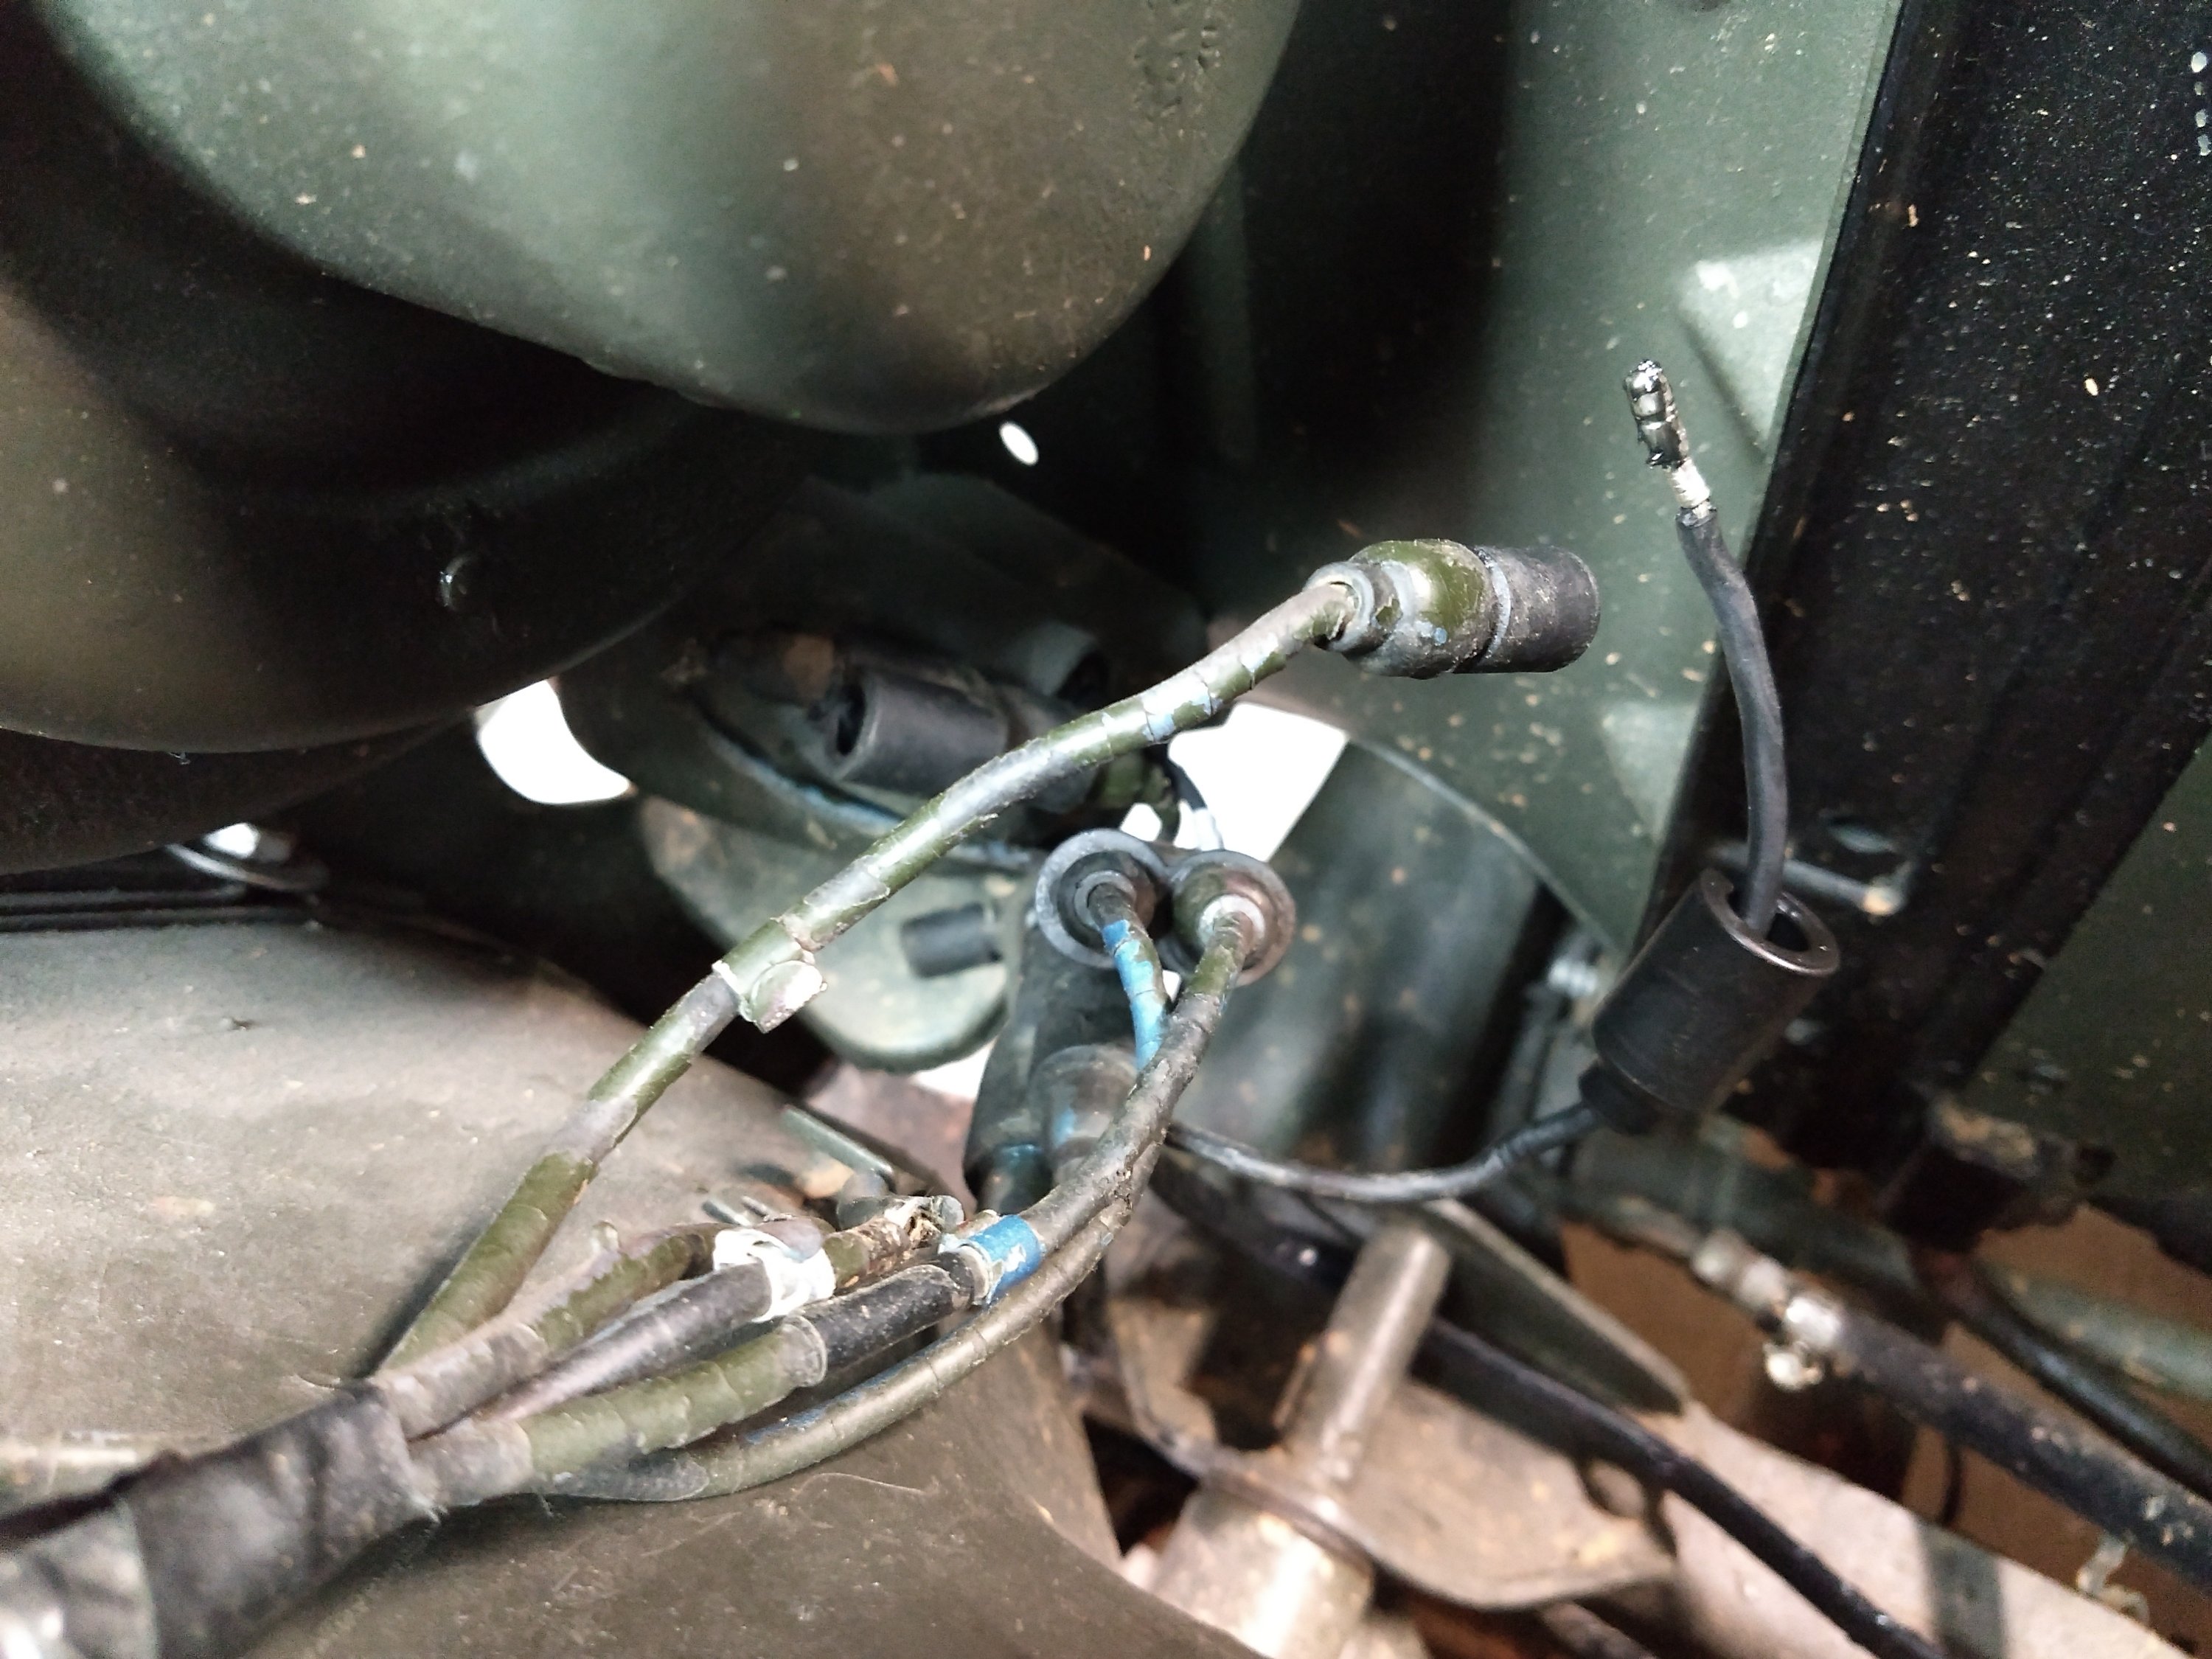
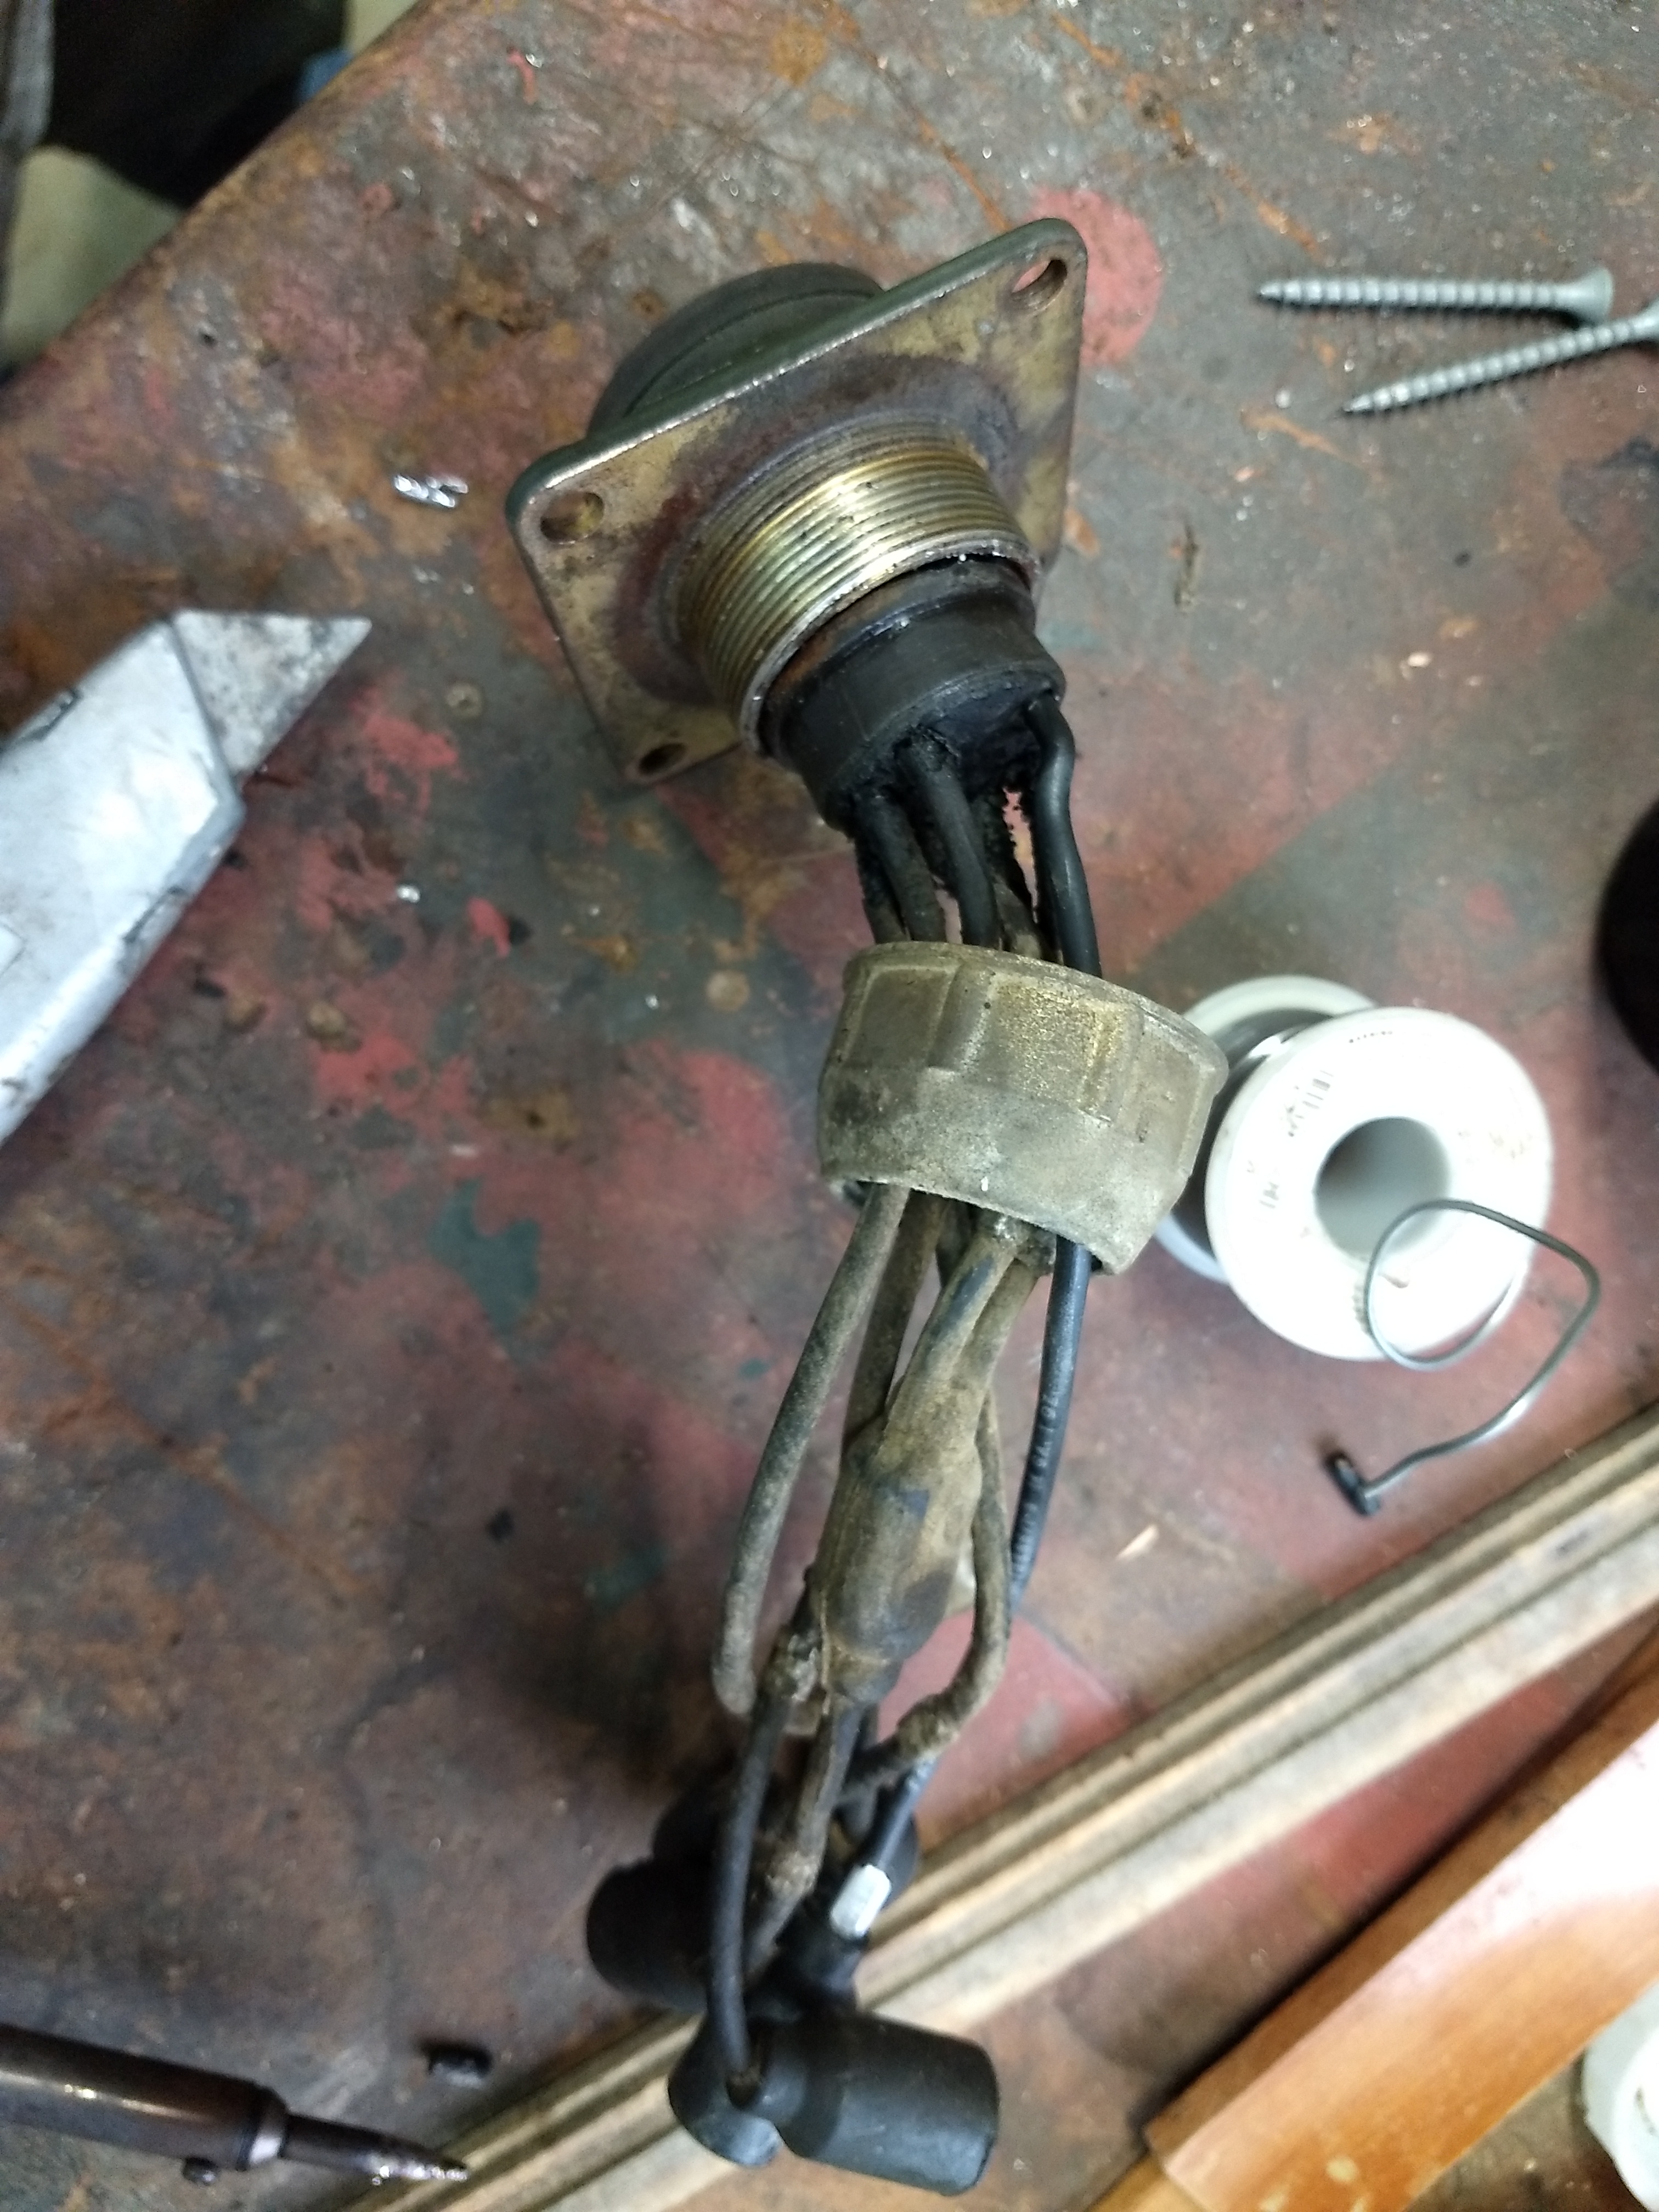
I had to scrape paint off of most of them, but still couldn’t read a few. Then I disconnected and removed the main harness.
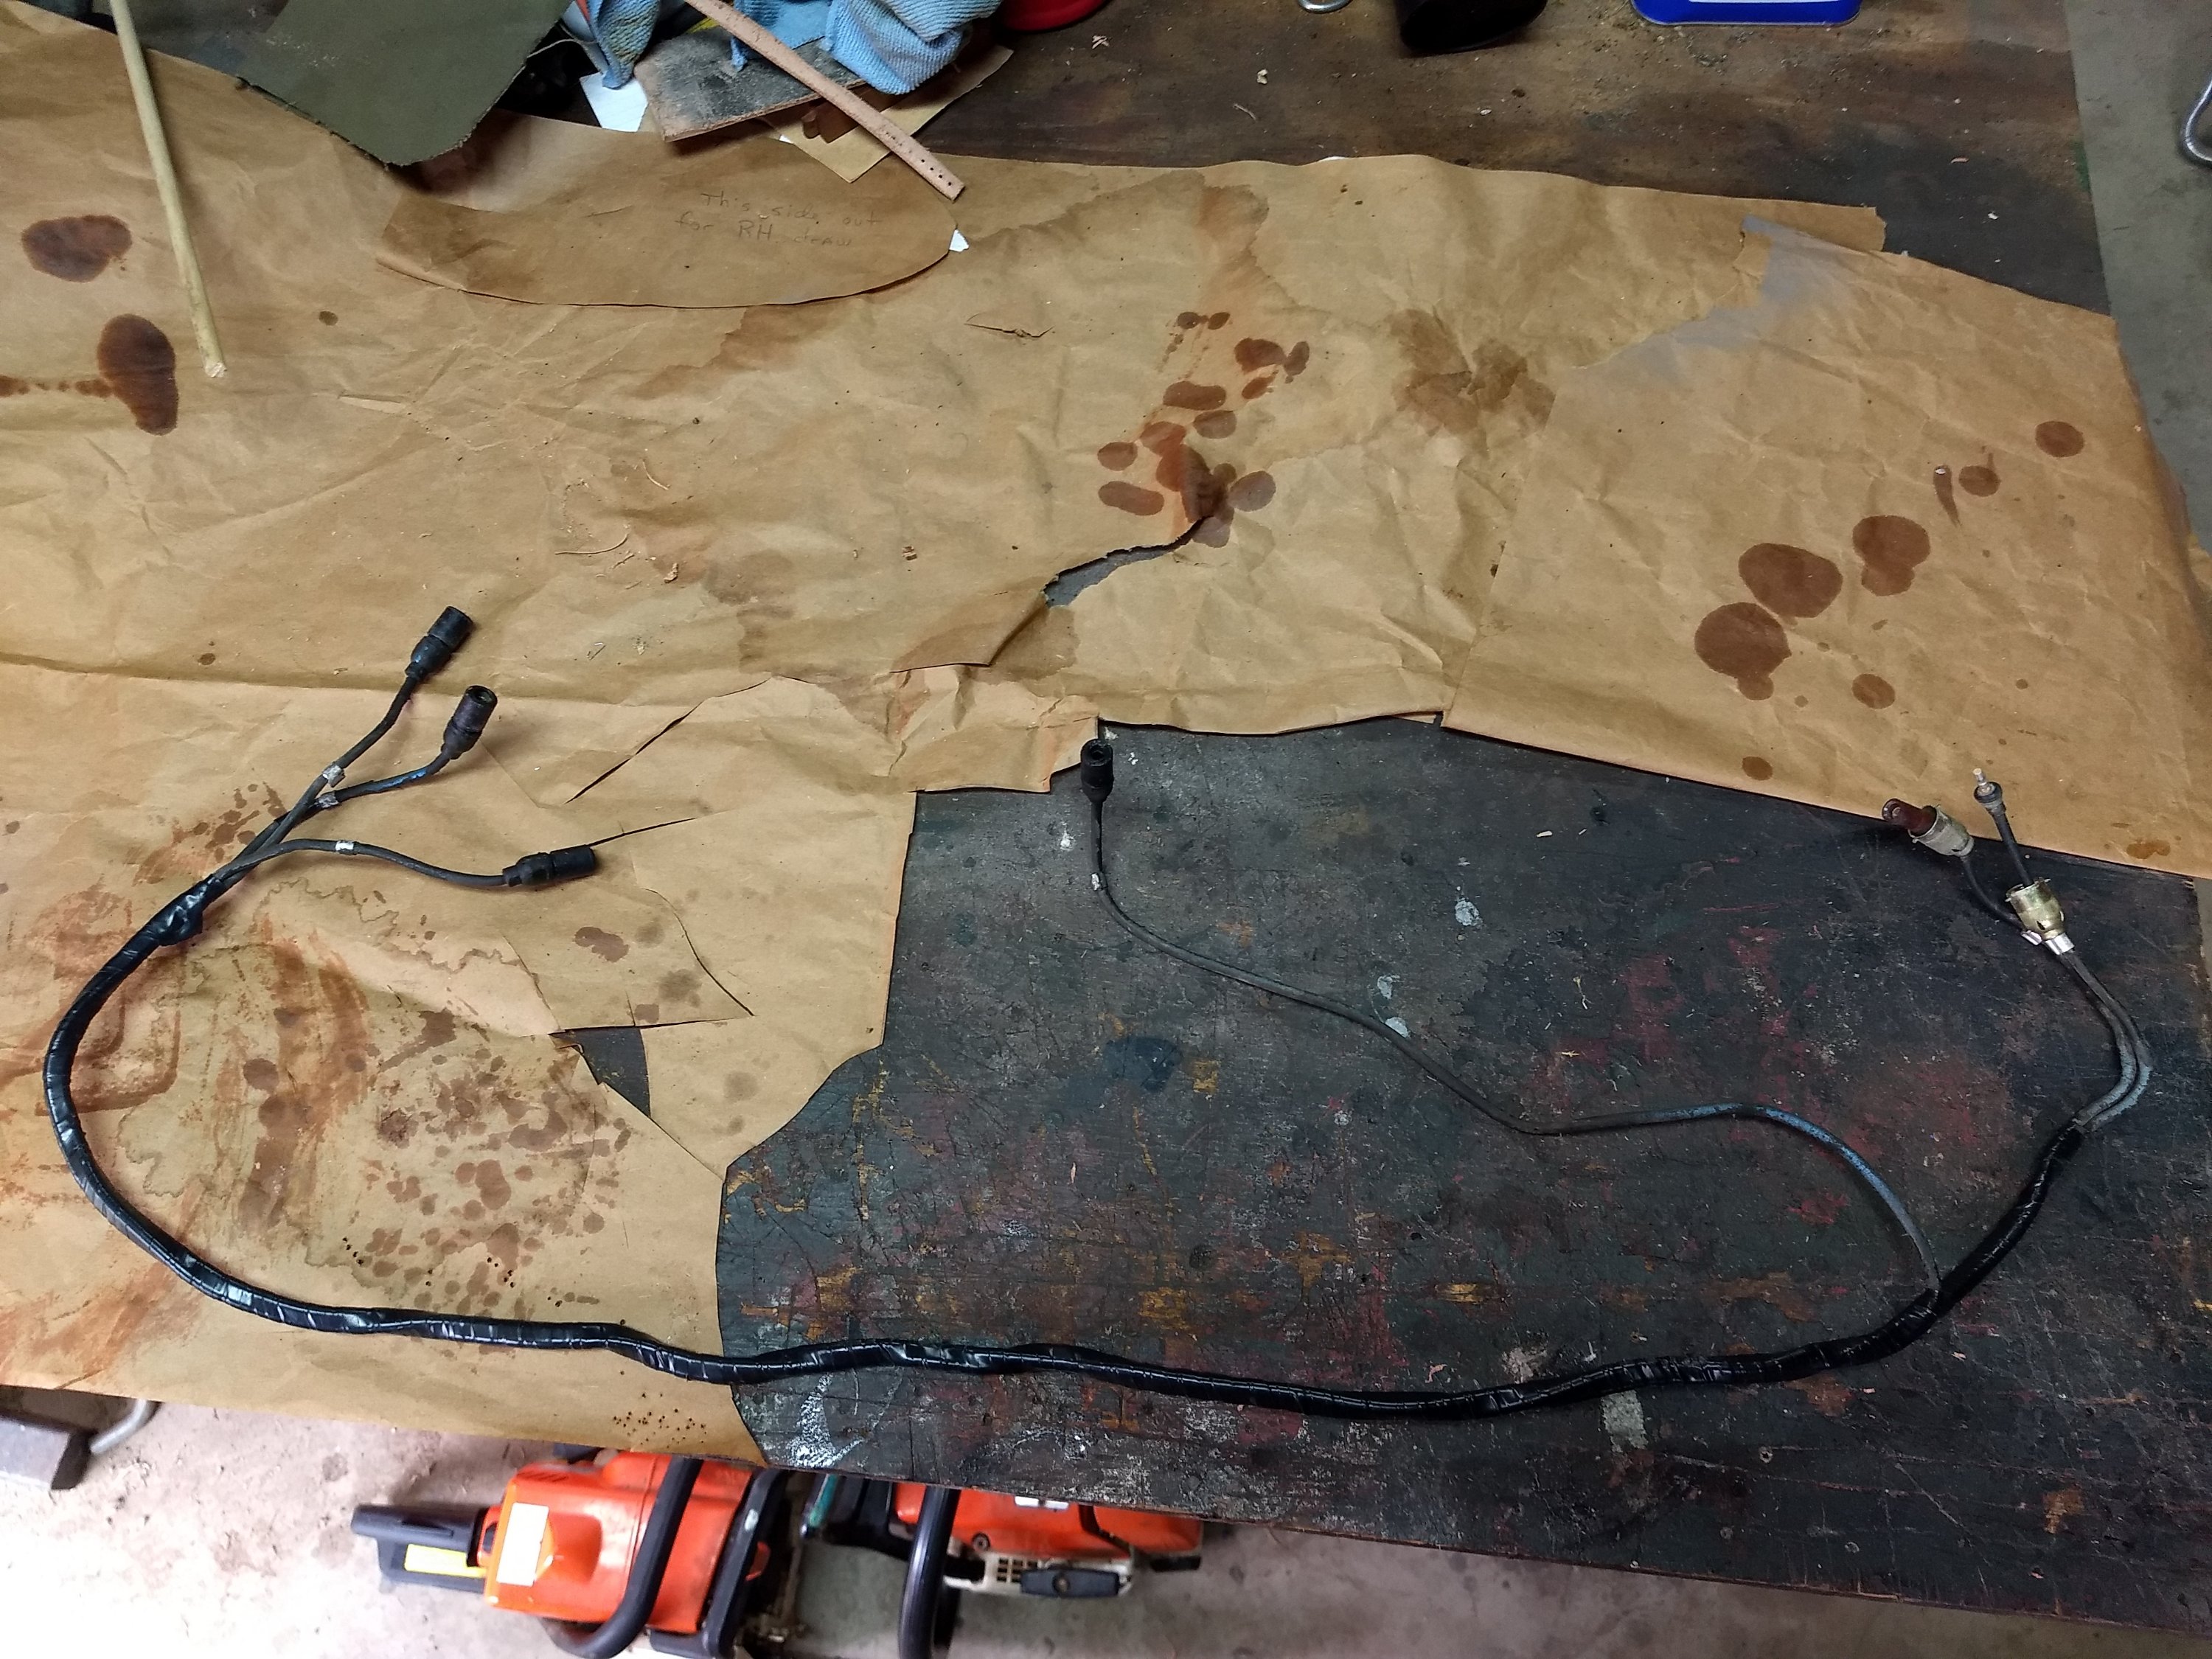
I looked through all of my new wire segments that I pulled from the M35a2 harness and found one that was the EXACT measurement I needed (100 1/2″) and had a male shell on each end. I cut it in half to make the 2 headlight wires. Next, I found another wire with a male shell that was 65″ long and cut it to 56″ for the right B.O marker light (now right turn signal). Then I taped them together with wiring harness tape. I couldn’t install the ends on the other side until the mail came with my new ends.
Next, I pulled the right headlight out to replace the Douglas connectors on the headlight pigtails. I say “pigtails” because I am using more readily available headlights with a 3 prong plug instead of the wires being attached to the bulb itself. I already had 3 pigtails with female shells, so I used butt connectors and shrink tubing to connect them to the 3 prong plug. I also removed the ground wire from the right headlight and fabbed a new one. Sorry, I didn’t take pics of this.
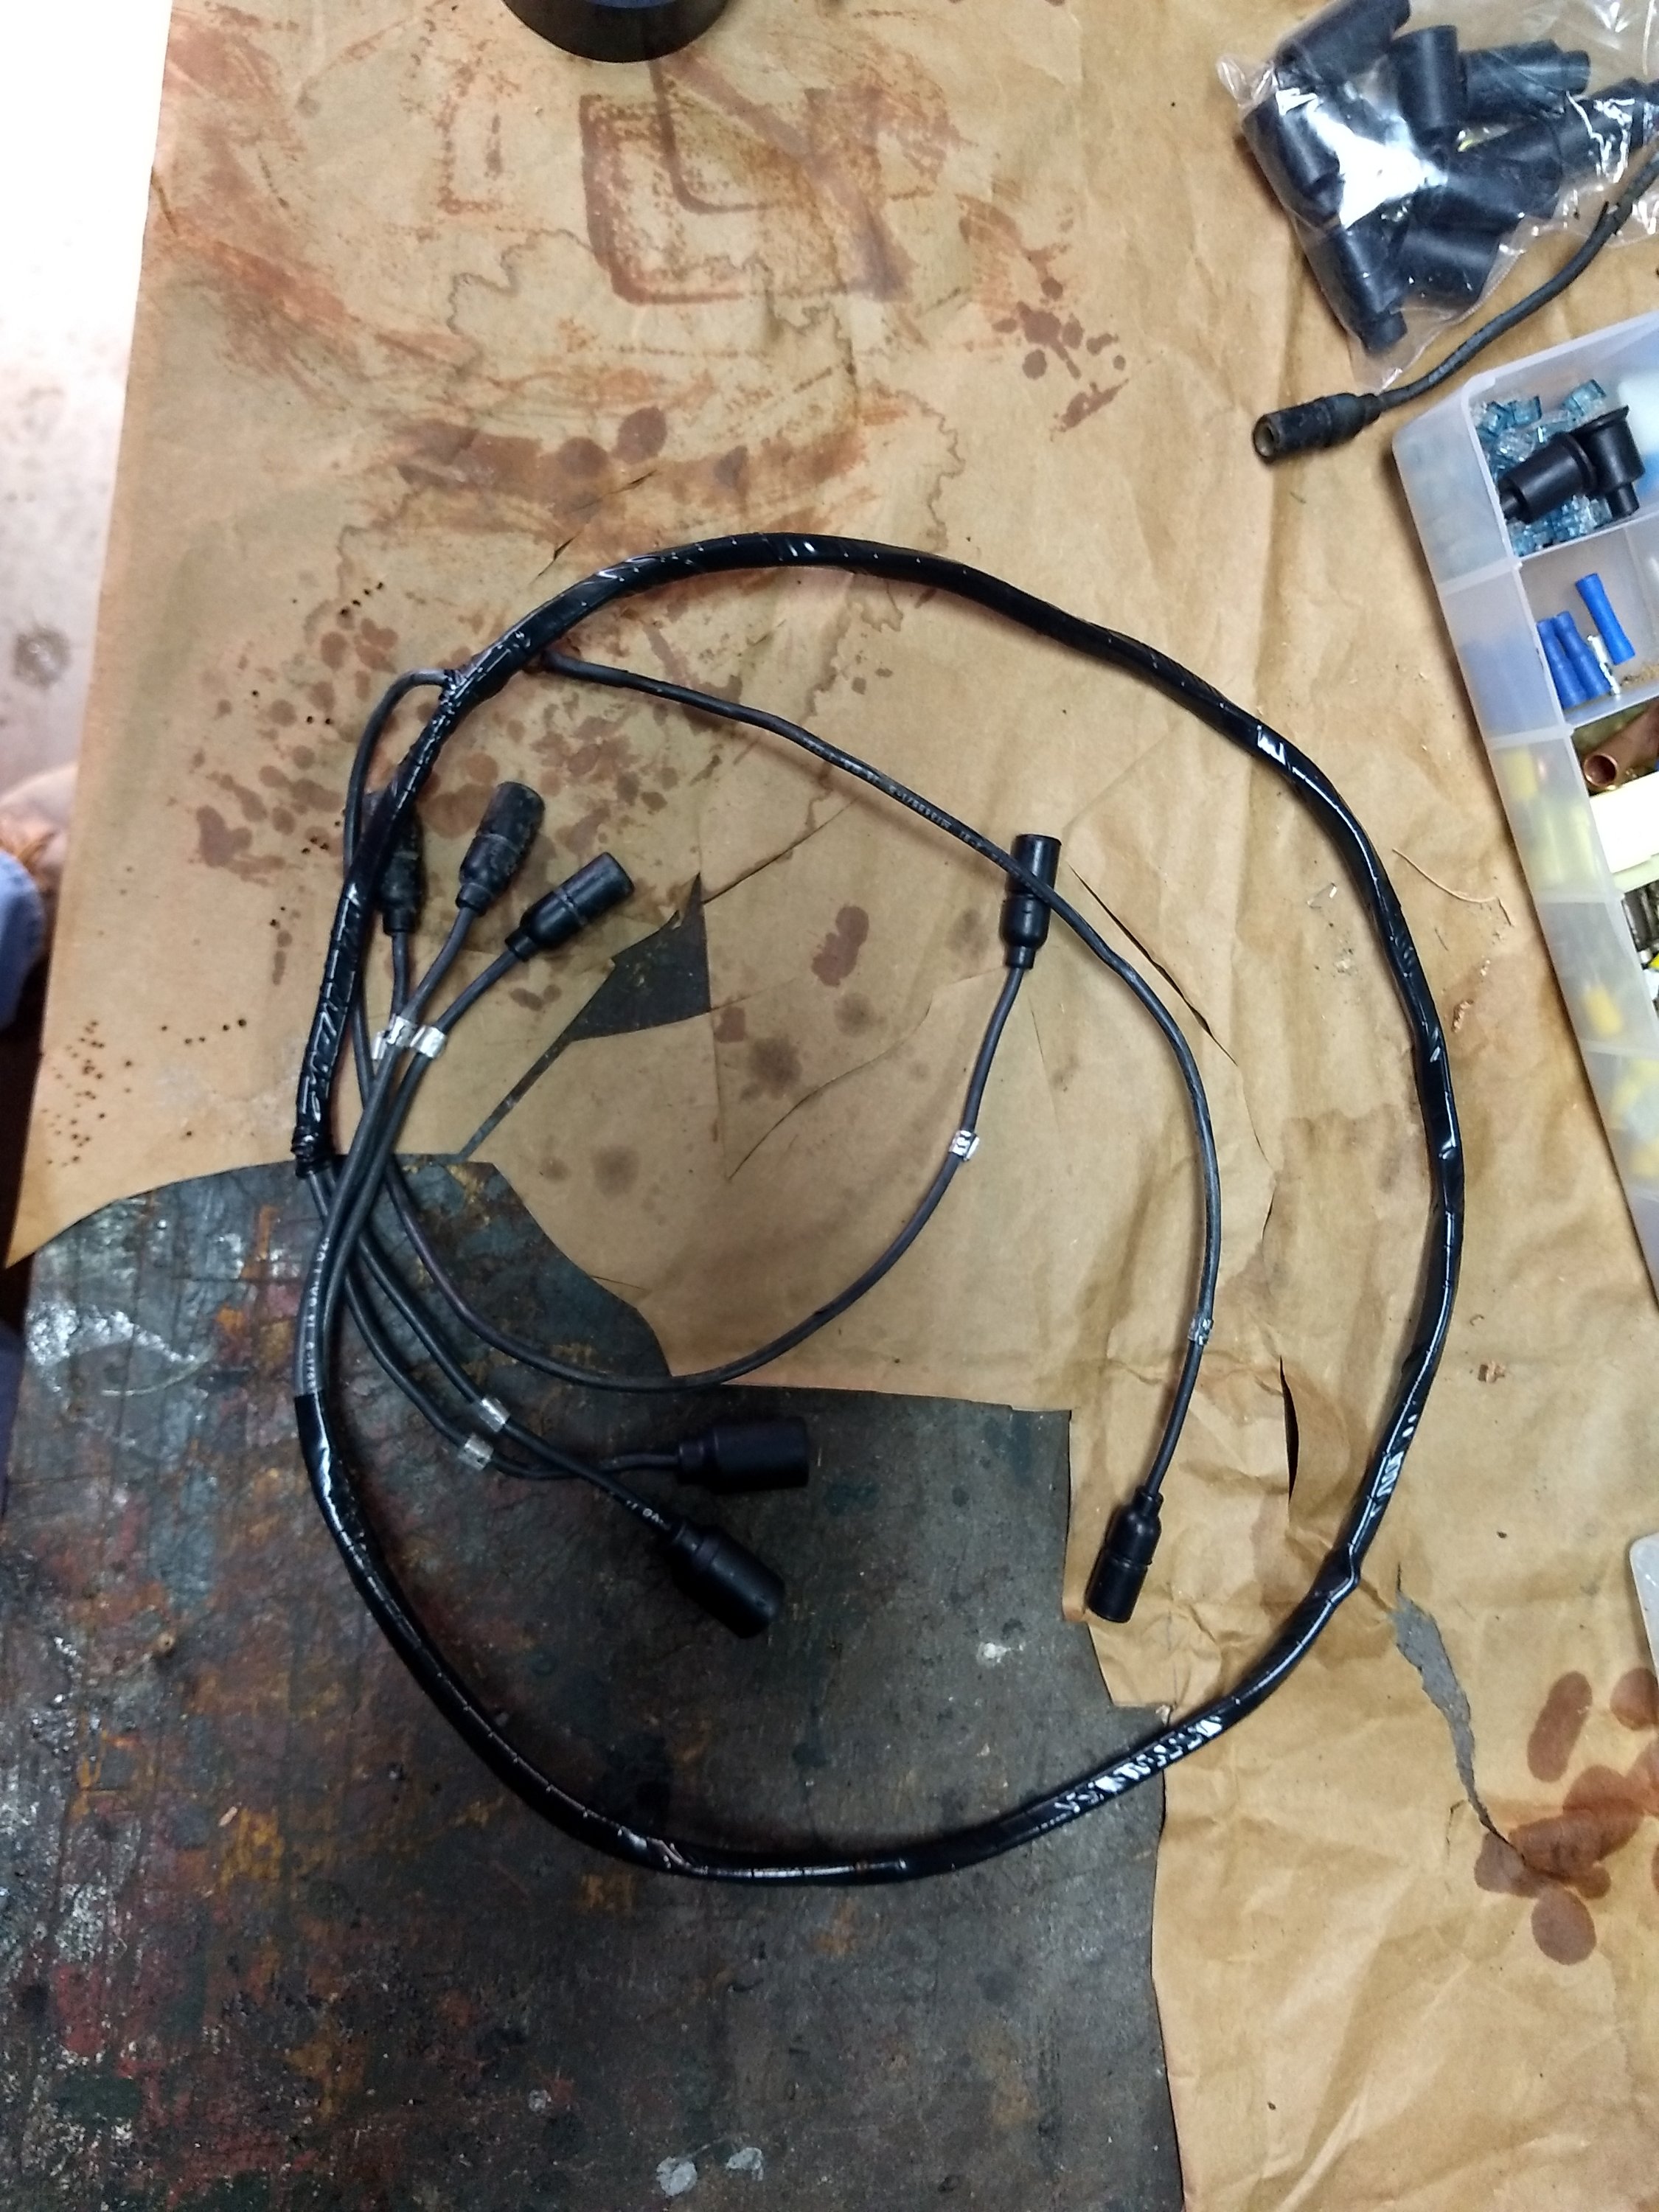
My new parts and connectors showed up, so I was able to finish up all of the new wiring with the rest of the male and female ends. I installed a male shell for the right B.O. light (turn signal) to finish up the main headlight harness. I cleaned up some of the old number tags and used some new ones from the new wires.
On the driver side headlight, the wires go directly from the main wiring harness (single to double “Y”s) to the headlight housing. These wires were 25″ long measured from end to end of the connectors. I found a couple of wires with ends already attached and just added female shells to the other ends. I also made a new ground wire.
When installing the new female shells (male ends), I strip the insulation back 1/4″ and flux the wire. Then I cut 1/4” piece of solder and drop it in the wire end hole. Holding the male end with pliers, I hold it over a propane torch until the solder melts, then stick the wire into the end. Hold it until it cools, then you’re ready to go! For the male shells, you can either crimp it or flux the wire, hold the end with pliers over the torch and solder the wire into the end. Nope – didn’t take any pics of this process either!
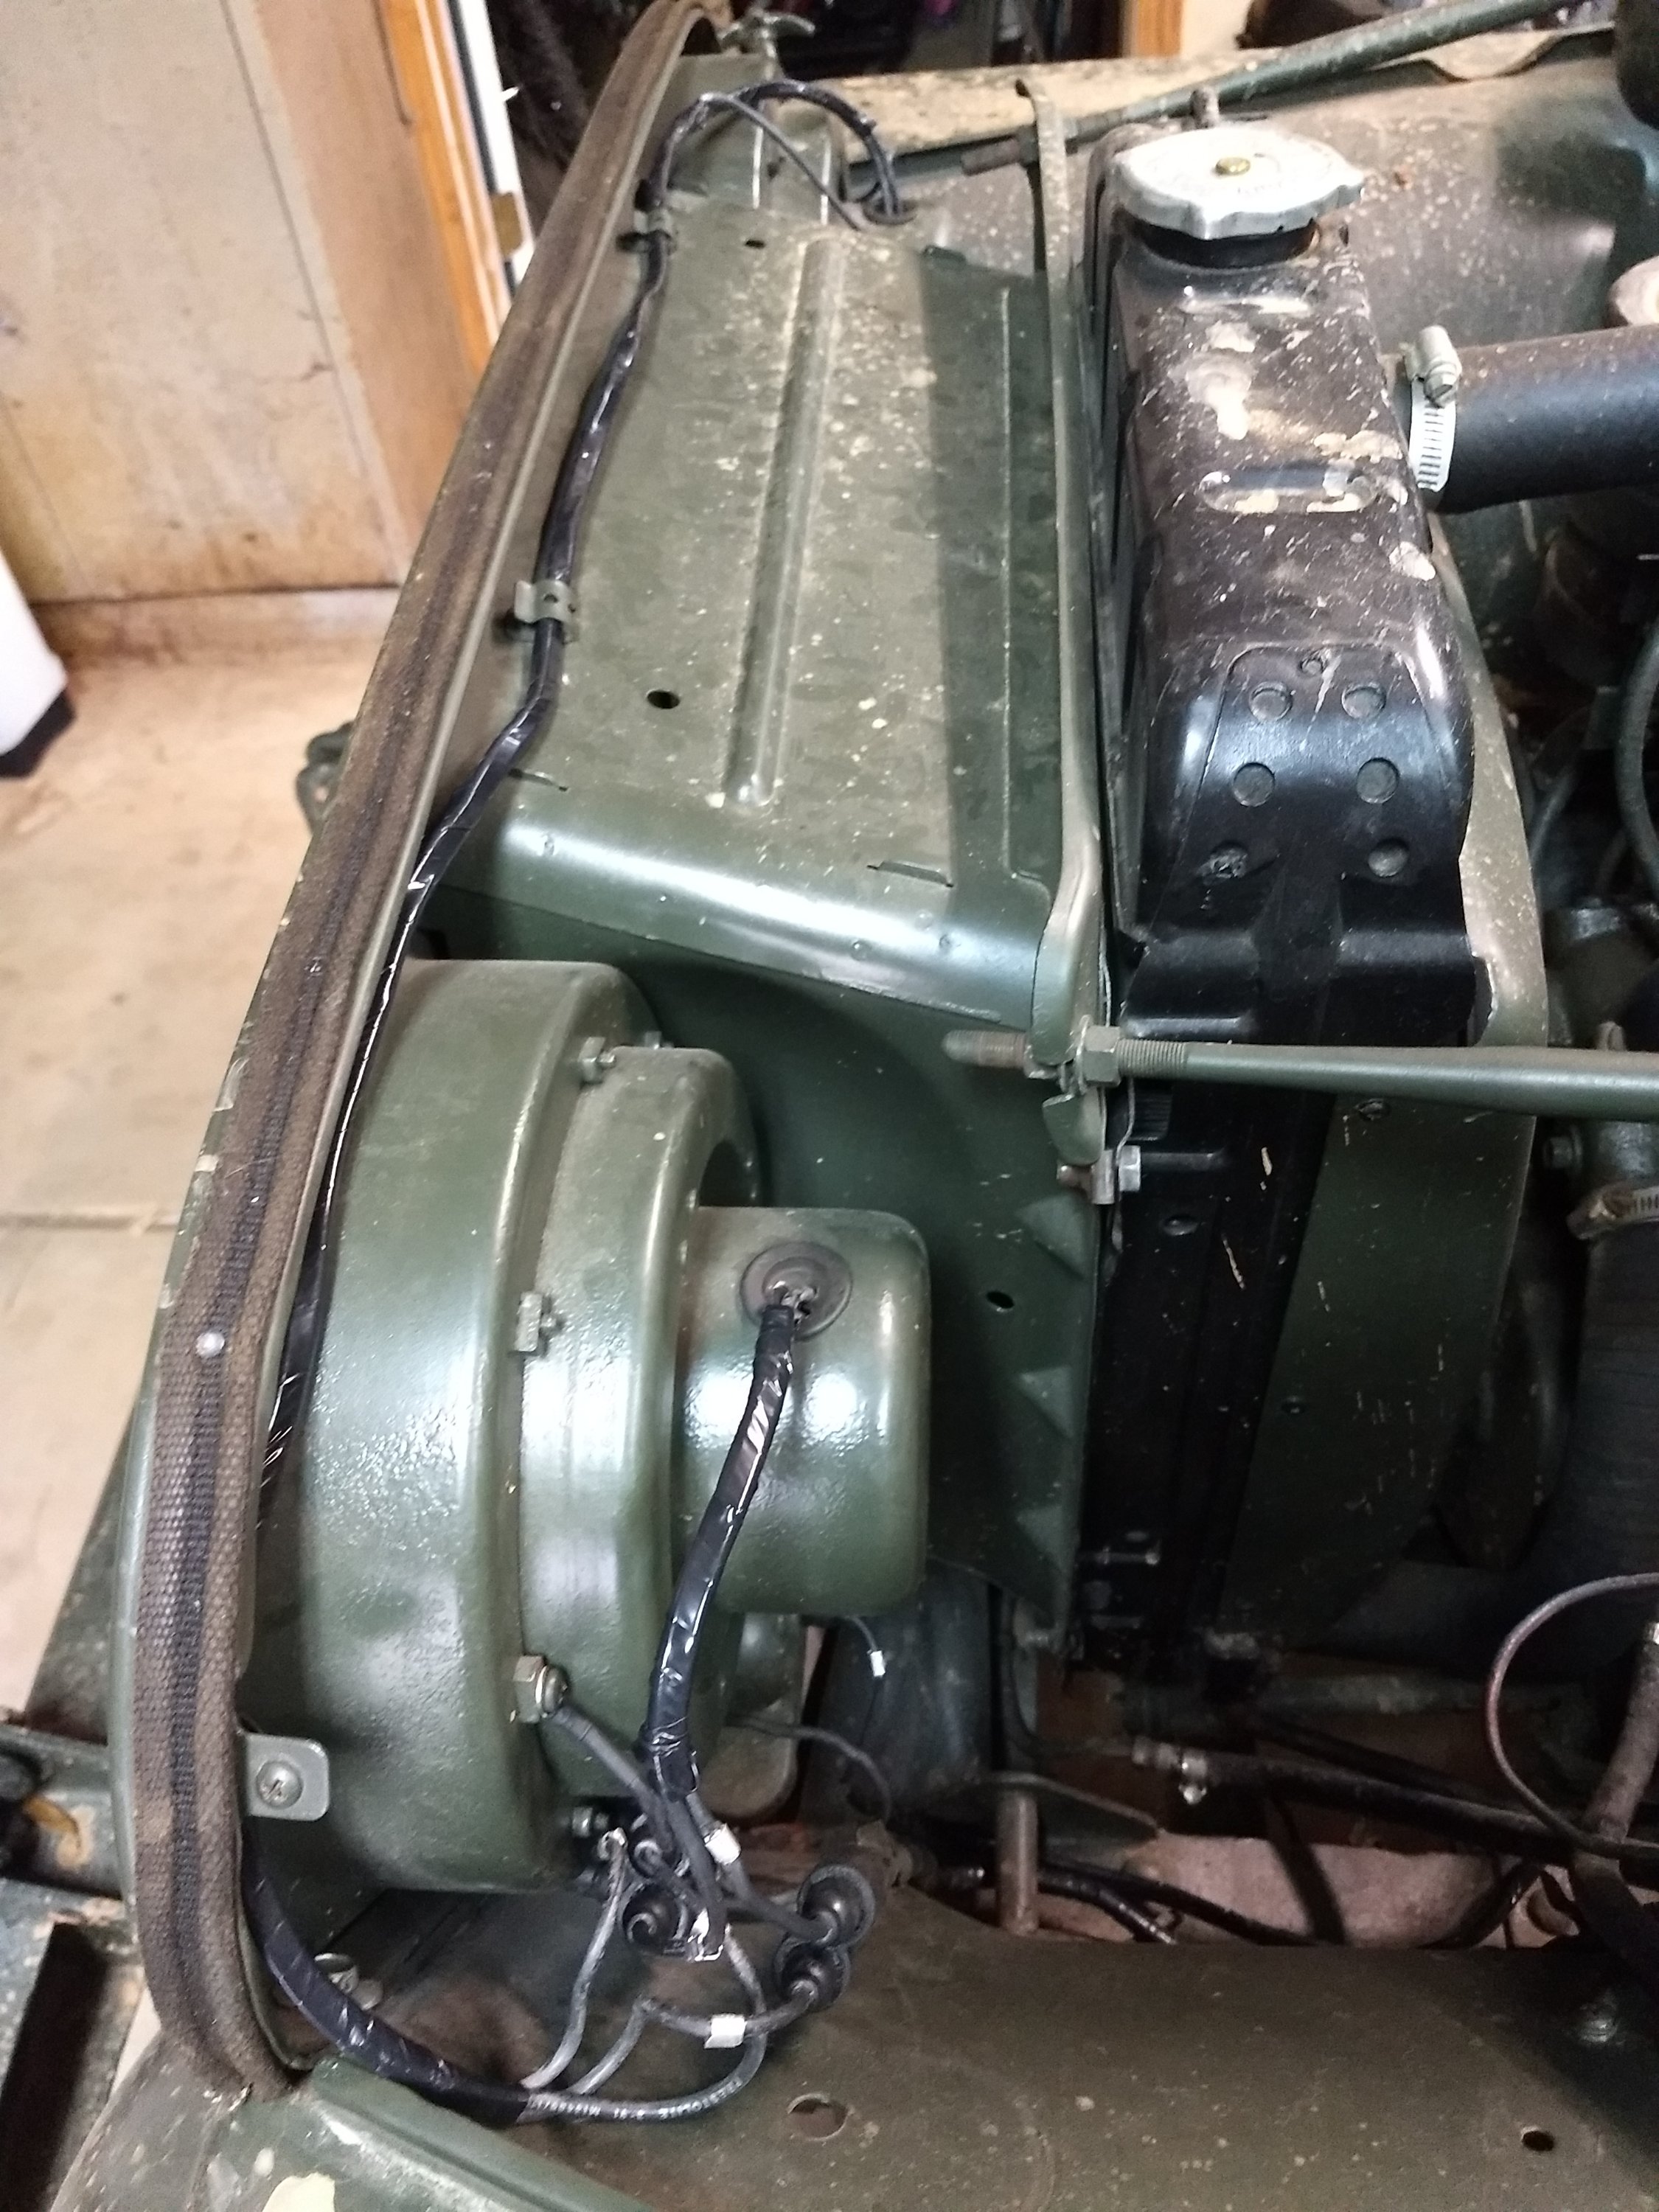
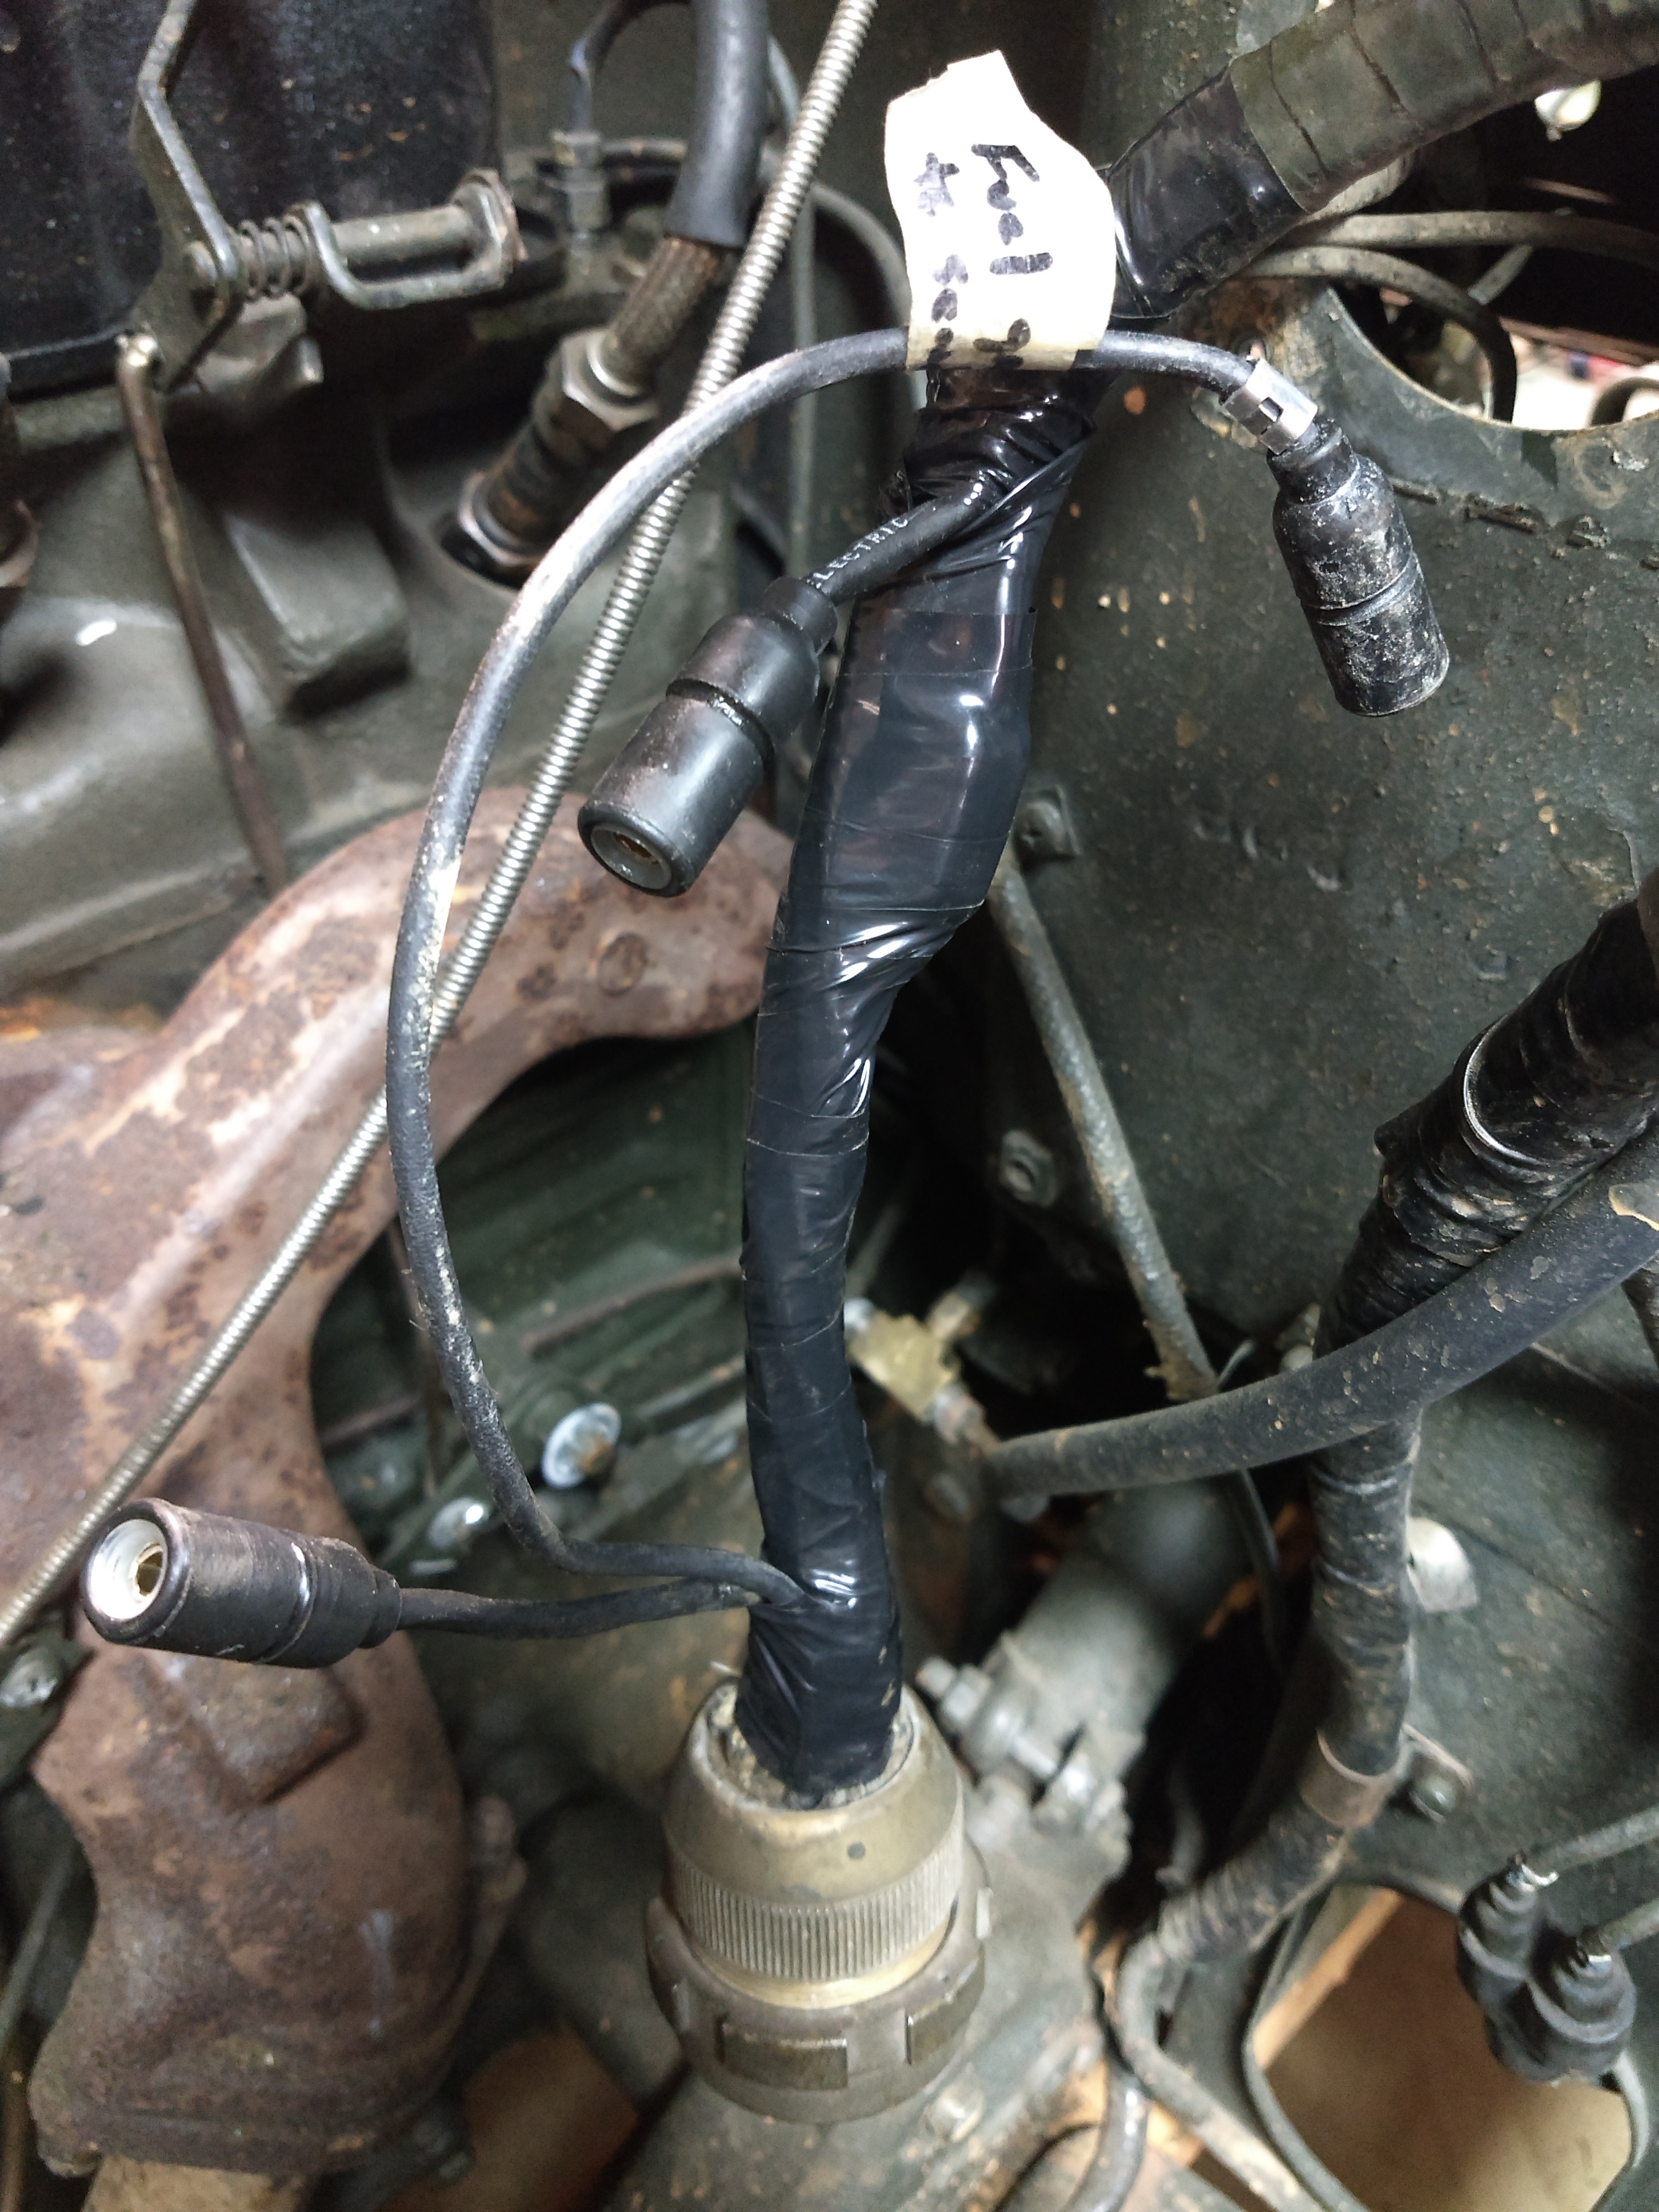
After all of the ends were on, I installed the main harness starting at the right headlight. I attached the headlight pigtail to the harness and clamped the connectors in the headlight bucket. Then I installed the new ground wire and ran all of the wires through the 3 hole grommet. I plugged in the B.O. light wire. I found that a drop of silicon on the male ends makes install/removal MUCH easier!
Then I could route the harness through the clips on the grill to the left headlight. I plugged the male ends into the “Y’s under the left headlight and the female B.O. light wire. I connected the left headlight bulb to the new wires, clamped them into the headlight bucket and ran them through the grommet out to the main harness “Y”s and connected them. I taped up a 6” section of these 3 wires to make it look a little better.
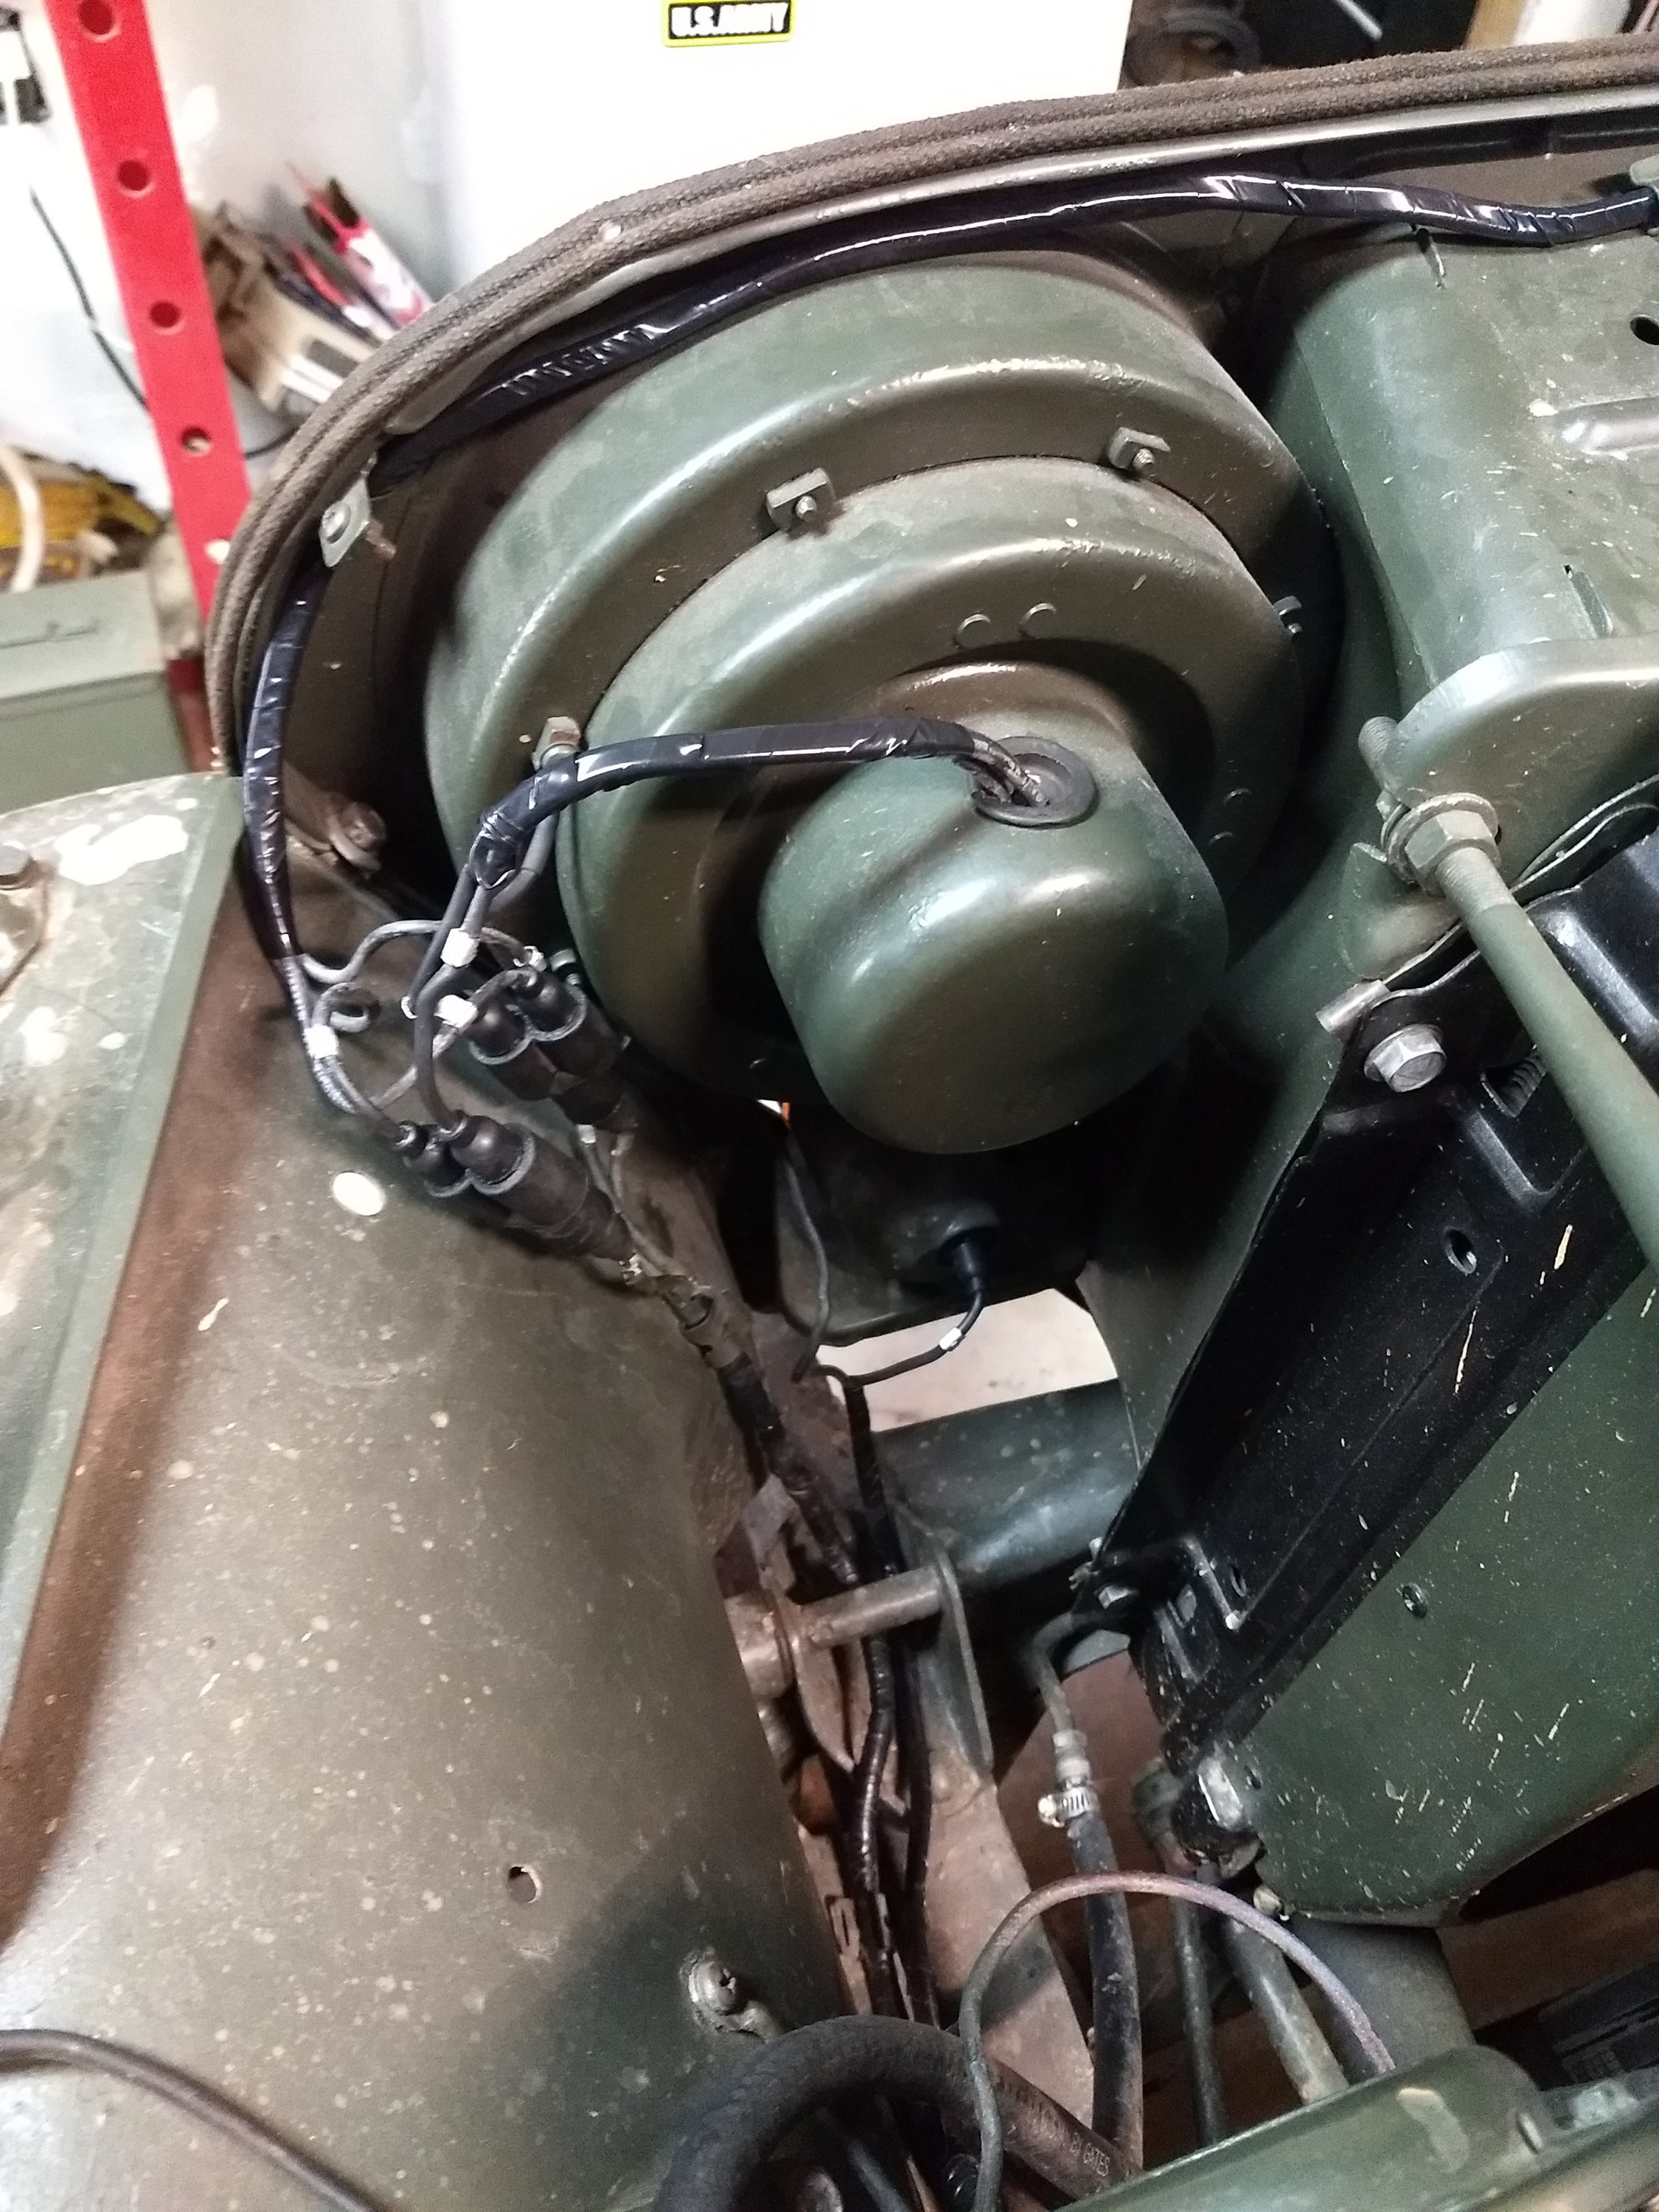
I think it turned out alright, and ready for another 55yrs of service! PLUS it’s MUCH safer!
Next, I got into the rest of my new parts.
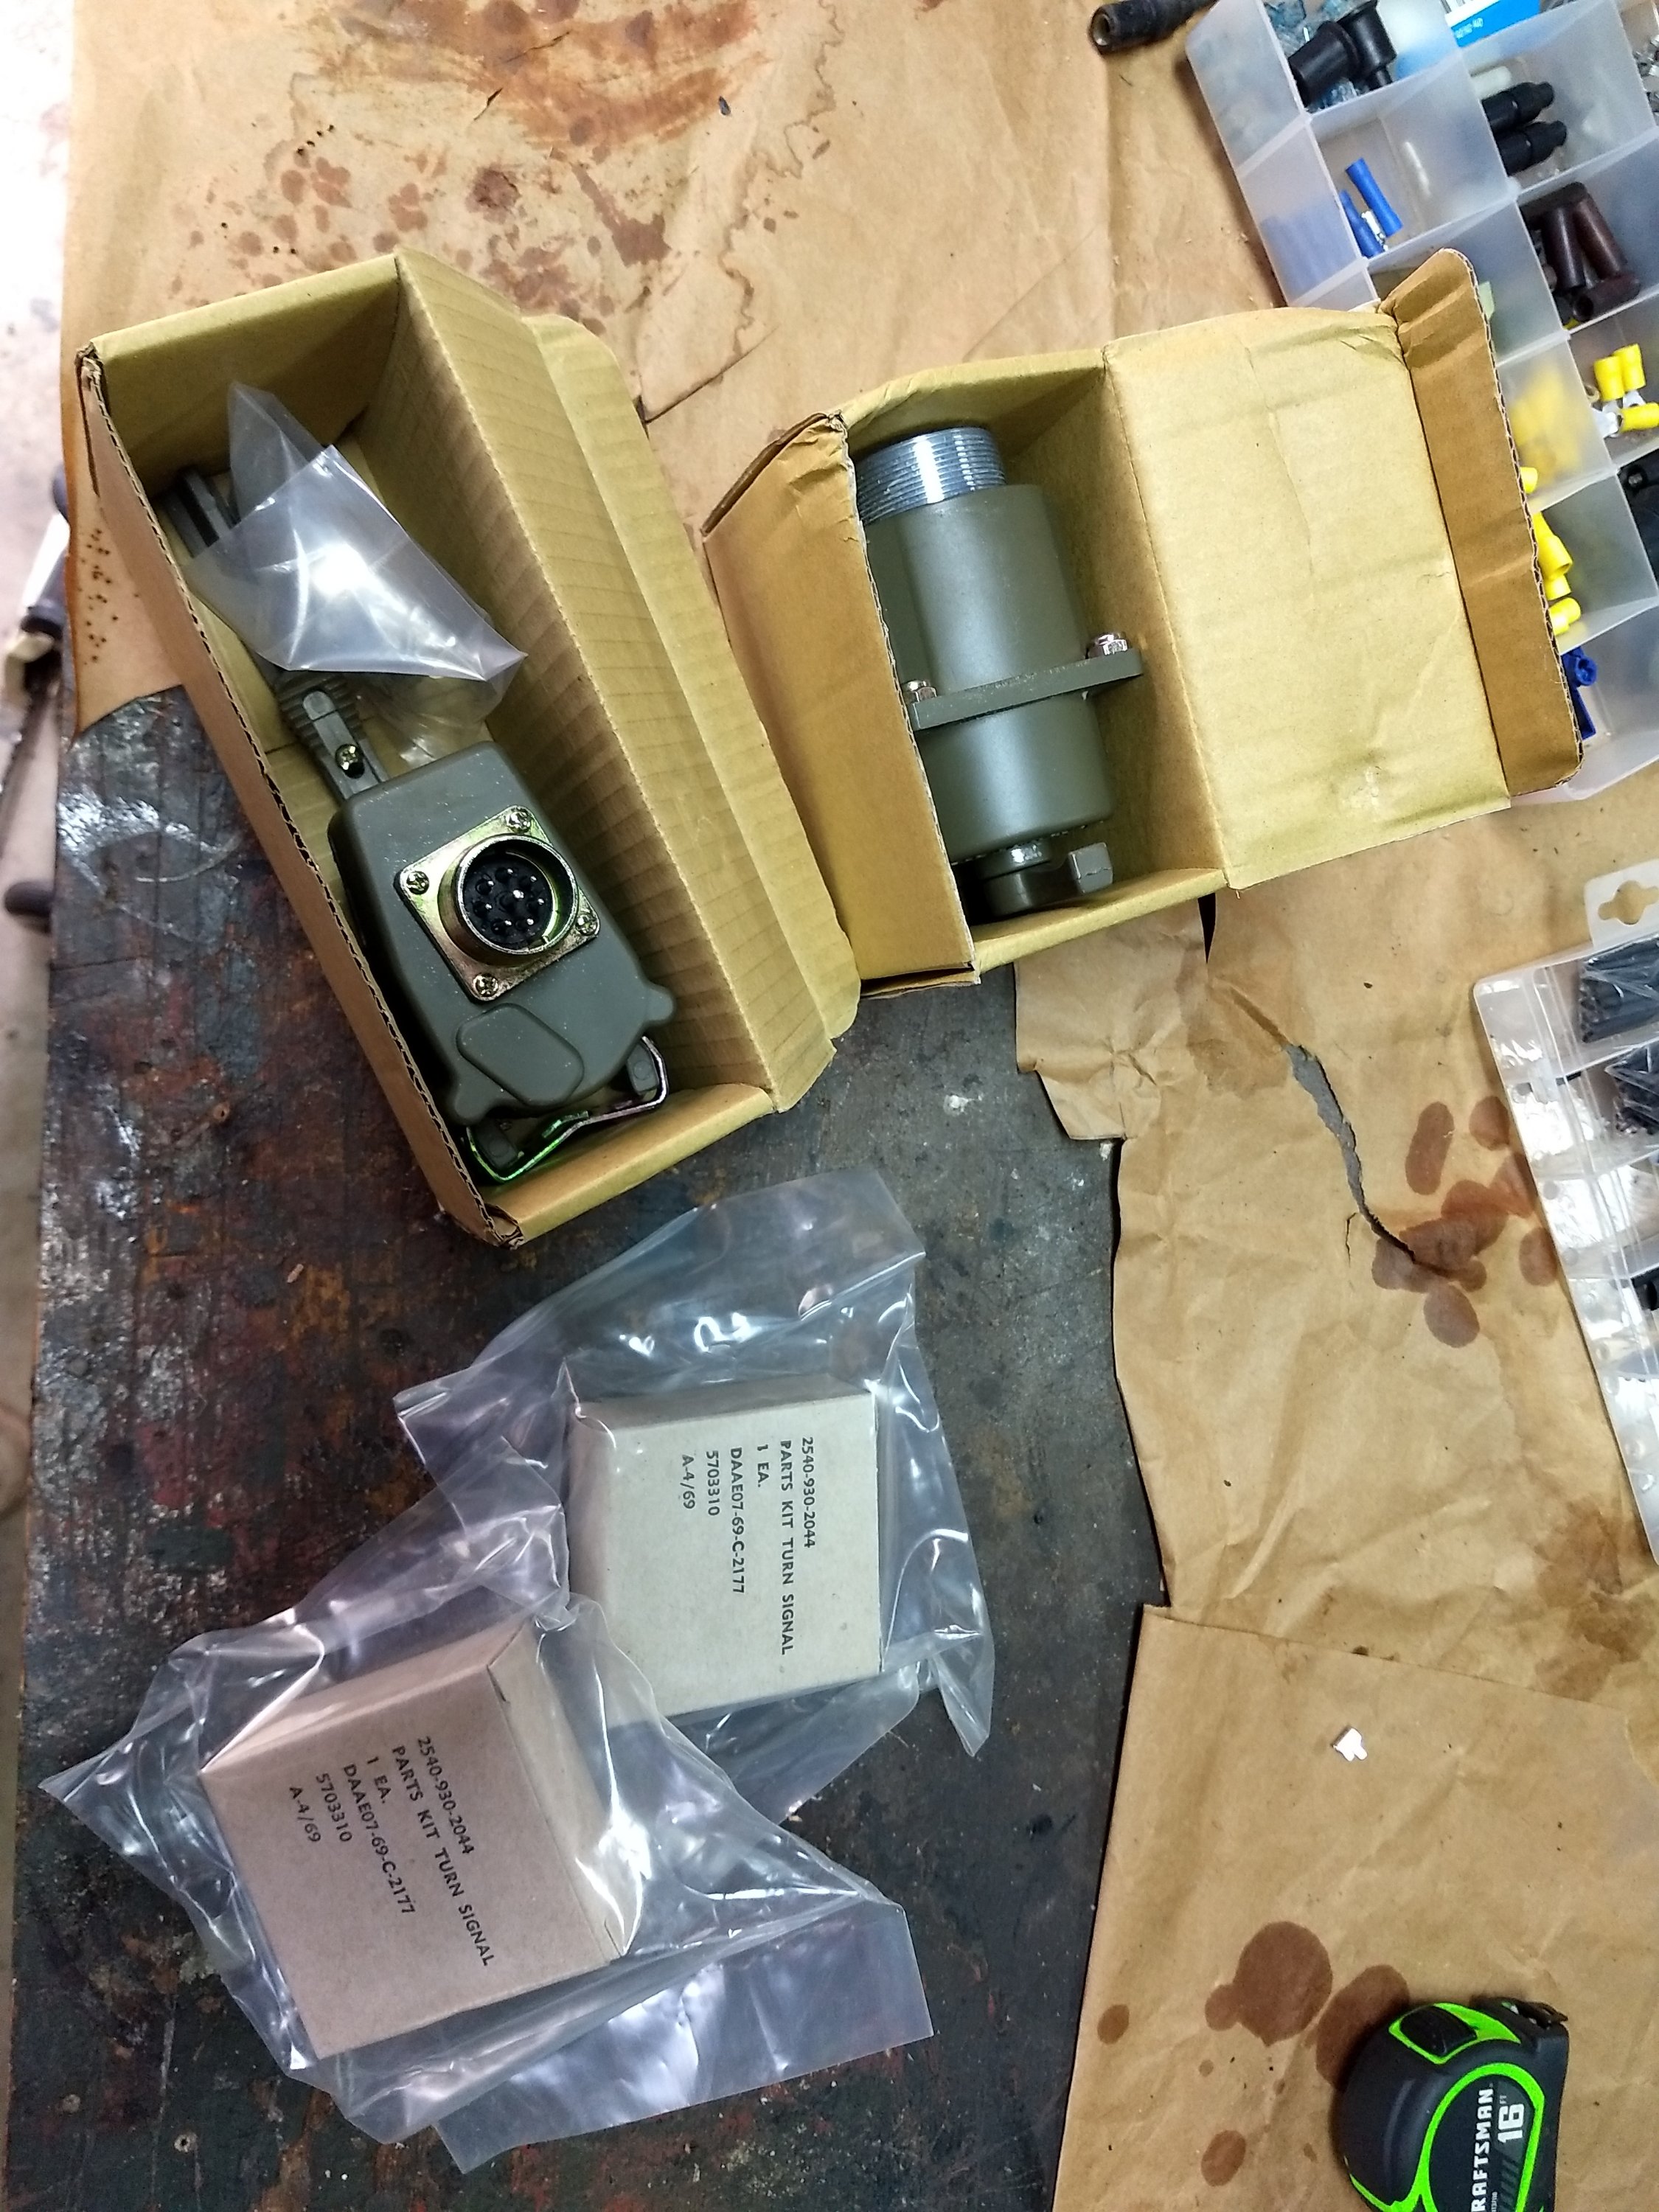
The orange turn signal kits came from Saturn Surplus (off eBay).
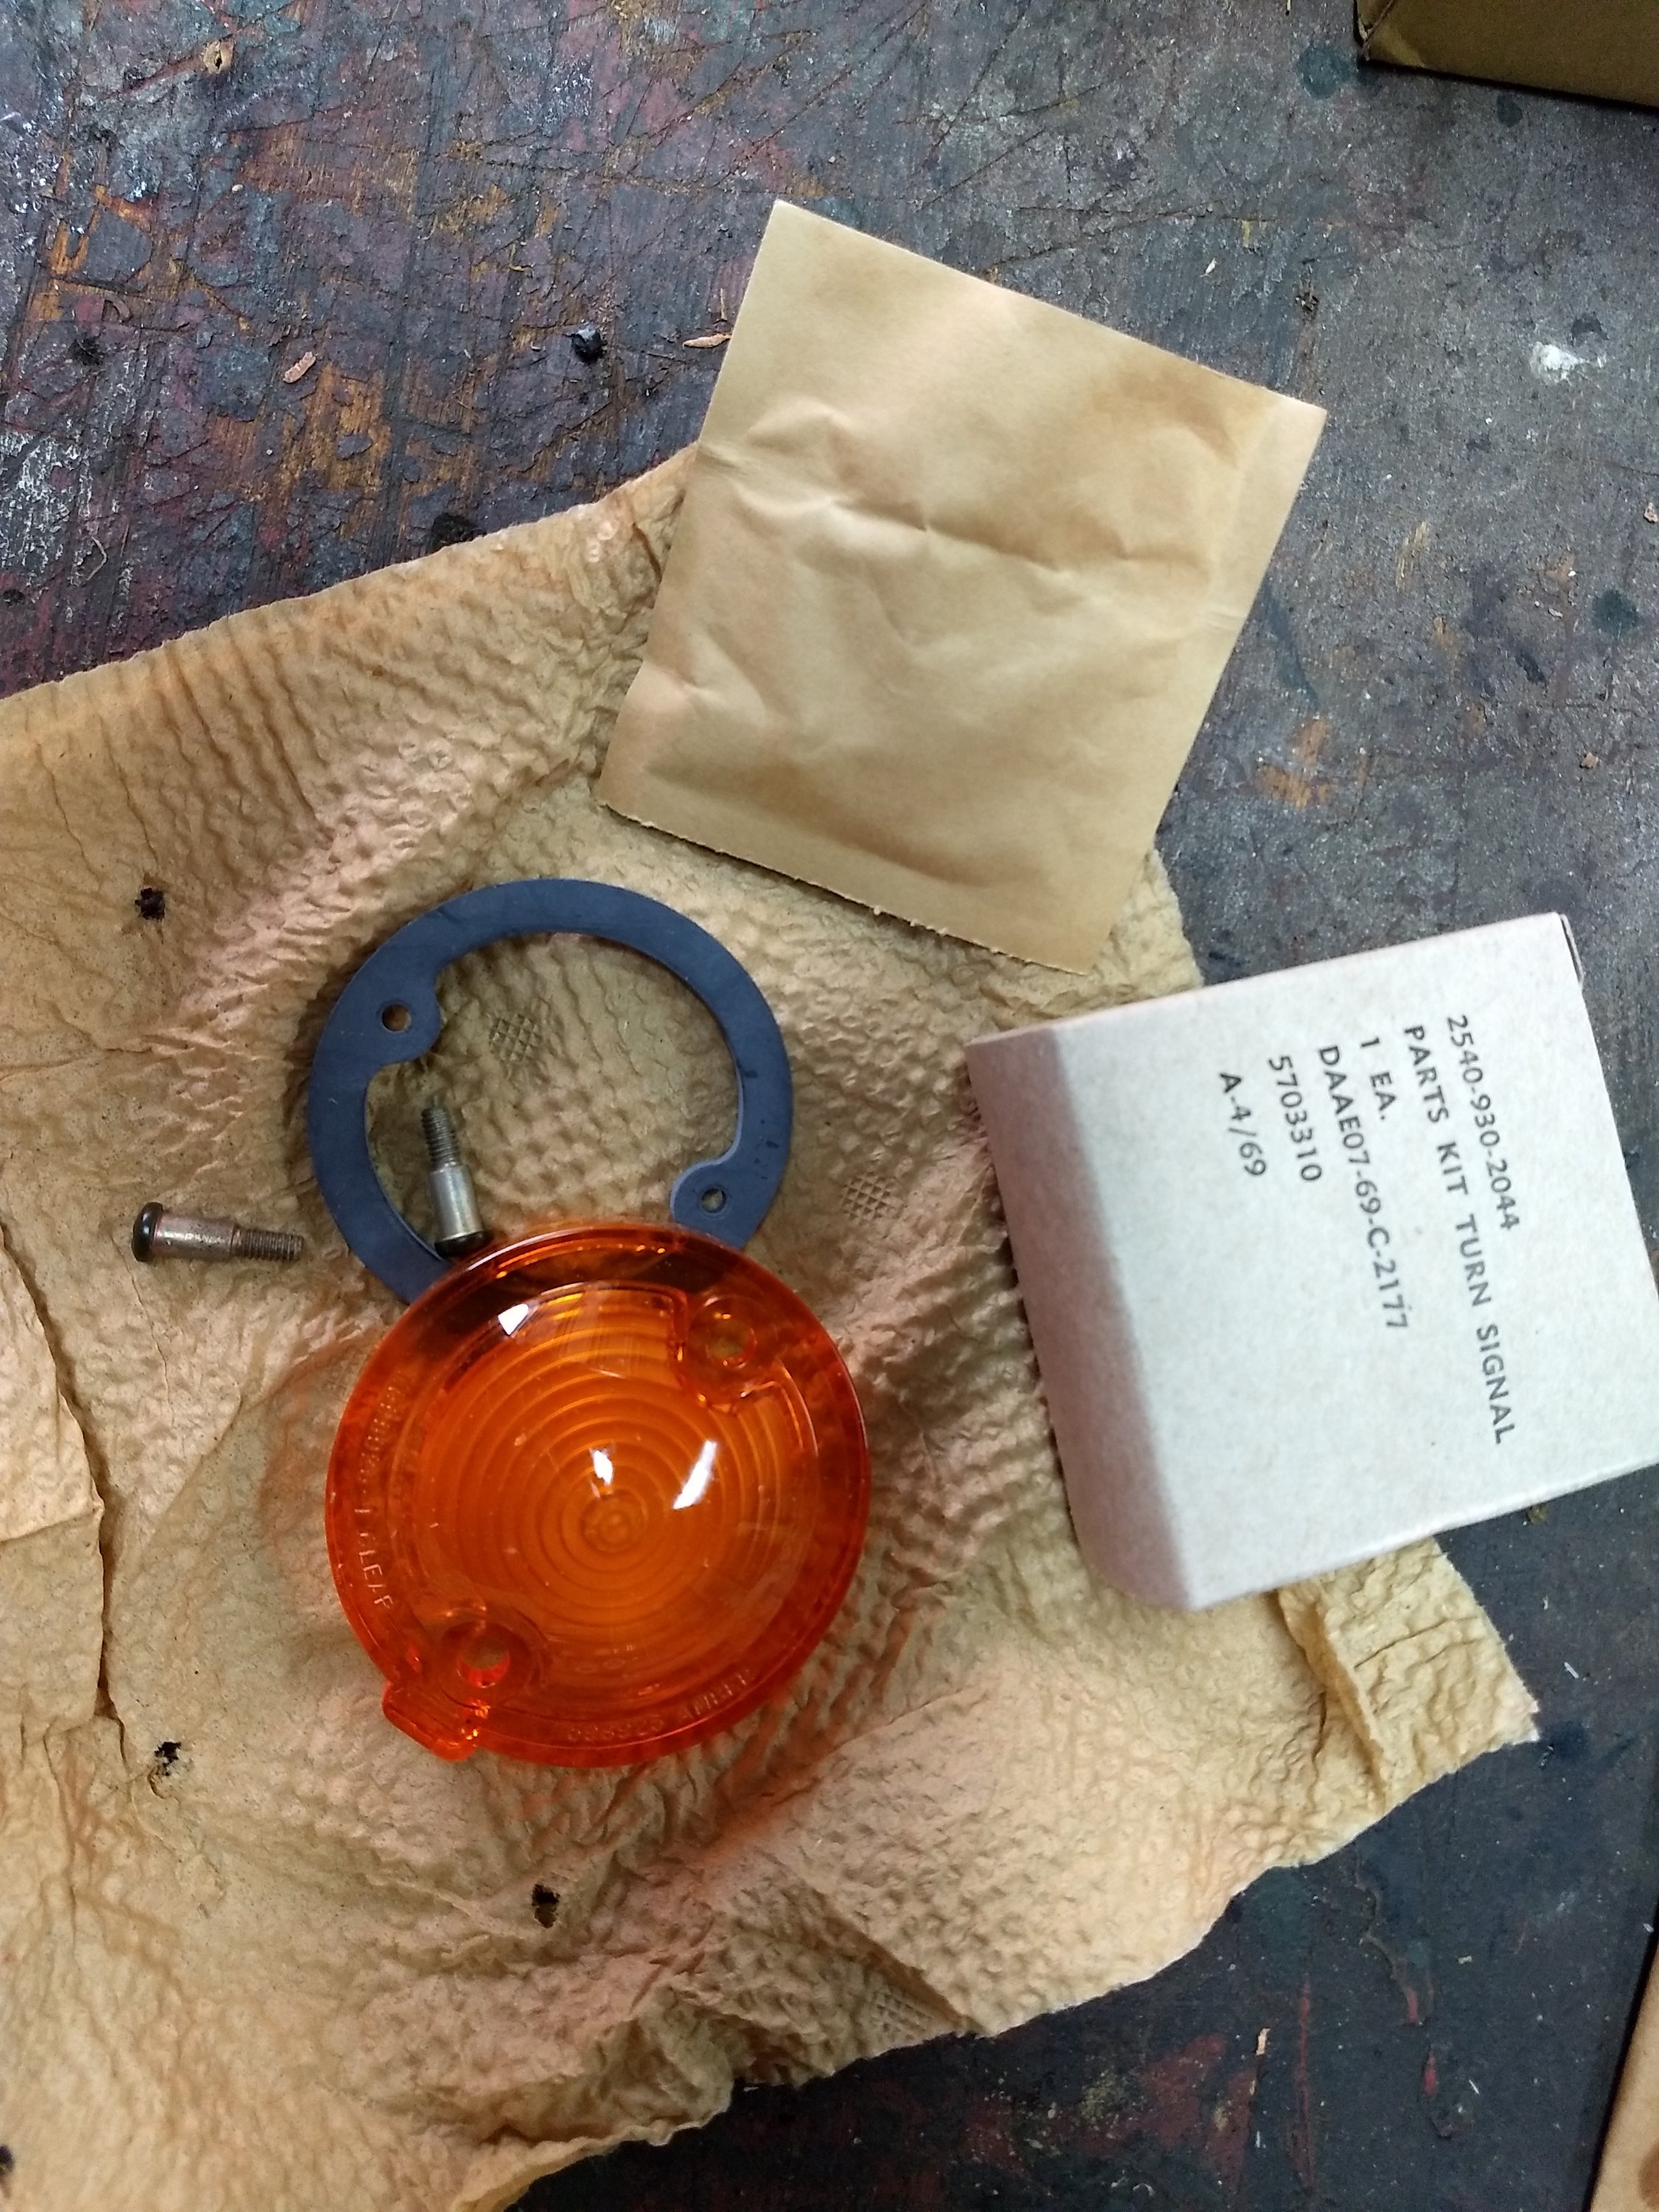
They were easy enough to install – no writeup needed:
The turn signal and headlight switches came from Big Mikes Motor Pool. I’m pretty sure they are Chinese repops judging from the packaging and absence of markings. Despite that fact, once installed, they work fine with the turn signal switch being pretty tight and has a distinct notchy feel compared to the worn out original one I have on my other Jeep.
I left them in their original paint for a couple of reasons: 1) I wanted it to LOOK like turn signals were added after the Jeep was in service and 2) I didn’t feel like painting them! Tell me what you think in a comment – should I leave them as is or paint them?
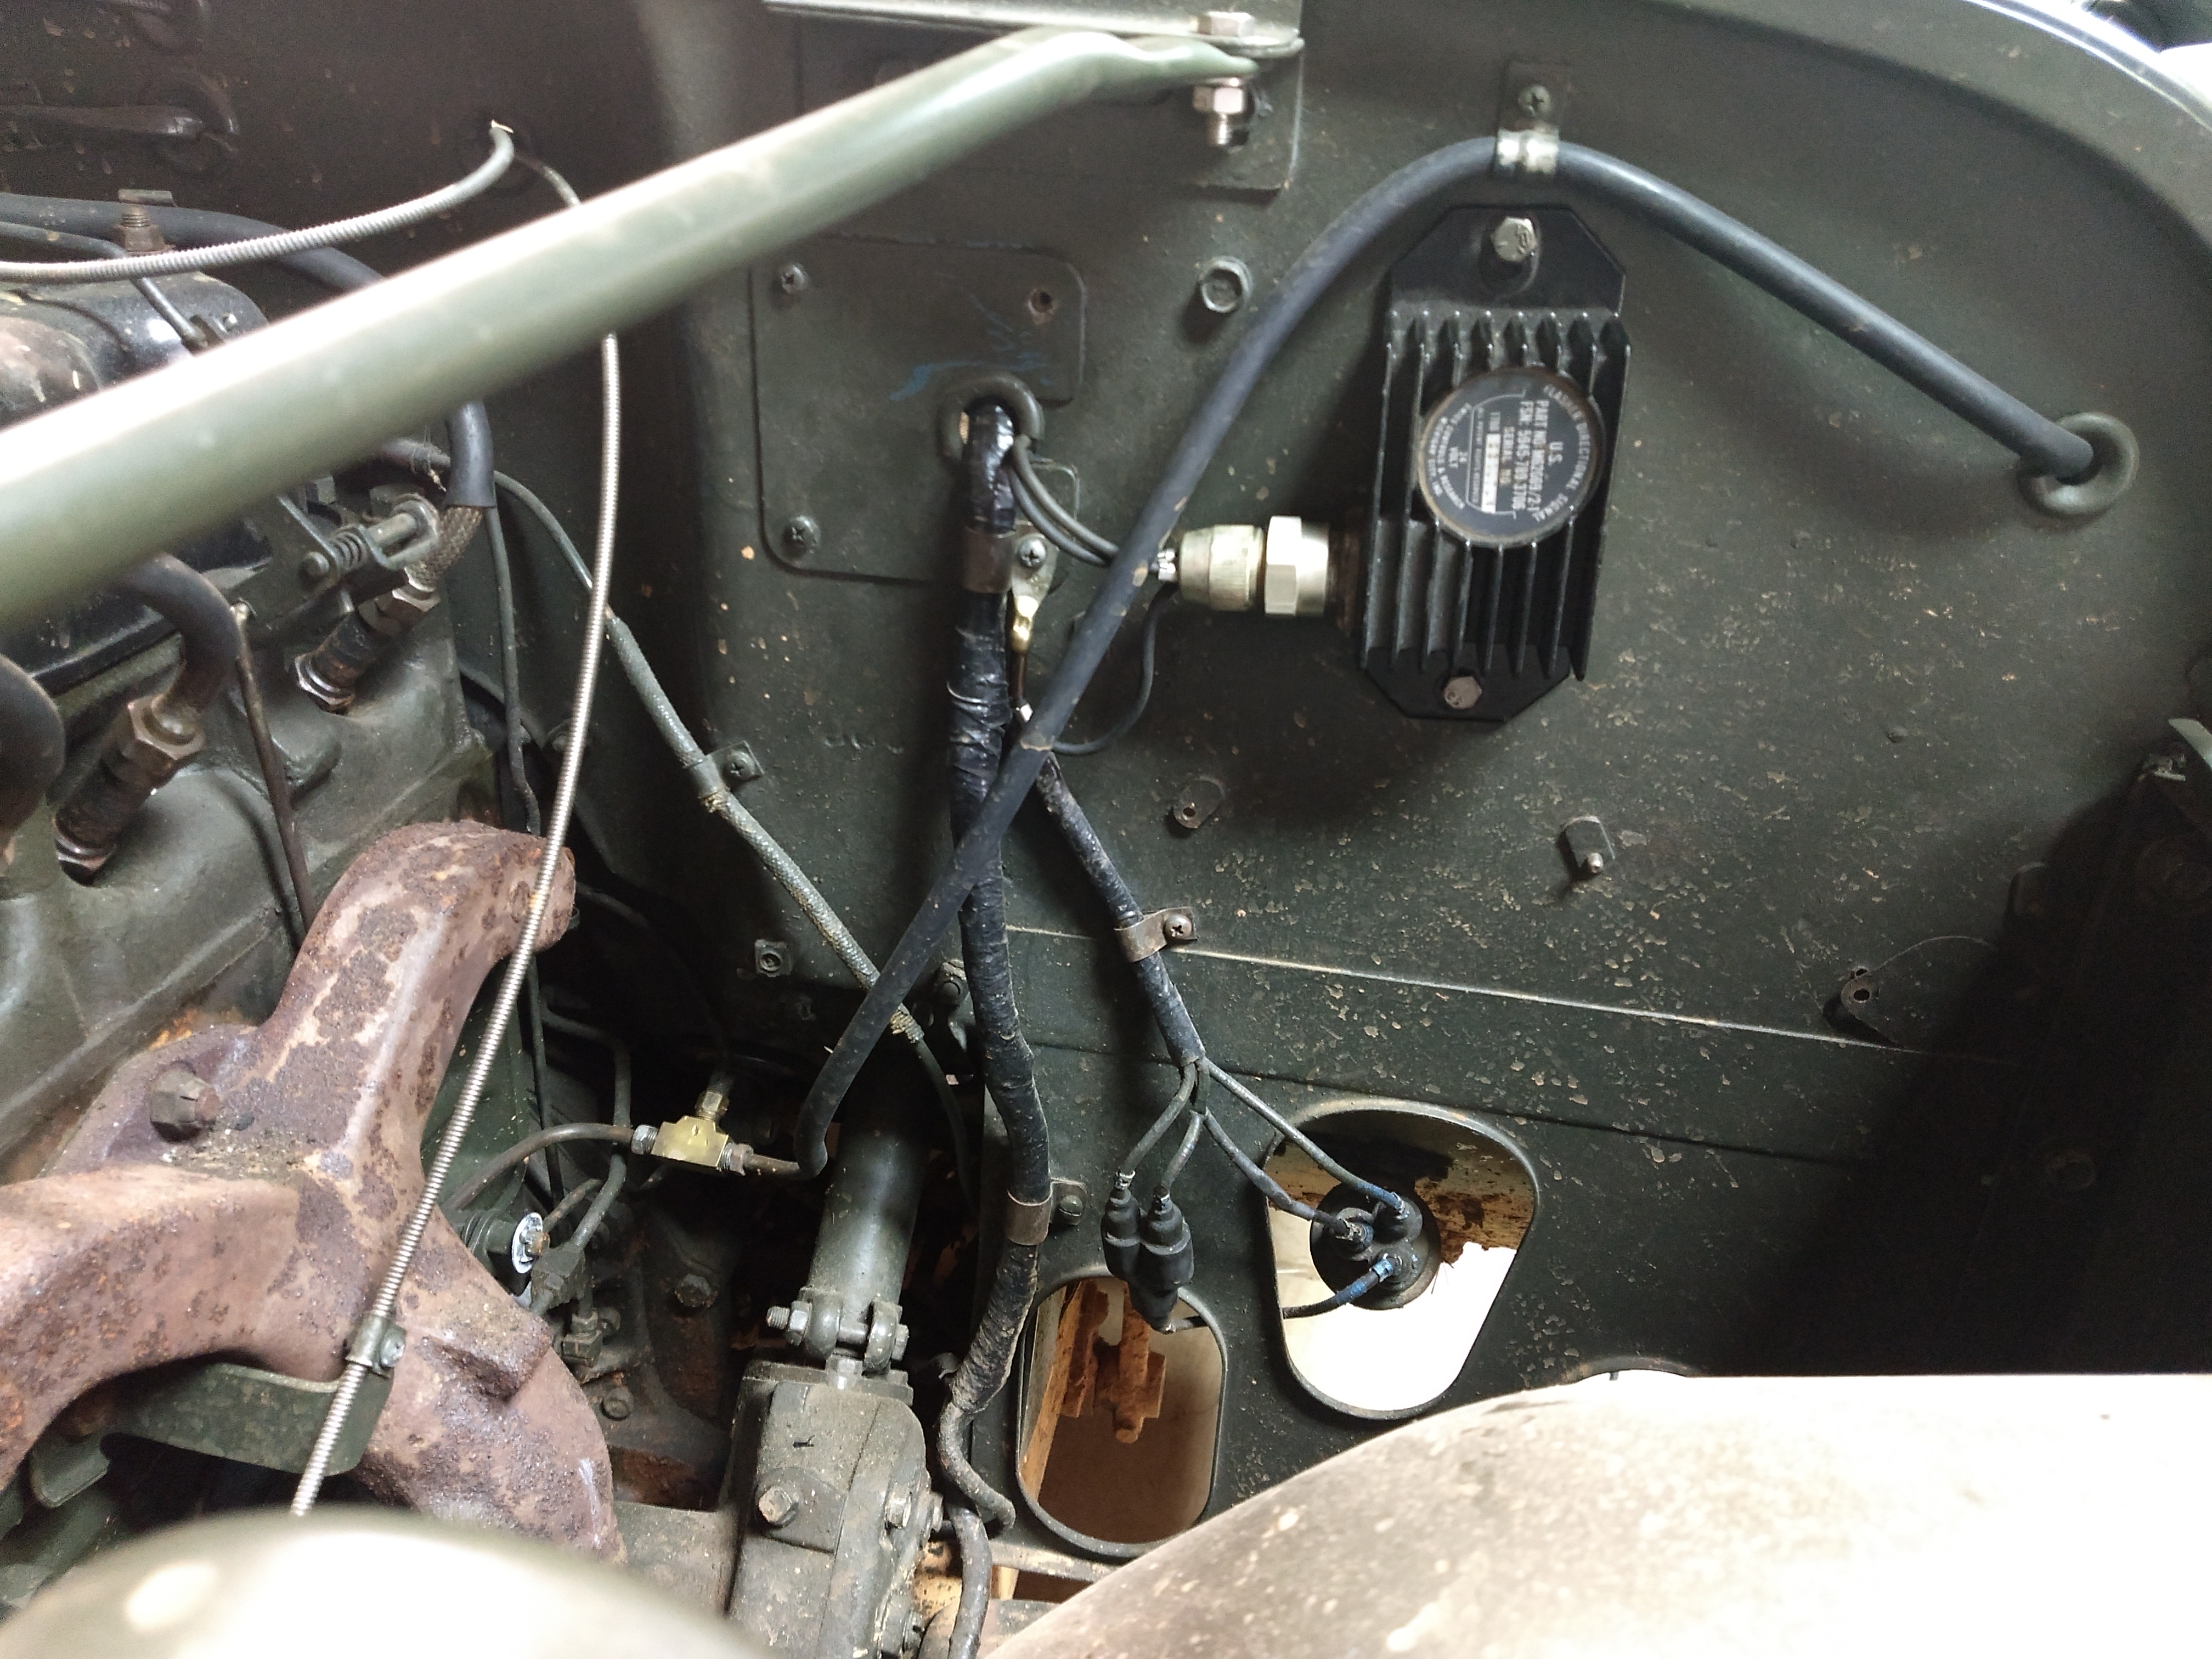
As far as wiring goes, I still want to make a new regulator harness. This is one of the main harnesses that cause fires (because it carries the high power from the regulator). I might do that the next time I’m off because I still have PLENTY of wire and now have a bunch of new ends. I will look around to see what else needs to be rewired as I go.
Today I finished wiring up the turn signals. NOT as easy as it sounds of course!
By “Finished wiring”, I mean getting the trailer turn signals working too. This was a little more involved than I was hoping. When I tested the trailer turn signals, I found that the right side wasn’t flashing. After doing a little investigating, I found that the trailer was wired correctly all the way to the IV cable.
Next, I pulled the left rear tire and the wiring shield to check the trailer receptacle wiring. That’s where I found the problem. Although it has the newer style rubber connectors, it DID NOT have the wire to the “J” pin (turn signal power wire). So that’s where the saga begins.
Of course all of the rubber connectors were “welded” together and trying to get them apart resulted in the rubber breaking apart. The wires (vehicle side and receptacle side) were also very brittle and fell apart when you flexed them. After I separated all of the connectors I decided I needed to replace a lot of the brittle wire and connectors. I found a few short pieces of wire from my M35 harness with male ends attached, so I cut the old brittle ones off of the vehicle side and spliced (with butt connectors and shrink tubing) new ends on. While I was working on the vehicle side, I cut the new 22-460 wire going to the right side light and spliced in a piece of wire with a new end going to the trailer receptacle. Then I wrapped the new wire up with the old harness with wiring harness tape. I also re wrapped the harness end with the new wires.
Next, I removed the trailer receptacle from the Jeep. Once on the bench, I removed the nut and pried the rubber plug away from the back of the receptacle so that I could install the new “J” wire. I soldered a new wire into the pin and reassembled everything. Once re installed onto the Jeep, I began hooking the wires back up. Since most of the wire tags were unreadable, this was a hit and miss deal. I used the multimeter to find which wire was hot when the lights were flashing or on, then I hooked that wire up to one of the receptacle wires – checked to see what light was on or flashing, then tried again after I marked what the previous wire went to. I labeled the wires with masking tape and a wire number. When I was disconnecting one of the wires, I pulled the female end off the receptacle side and had to splice in another one. Once I figured out where all of the wires went, I slid the connectors together and reinstalled the wiring cover.
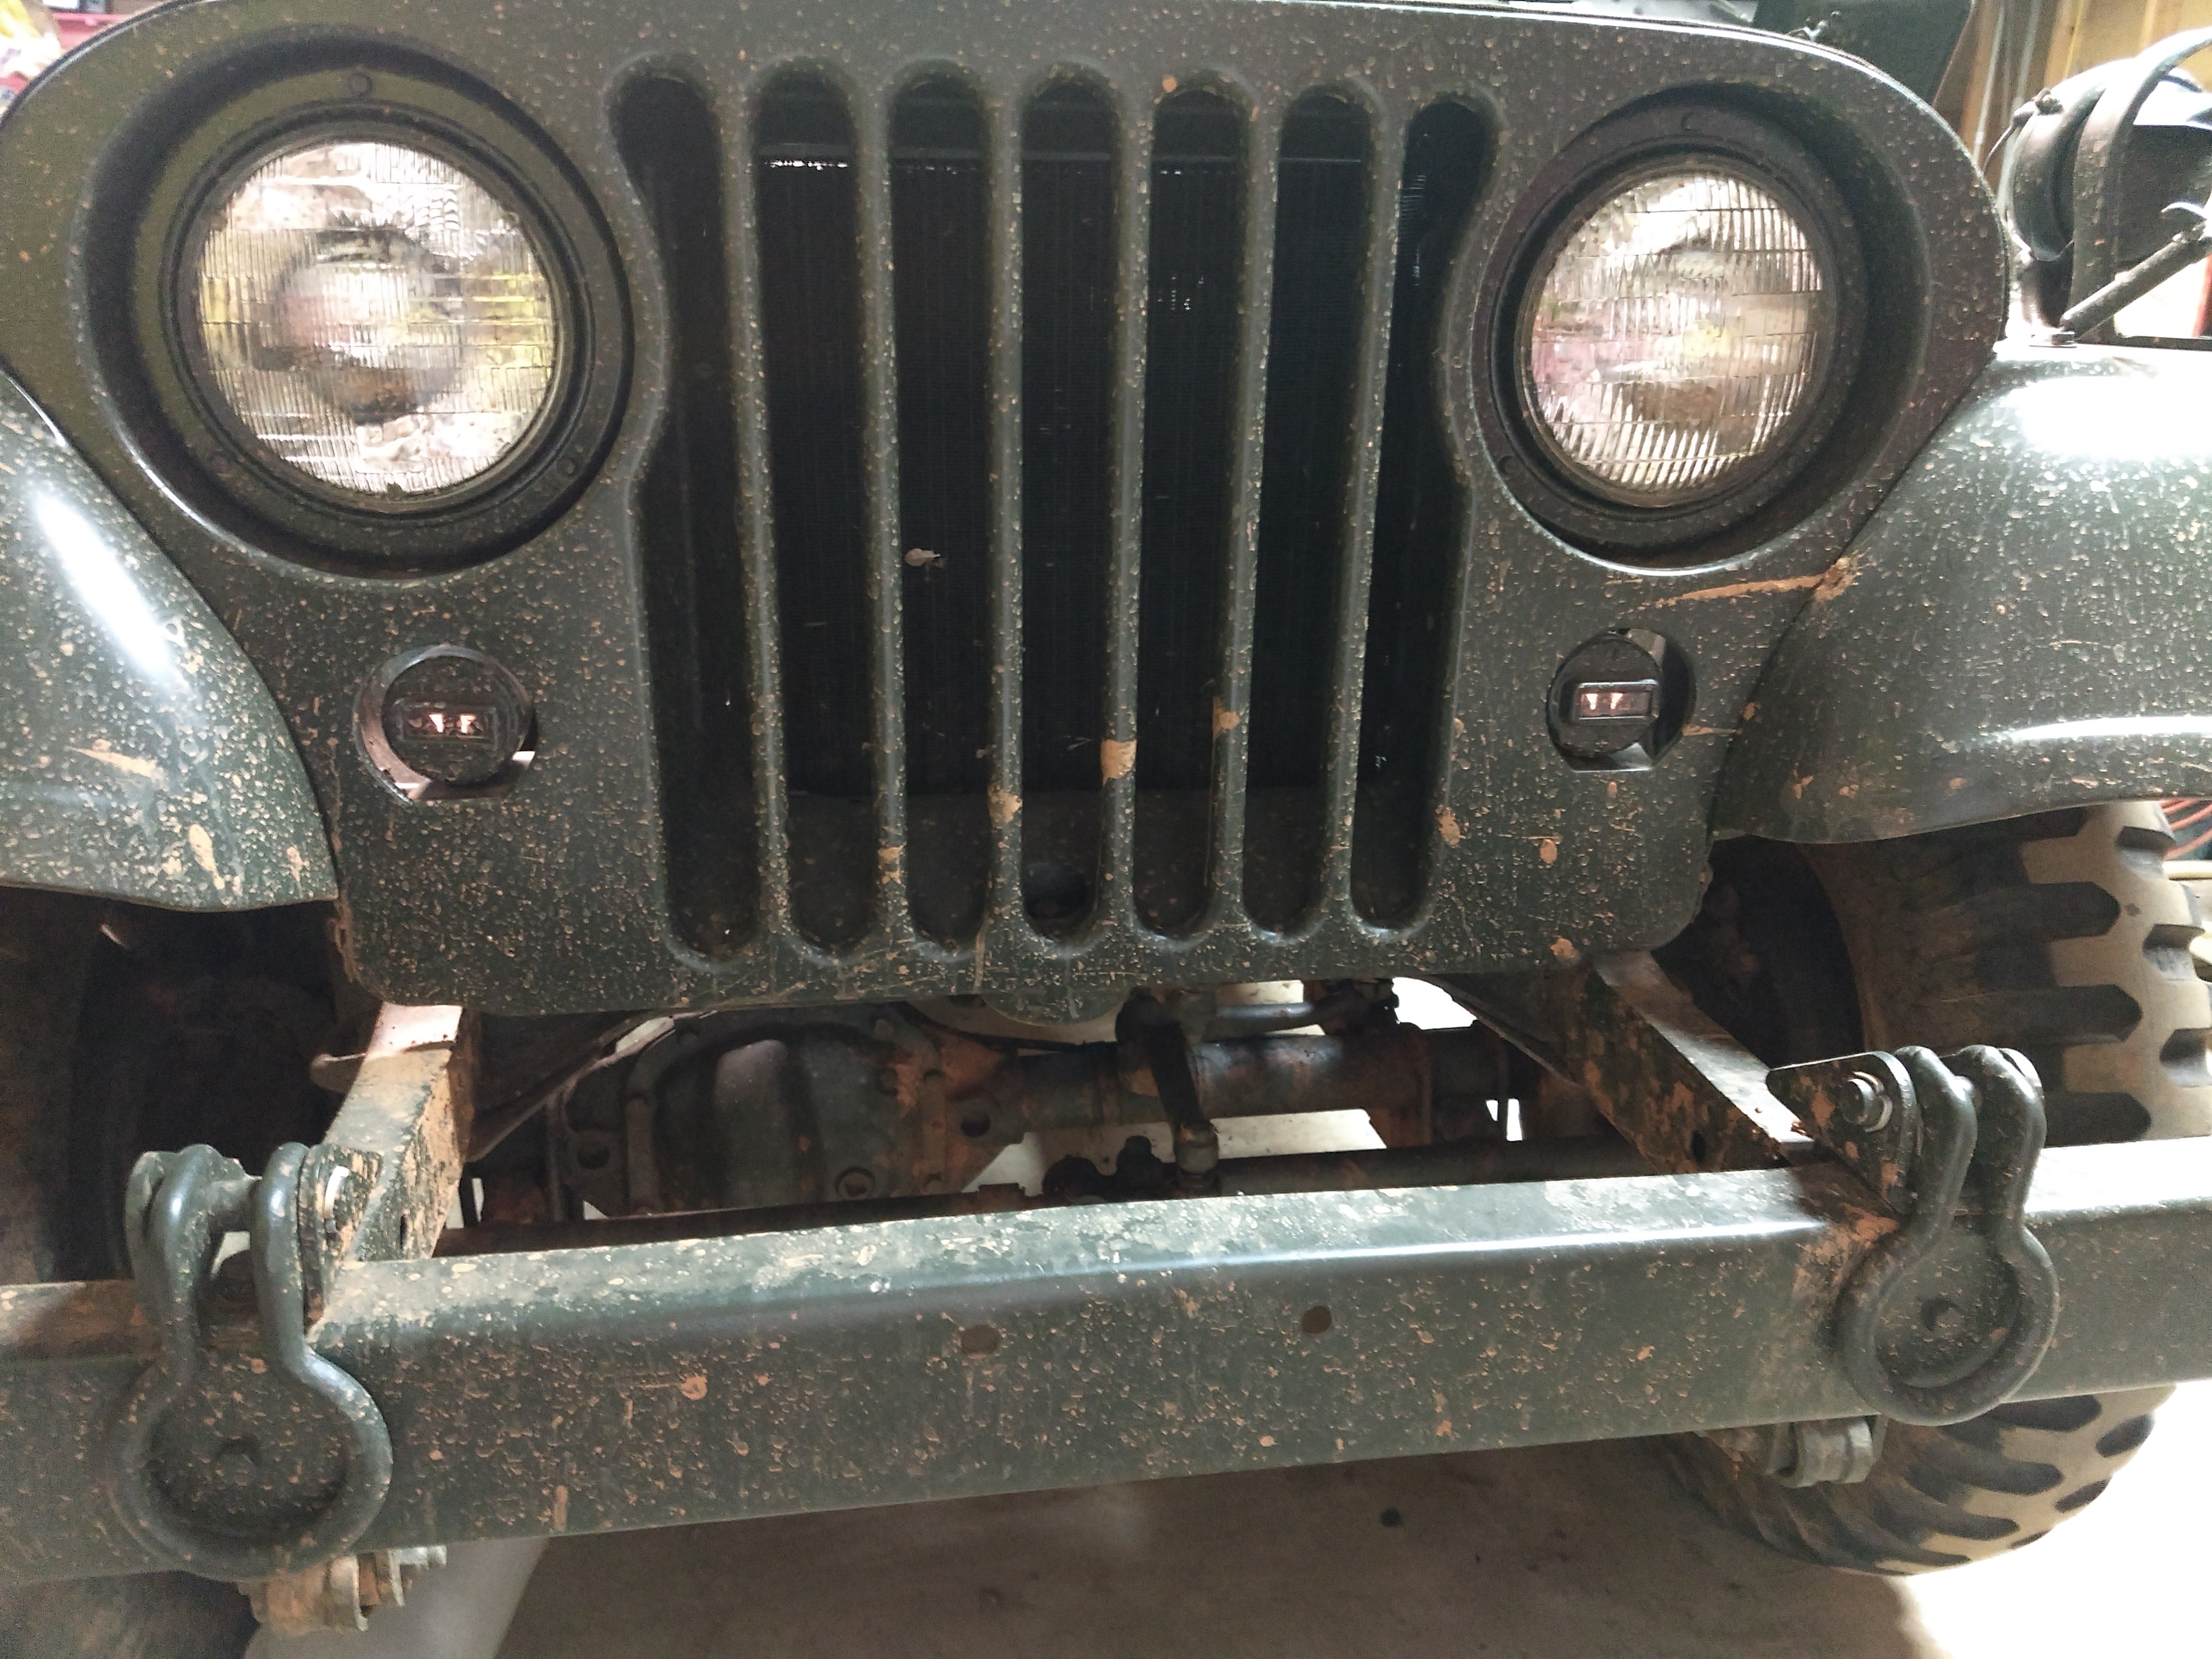
Next, I started to install my orange turn signal lenses. After I pulled the B.O. light doors, I found out that the lenses weren’t made for the military B.O. lights – too small! Well that’s one more thing I have to buy!
The last thing I did was to slide all of the connector boots together (a PITA!) and tuck and zip tie the harness up under the dash.

So overall this wasn’t a TERRIBLE job to do. It would’ve been much easier with a wiring harness that wasn’t falling apart and a light switch that was working correctly though. But at least it’s done now and I can move on to other things that need to be done on the Jeep. I can also SAFELY drive it on the road now! This will help out when I align the front end for sure. I also need to get some road miles on it because we are supposed to be going on a road and trail ride at the rally.
Now I just have to break down and order the parts I need.
Yep, it’s been a LONG time since the last update. It has probably been almost a year. The last upload I did was leaving for the Denton rally last year, and it’s a little over 2 months from that time again!
So yesterday I went out to the shop since it was 70 degrees – I decided to work on the Jeep. One thing that has been keeping me from driving it is the fact that it doesn’t have turn signals – and these days that is a definite MUST HAVE to be on the road! I bought the harness last year and already had a solid state flasher. I knew I was going to have to buy a T/S switch, but figured I could pull the one off of the Army jeep until I can order a new one. I also knew that I was going to need wire and fittings. I ordered the fittings while I was originally ordering parts to finish the Jeep. I also bought an NOS wiring harness off of eBay for an M35a2 a couple of years ago to build a new Jeep harness – that didn’t happen, so I have plenty of wire to use for the turn signal assembly.
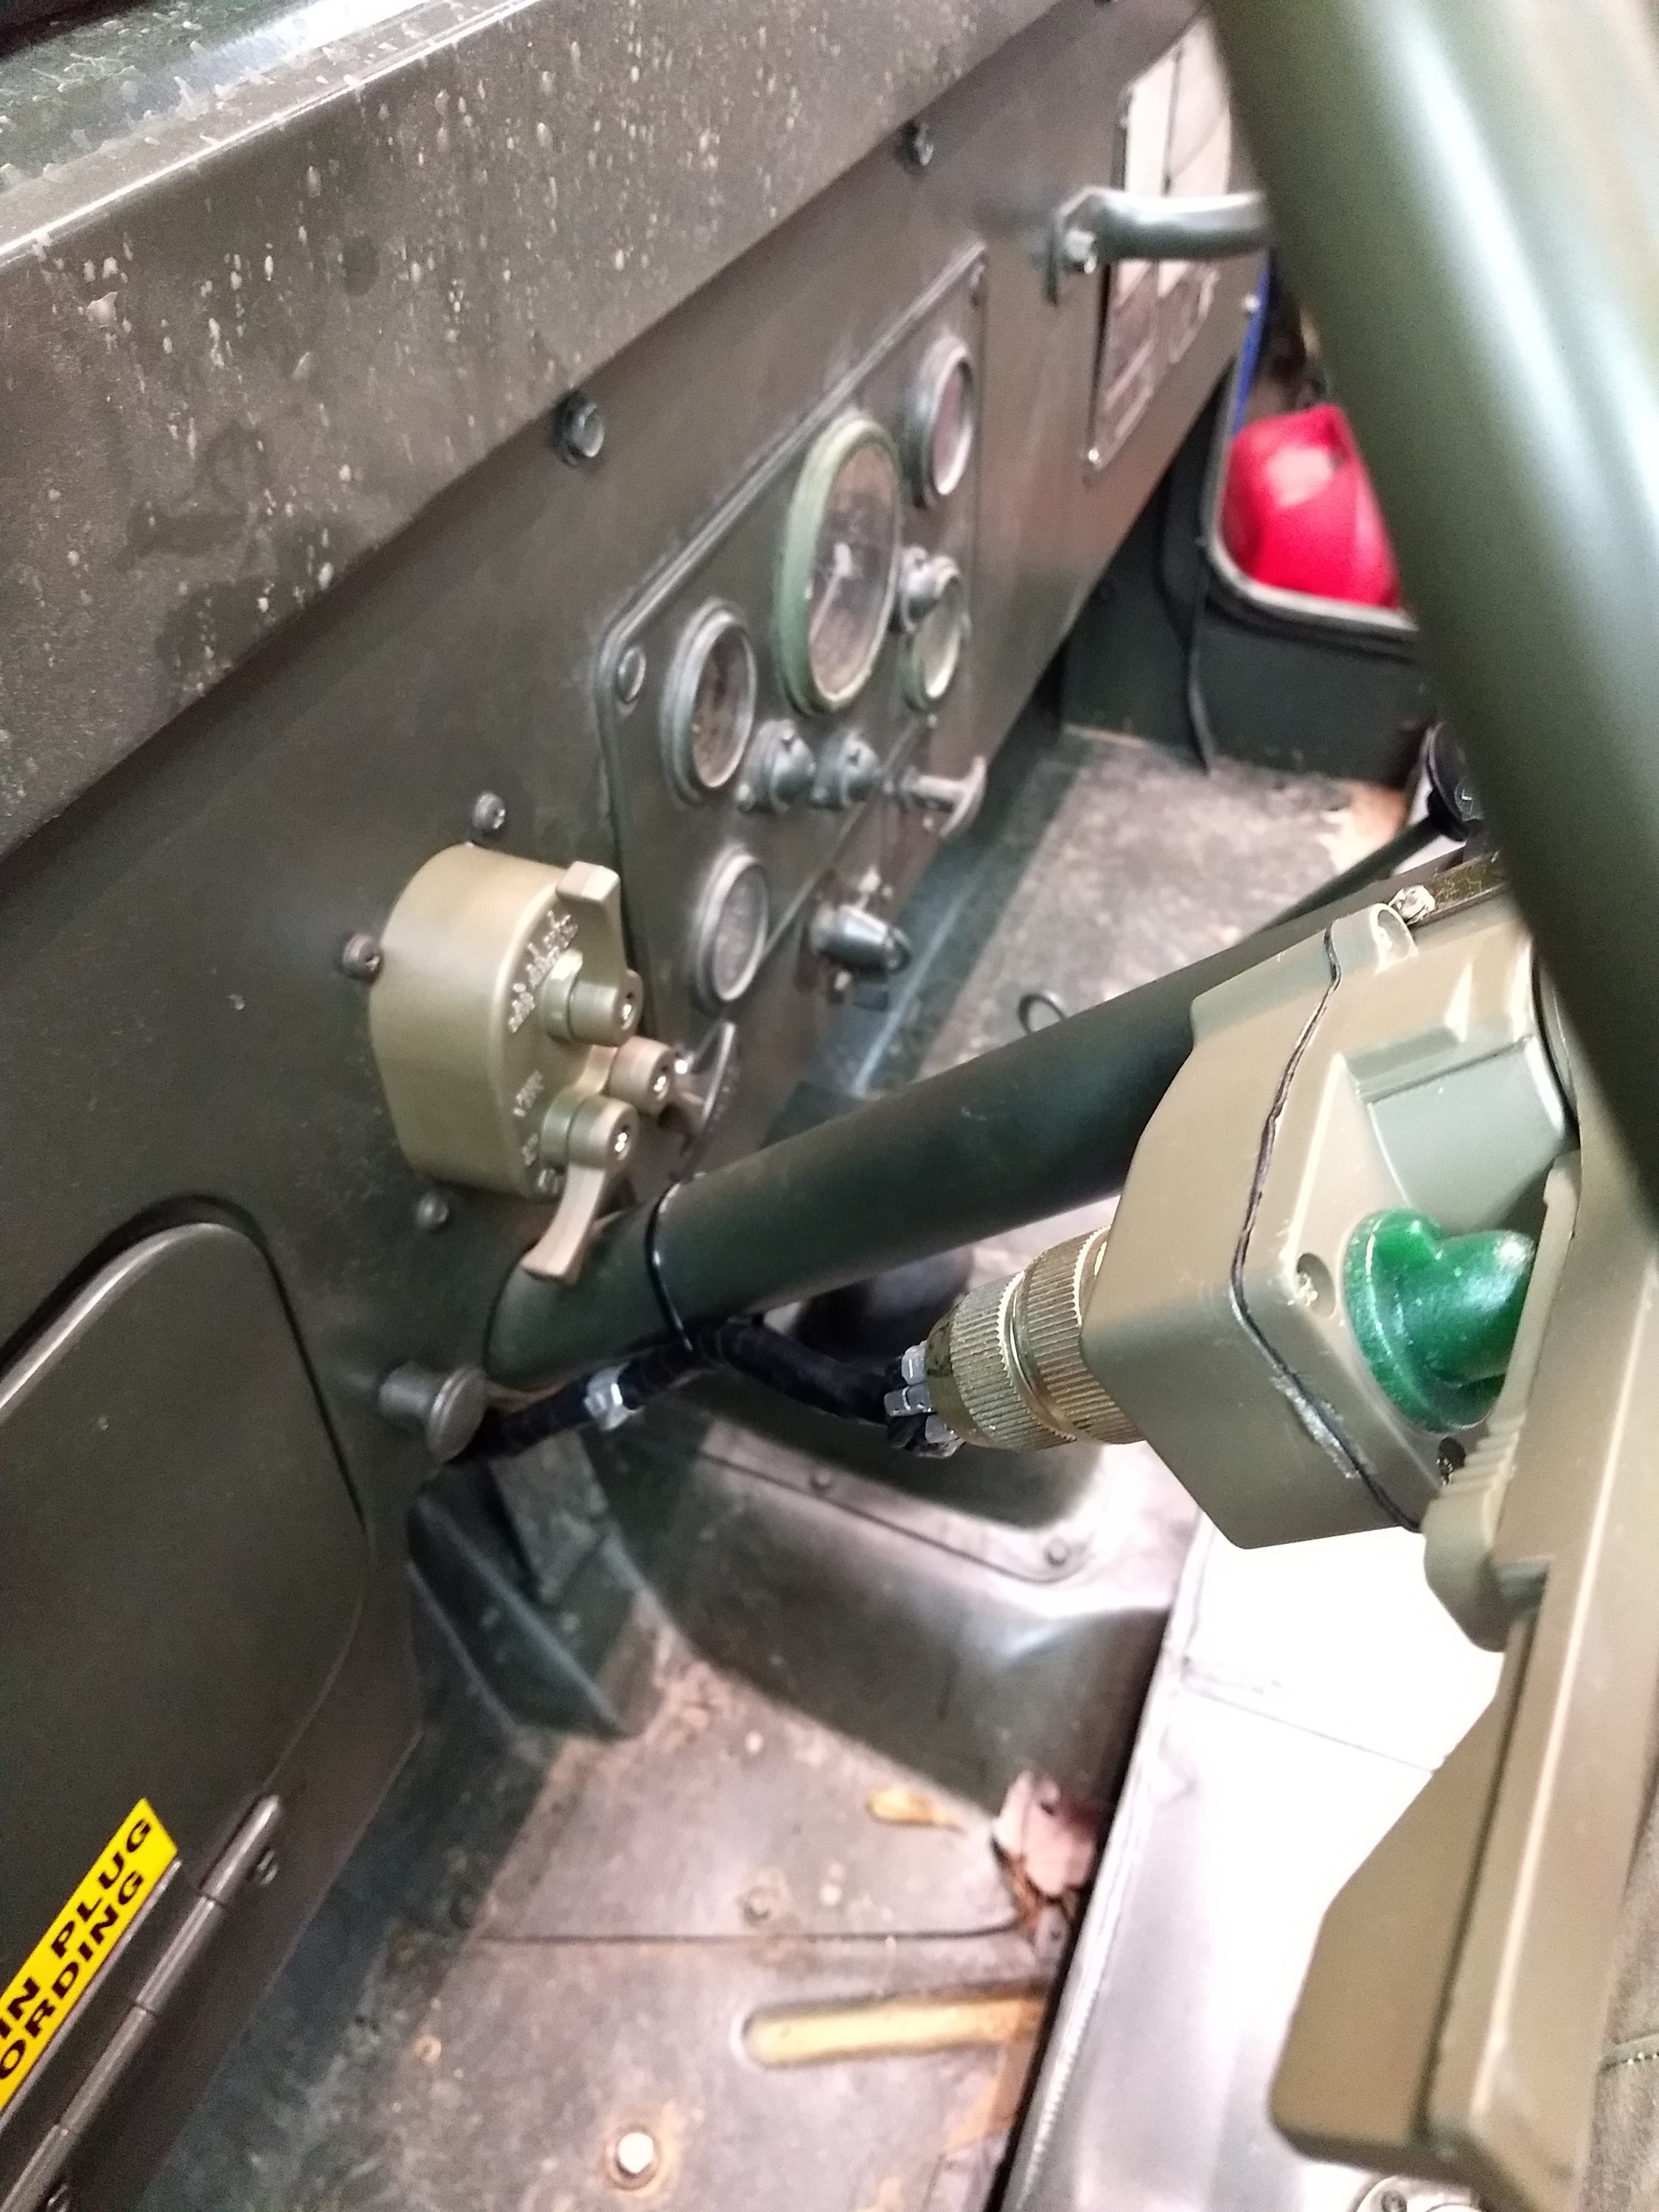
So with parts and instructions in hand, I set out to get the turn signals installed. First was modifying the headlight switch wiring. First step was to cut wire 22 about 6″ away from the plug and install new male ends on both pigtails. Then you had to take the plug apart to add a 12″ pigtail to pin J on the plug. This pin supplies power to the 460-461 (turn signal) circuit. After these were done, I retaped the harness down to below my modifications.
Next step was to mount the flasher. I mounted it in the same spot as the one on the Army Jeep – right outside of the firewall pass through plate. I ran the turn signal harness through the firewall and connected to the flasher. I used one of the plate screws as my ground connection.
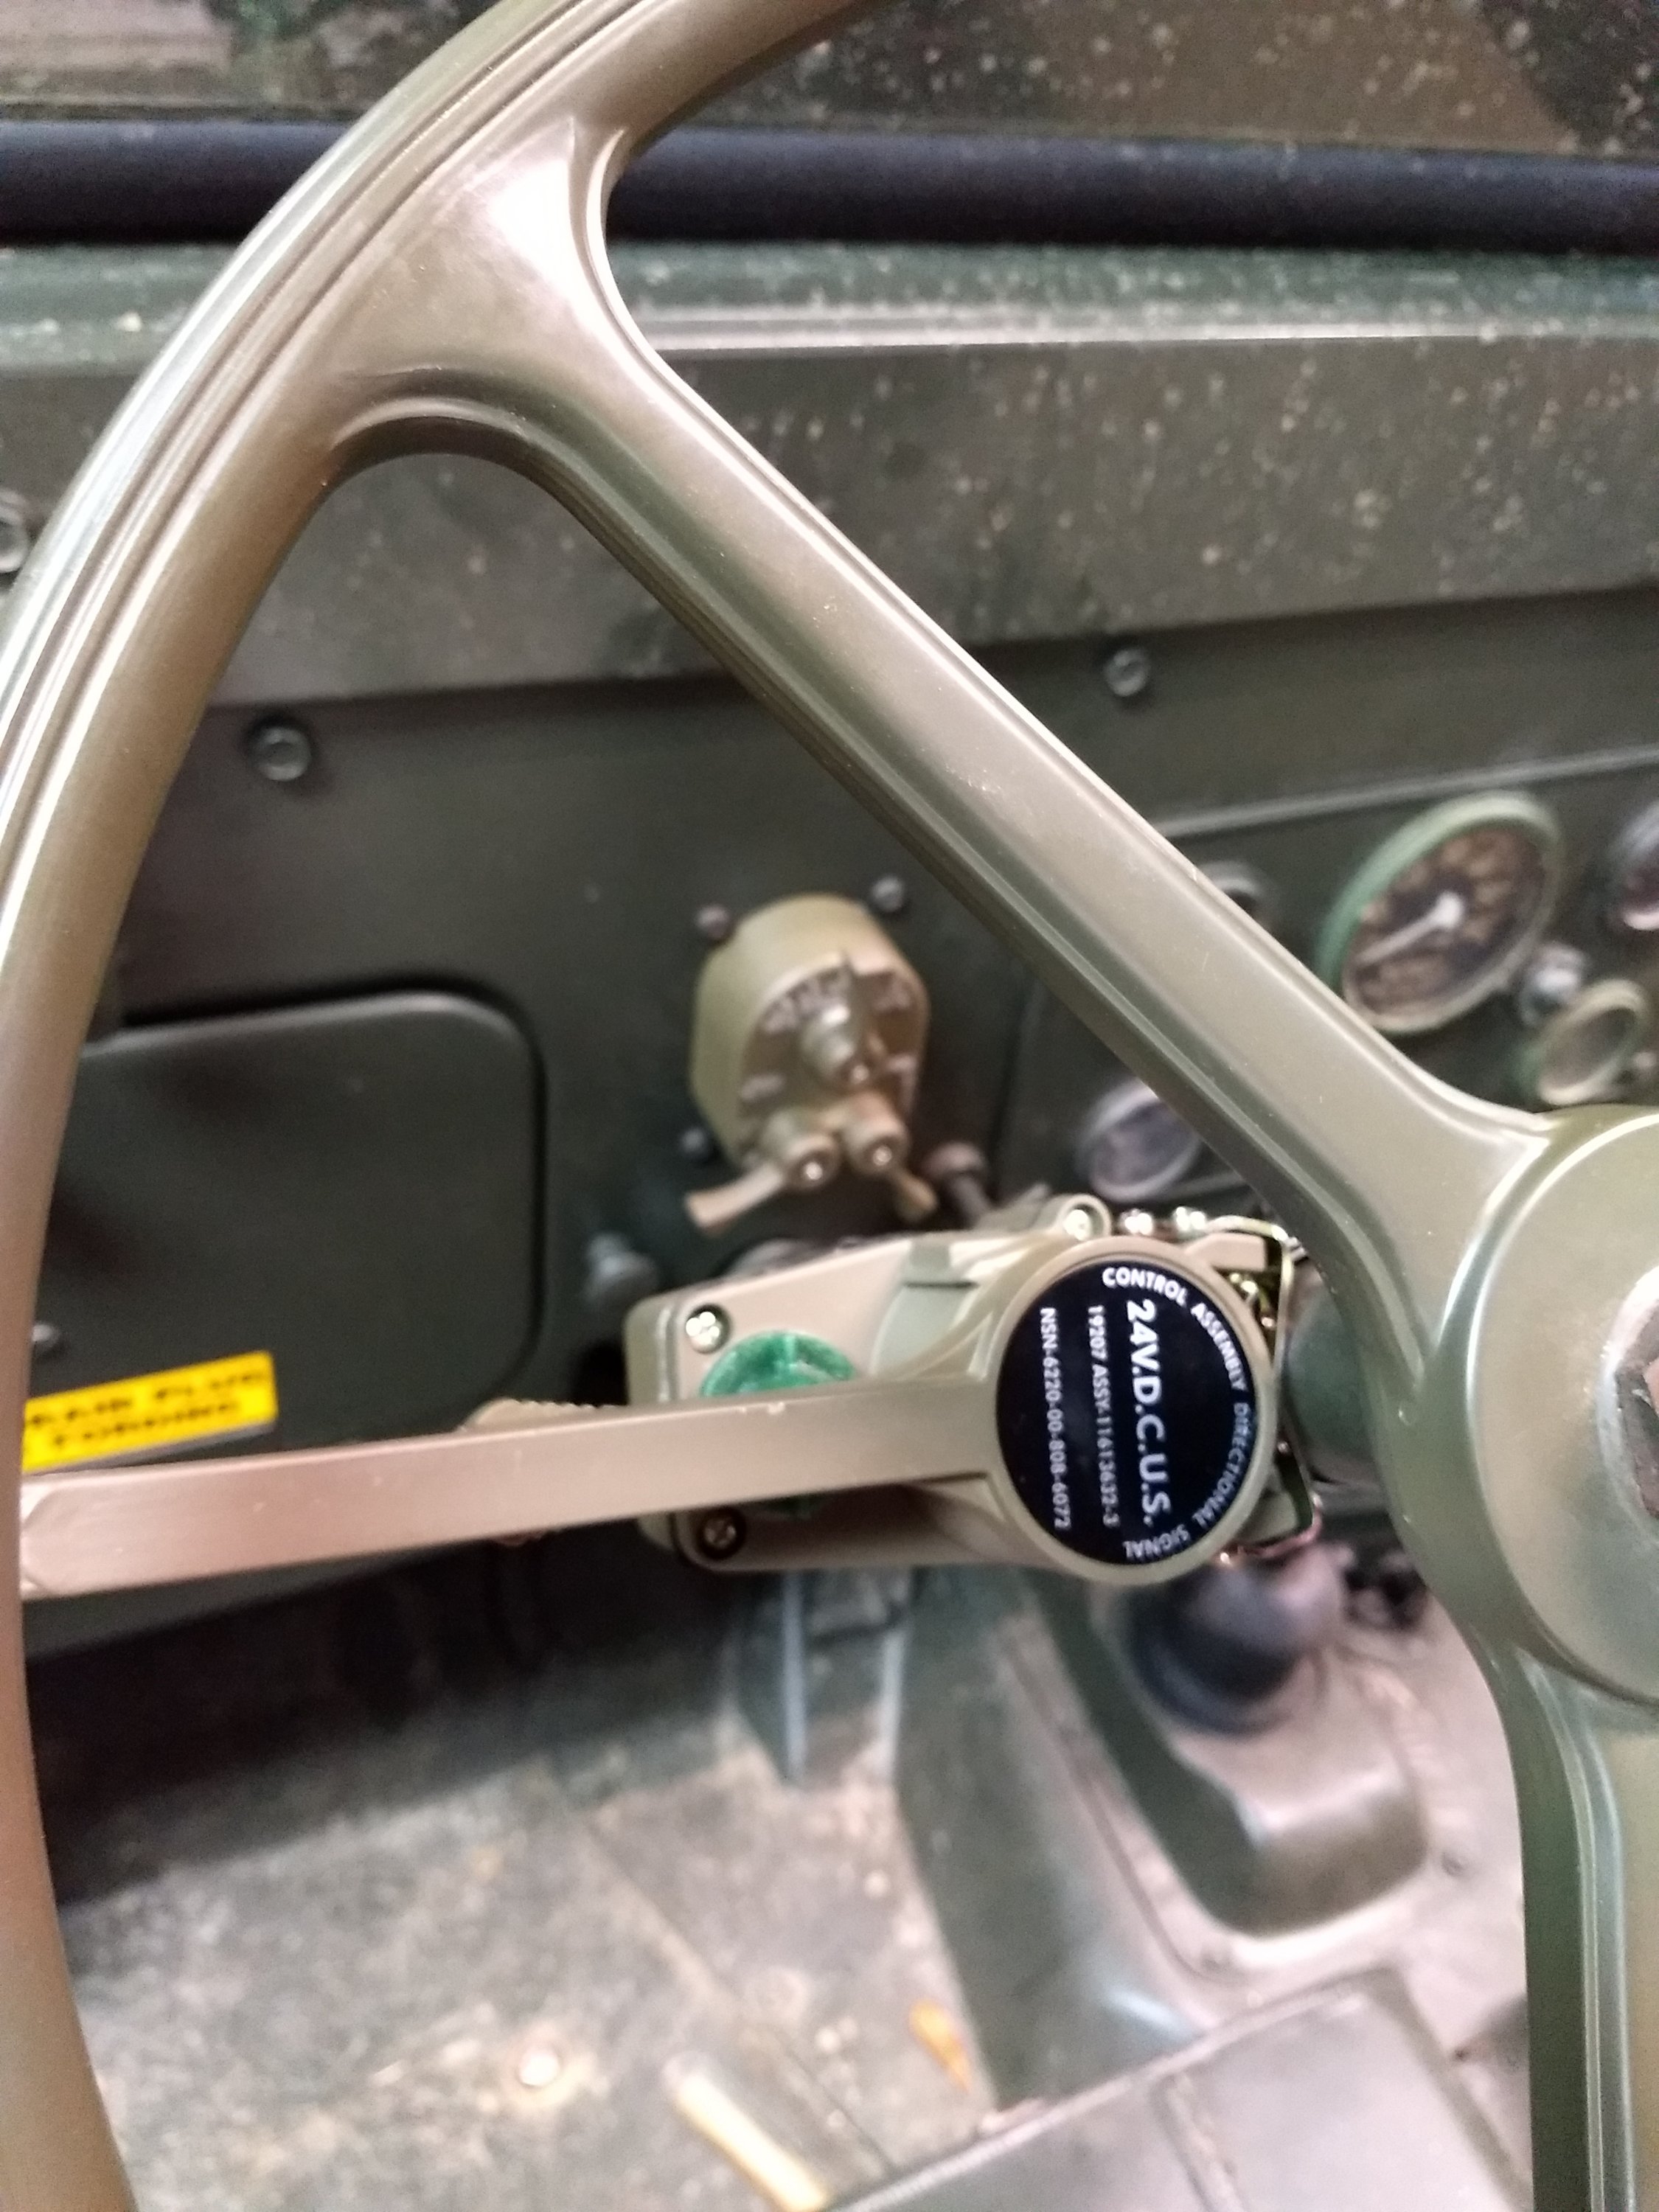
I robbed the turn signal switch off the Army Jeep and installed onto the steering column then hooked up the plug. Then I hooked up the 2 – #22 wires to the pigtails and the 461 wire to the new 461 pigtail. I turned on the switch and – NOTHING!
Starting troubleshooting. I went back and checked my connections – everything was right. Then I pulled the flasher plug – no power. I pulled the #22 wire and #461 wire apart – NO POWER! I switched it back off, then on – No POWER! I did this same routine a few times, then I had power! I plugger everything back up and HAD LIGHTS FLASHING – YAYYY! I turned the power switch and light switch off to tidy up a few things and drink a beer to celebrate. I turned it back on -NOTHING FLASHING! I played around with it for a little while, finished my beer and gave up for the night.
Today, I started off slow – aired up the tires and filled the steering gear box (I don’t think I ever put any oil in the thing and the plug was kinda loose). I also adjusted the gear and reinstalled a missing steering gear bolt (1 OF 3!) and tightened the other 2!
Next, I started troubleshooting the turn signals again. This time I started with the light switch – pulled the one from the other Jeep and installed it – FLASHED EVERY TIME! With that problem fixed, I decided I needed to tear my M35 wiring harness apart to get some longer wire to run to the right rear light. This took about an hour, but I had plenty of wire to do all kind of wiring repairs! First, I measured for the front turn signal wires – I figured about 3.5′ each would do it. So I fabbed up a 2 wire harness with 2 male ends on it and taped it up (with REAL harness tape, not electrical tape).
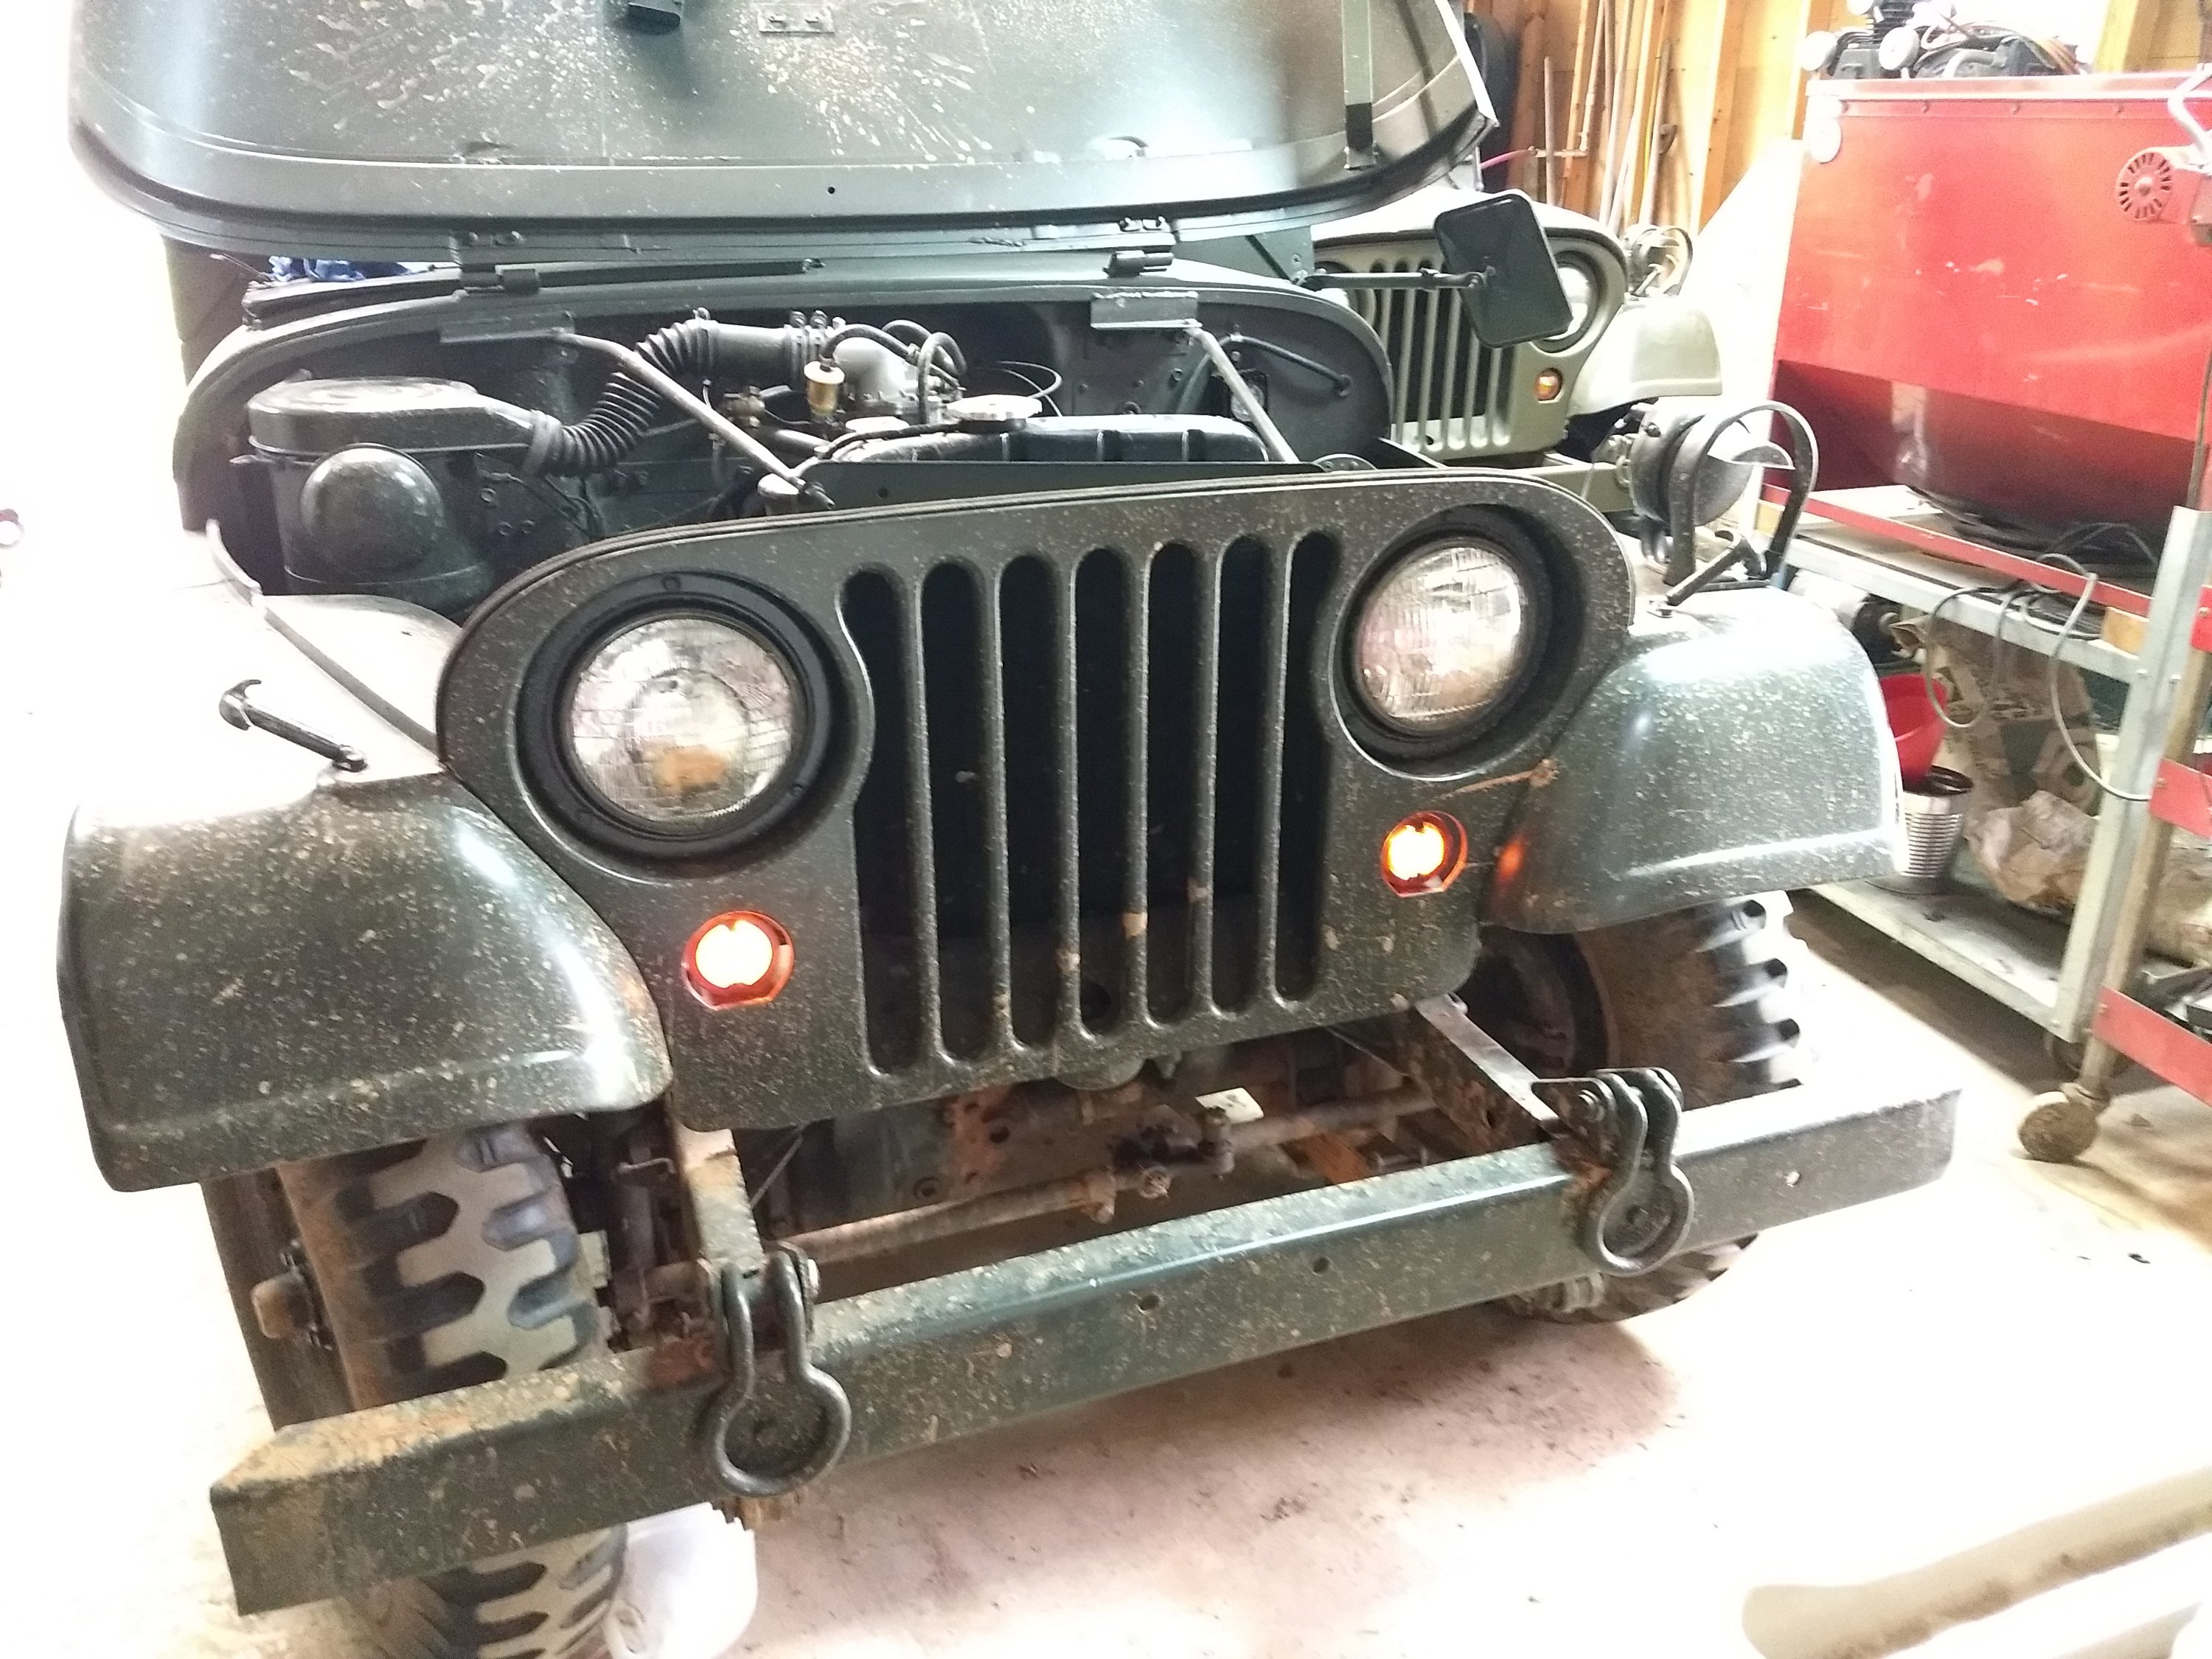
I ran that through the firewall and to the left front B.O. light. I installed a male end on that wire and a female on the right side wire. I hooked them up to the 460 and 461 wires on the turn signal harness and hooked up the lights – they WORKED – EXCELLENT! I still have to change out the B.O light doors for orange lenses, but I already have them.
Next, I found a piece of wire that was pretty long and already had a male end on it and temporarily ran it down the frame following the wiring harness. I did this to check length and to see how much more wire I needed to go the whole length. I grabbed another piece of wire that would go the rest of the way to the right rear light and double checked (following the wiring harness). I pulled the wires back out and used a butt connector and heat shrink to connect them. Then I ran the wire along the harness and zip tied it in place all the way to the rear light. I cut it to length and installed a female connector and YAYY – FLASHING LIGHTS ALL AROUND!
Tomorrow I will tidy everything up and order new turn signal and light switches. That’s one thing crossed off the list.
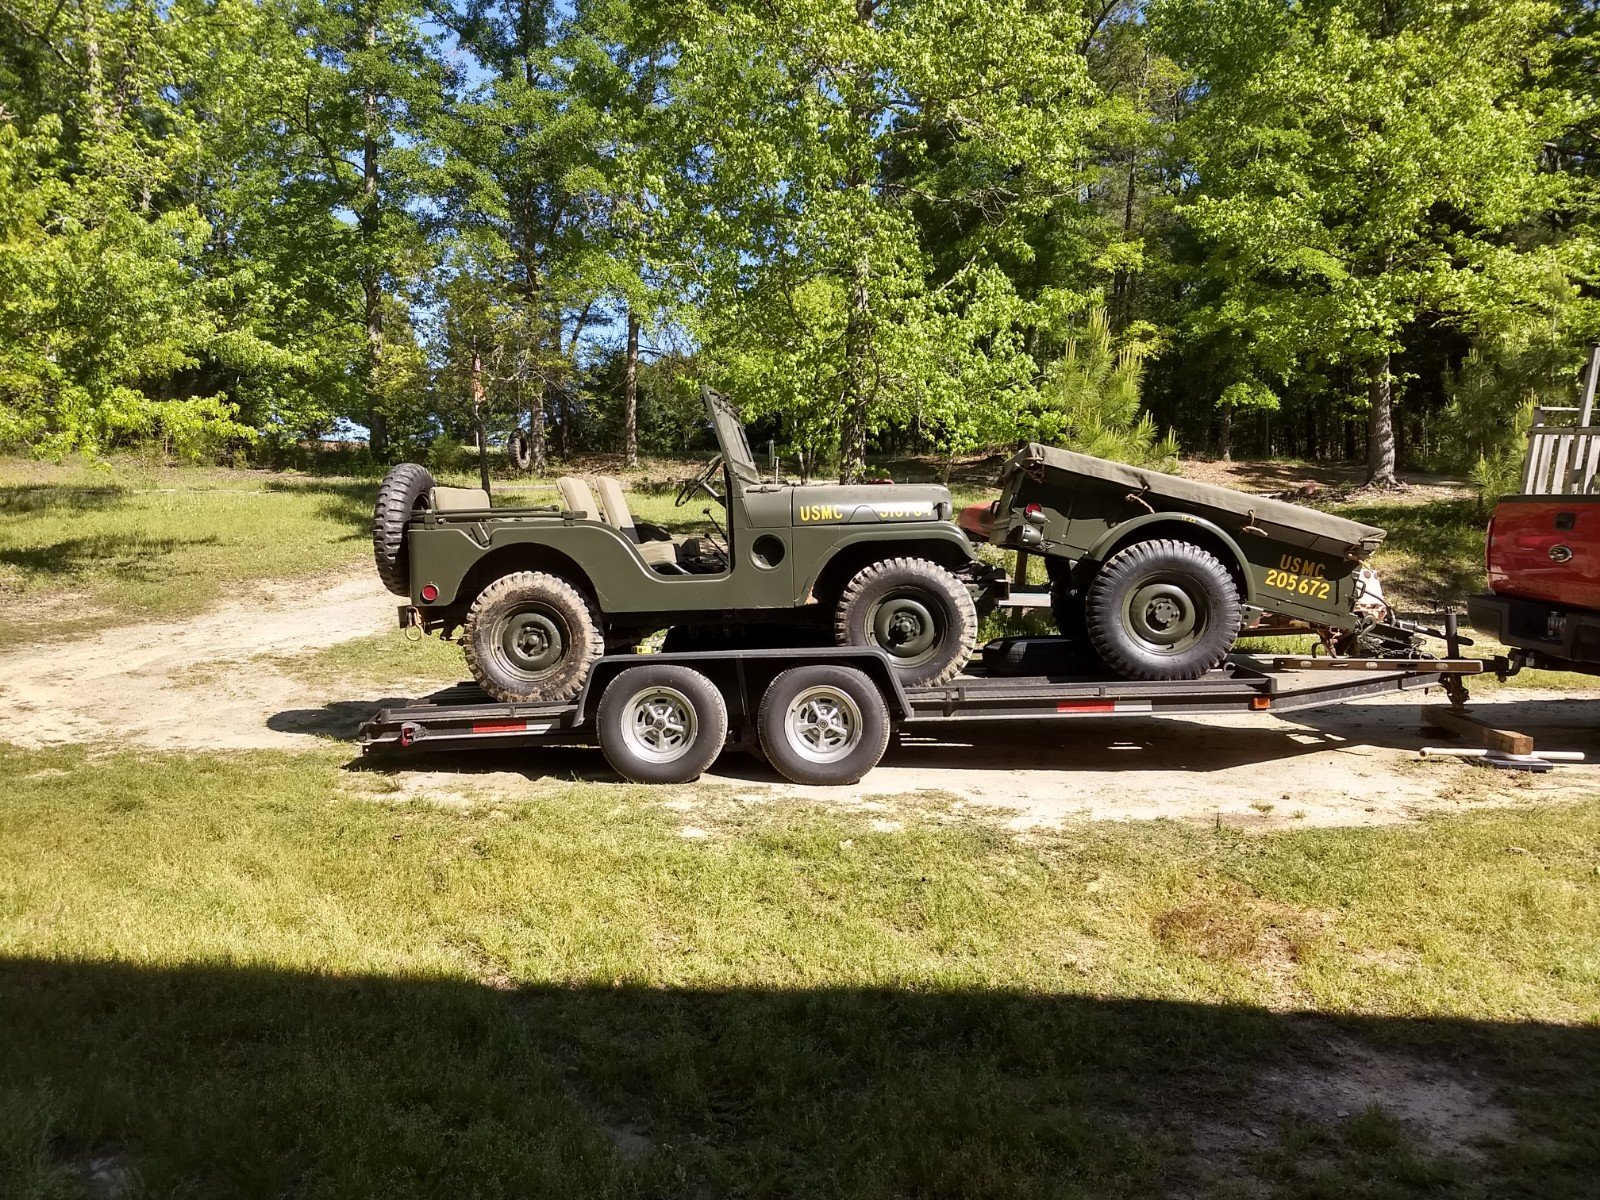
We loaded up and headed out about 4pm Thursday afternoon and headed out.
Our trip went pretty good with only one stop for readjustments of the camper loading and tie down check of the jeep/trailer. The trailer pulled pretty good in this configuration, but I could tell it was tongue heavy. This could’ve been caused by all of the stuff in the bed of the truck also.
My mom and step dad also came to the rally, but they had an incident on their trip where the hitch pin came out of the drawbar. The camper tongue dropped to the chains and the tongue wheel hit the pavement and dragged for a couple hundred feet. They got it hooked back up and used a coupler lock as a makeshift hitch pin to get them to the rally. Once set up and nerves calmed, the rally was GREAT!
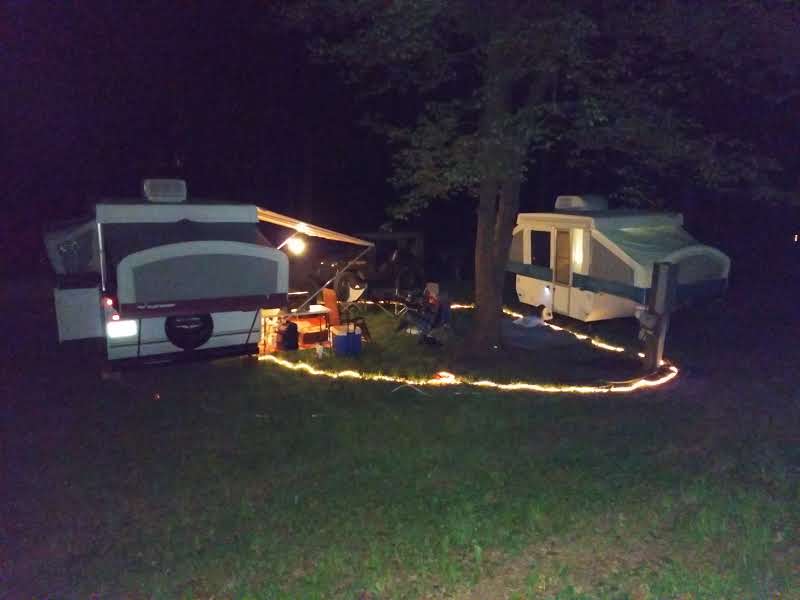
We had pretty good weather with a thunderstorm on Friday afternoon, followed by a couple of hours of high winds, but other than that, it was great.
The jeep did good. I did a little adjusting on the carb which helped a lot, but it still has a dead spot when you first step on the gas.
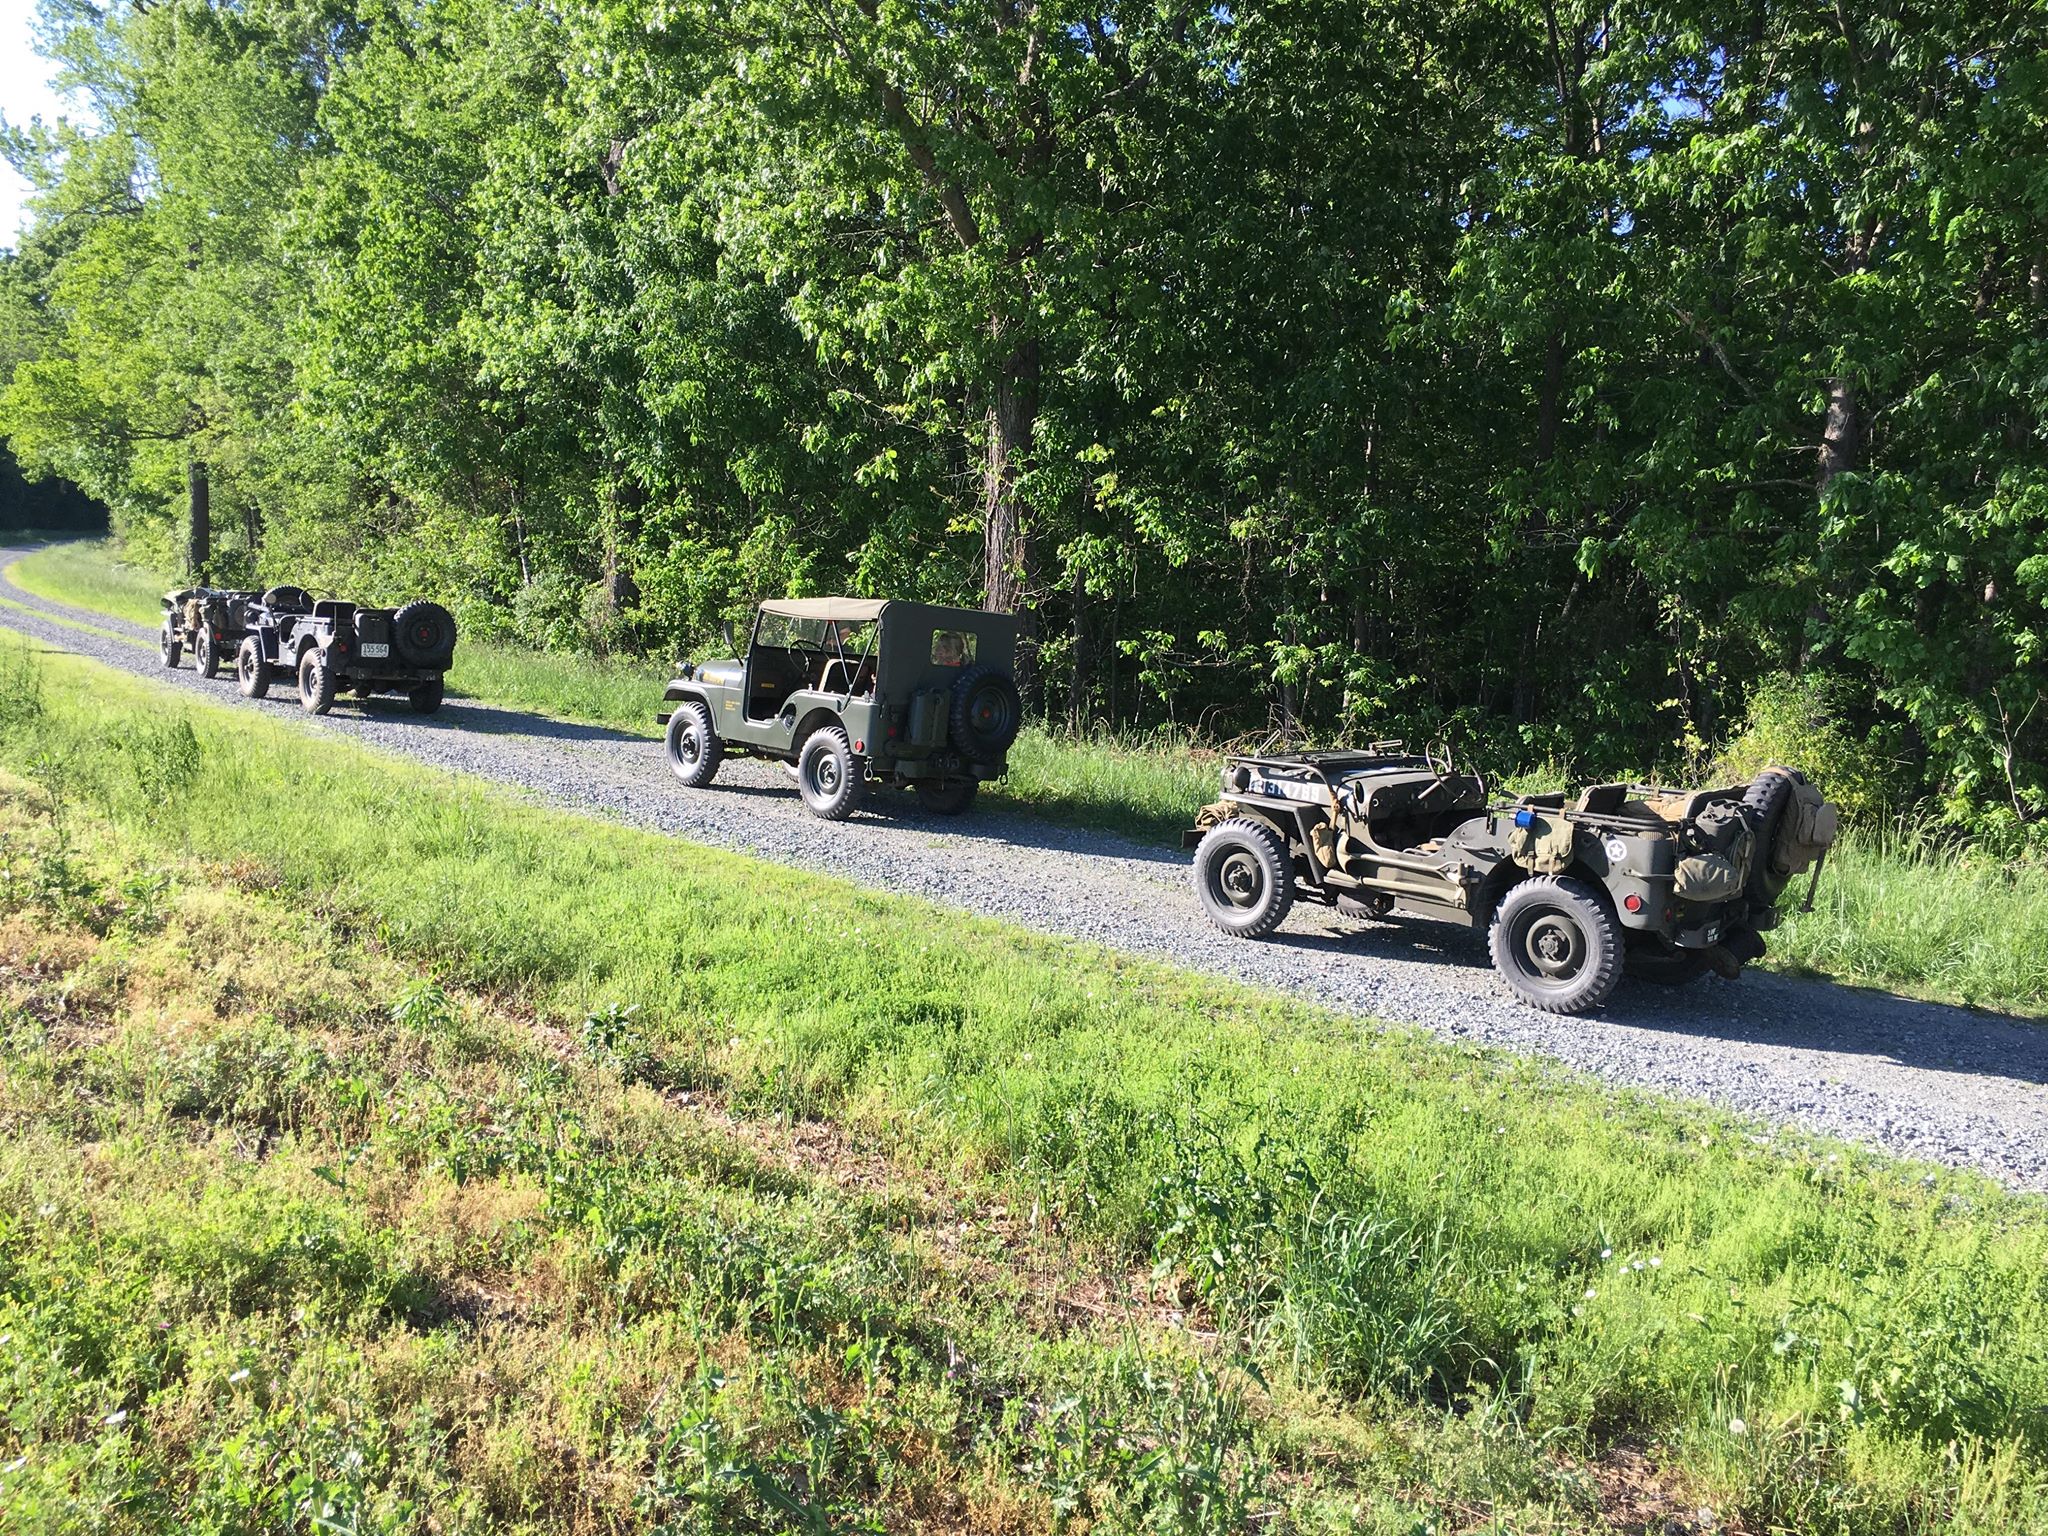
Saturday evening, the “Jeep guys” took a little ride out into the country and hit some back roads and gravel roads with a little offroading mixed in (just down the side of a railroad track and through a soggy, overgrown grass covered campsite area). We probably drove a total of 15 miles total. We had a mixture of Jeeps from WW2 to the M151. I DID find out that the Jeep needs to be lined up – it was pulling pretty hard to the right on the road.
The only one missing from the entire Jeep lineup was the M422 Mighty Mite. We are going to get together before the next rally to plan out a longer drive with some actual offroading since the big truck guys get to have all the fun with their convoys.

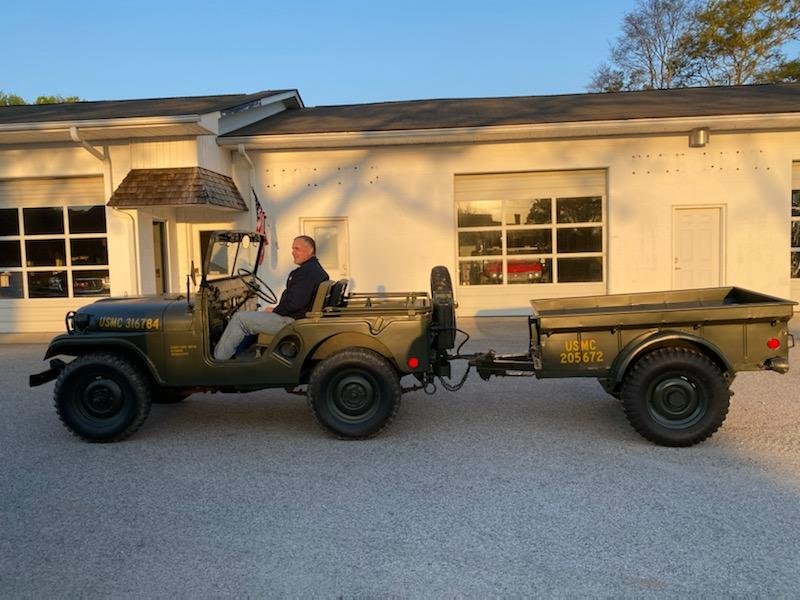
The Jeep was driven a LOT during the rally. Between me and a Steel Soldier friend, we probably put 25 miles on her just driving around Denton Farmpark roads checking out the rally. I kept the trailer hooked up and pulled it around until the trail ride, so it got some miles on it too.
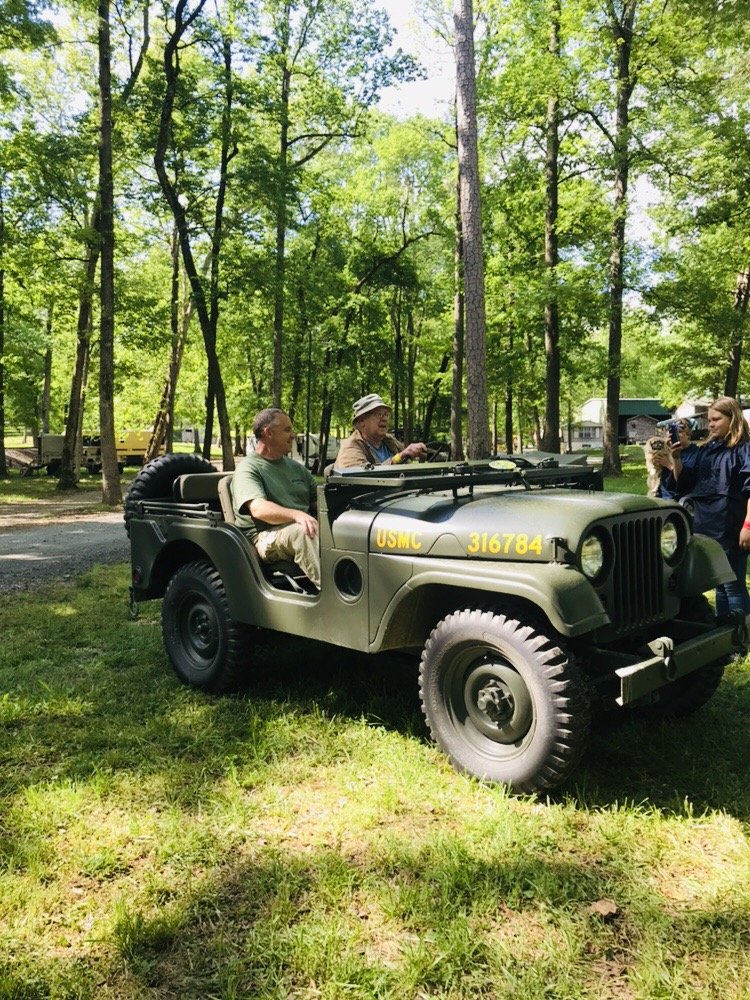
The highlight of the rally was when we were loading up to leave. My step dad (an old Marine) took a ride with me and then asked if he could drive her back to the campsite. This was the first time he had ever driven a Jeep – and it was a USMC Jeep like the ones in service while he served! This made all of the hard work worth it!
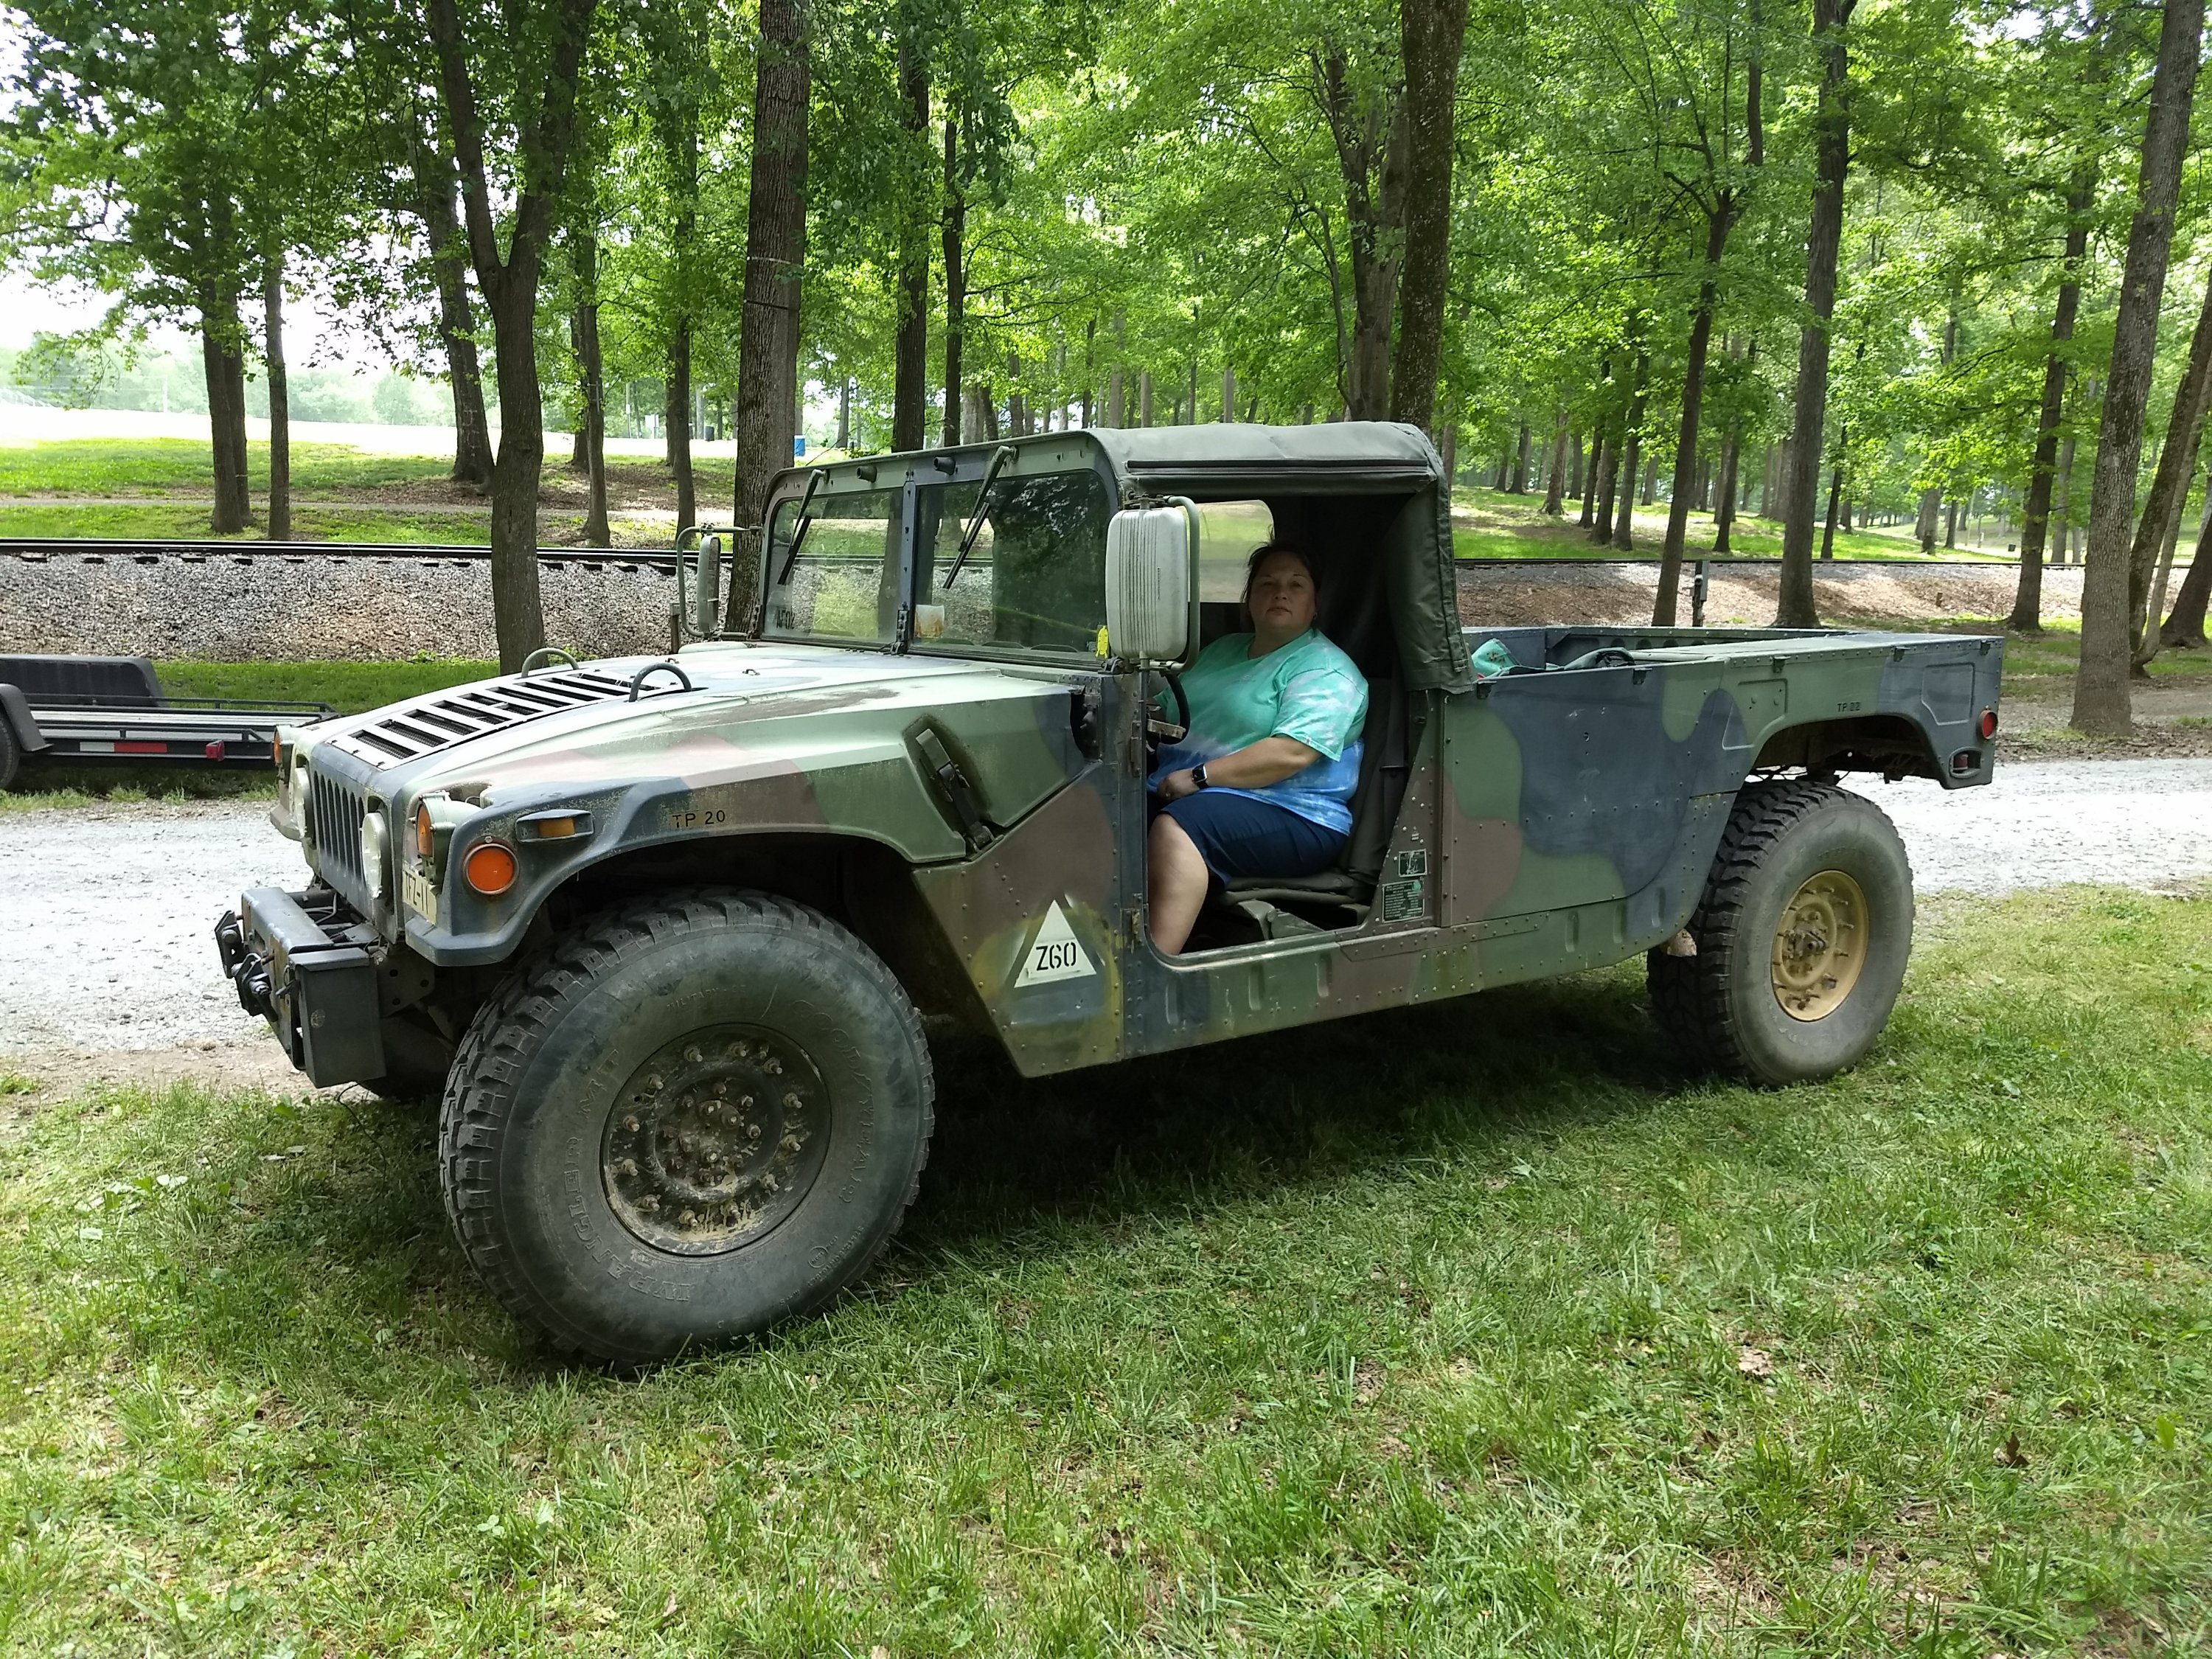
While my Steel Soldiers buddy was driving the Jeep, I was driving his HMMWV. Then I gave my wife a chance to drive it. I think she wants one! Maybe the next military vehicle after I sell my Army M38a1?
I bought a few parts that I needed for the Jeep and other M100. I bought an M35a2 gauge cluster for $20 (has a good speedometer, volt gauge and temp gauge I can use on the Jeep). Everybody else was selling speedometers for $50! I installed the volt gauge and speedometer – the volt gauge worked, but the speedometer didn’t. I guess I’ll troubleshoot that soon. I also bought a tail light that was NEW inside for the M100 for $10 and a IV cable socket cover for $5 for the M100. Add to that the 2- 50cal ammo cans for $5ea and the $3 vehicle log book, and I think I did pretty good for deals.
All in all, it was a great rally – got to spend time camping with my family and doing what I enjoy doing for 4 days/3 nights. I can’t wait for next year! I guess it’s time to get back to the real world – back to work and working on stuff around the house on my days off. I want to get back on my Army ‘a1 – get the distributor back in and leaks fixed so that I can get it back on the road and up for sale. I need to make room in the shop for my side by side and lawnmower.
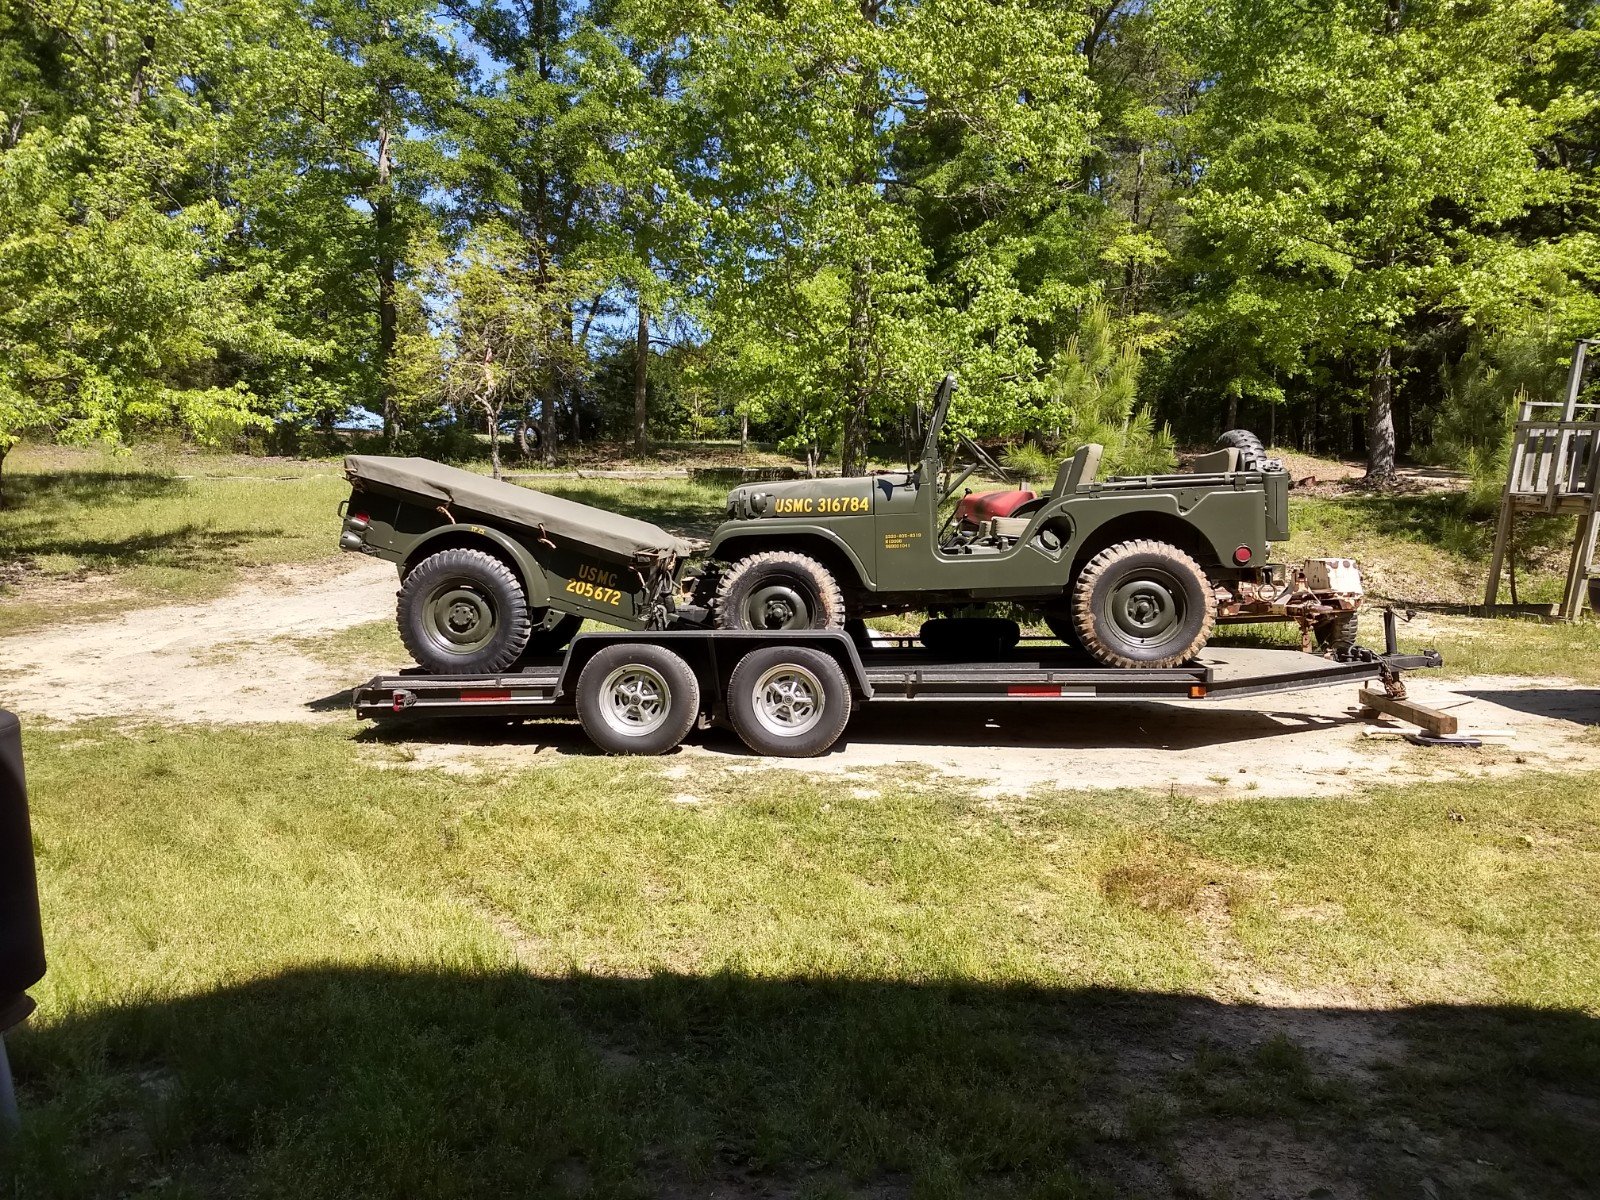
Total weight of trailer, jeep and m100 is about 5,300#, so I was looking for a tongue weight between 530 and 800#.
First try – Nope, I really wanted to be closer to 15% – this is just over 10% (550#). Plus I don’t like the trailer tires on the tongue like that.

Second try – still too light (570#), but better with the trailer tongue over the car hauler tongue.
Third try – too heavy (900#) and trailer is too far back.

I settled on this one. Still too heavy at about 810#, but after strapping it down and going for a 20 mile test drive, it pulled fine.